
24 tips on how to get the most out of Business Central
As an early Christmas gift, we give you 24 excellent tips on how to work faster, more efficiently and to take full advantage of Microsoft's Dynamics 365 Business Central business system. Starting on December 1st, we release one tip a day until the final on the 24th.
- #1 Explore alternative role centers
- #2 Customize menus
- #3 Customize your own screens
- #4 Work efficiently with dates
- #5 Use Business Central's built-in help feature
- #7 Open new windows
- #8 Work in several companies simultaneously
- #9 Preview posting
- #10 Edit in Excel
- #11 User tasks
- #12 Manage Sessions
- #13 Types of items
- #14 Save scanned accounting documents directly in Business Central
- #15 Print to Email Printer
- #16 Activate the system change log
- #17 Get an overview of your companies in the Company Hub
- #18 How to create and use views in Business Central
- #19 Save notes and attachments to Business Central records
- #20 Utilize Microsoft Teams with Business Central
#1 Explore alternative role centers
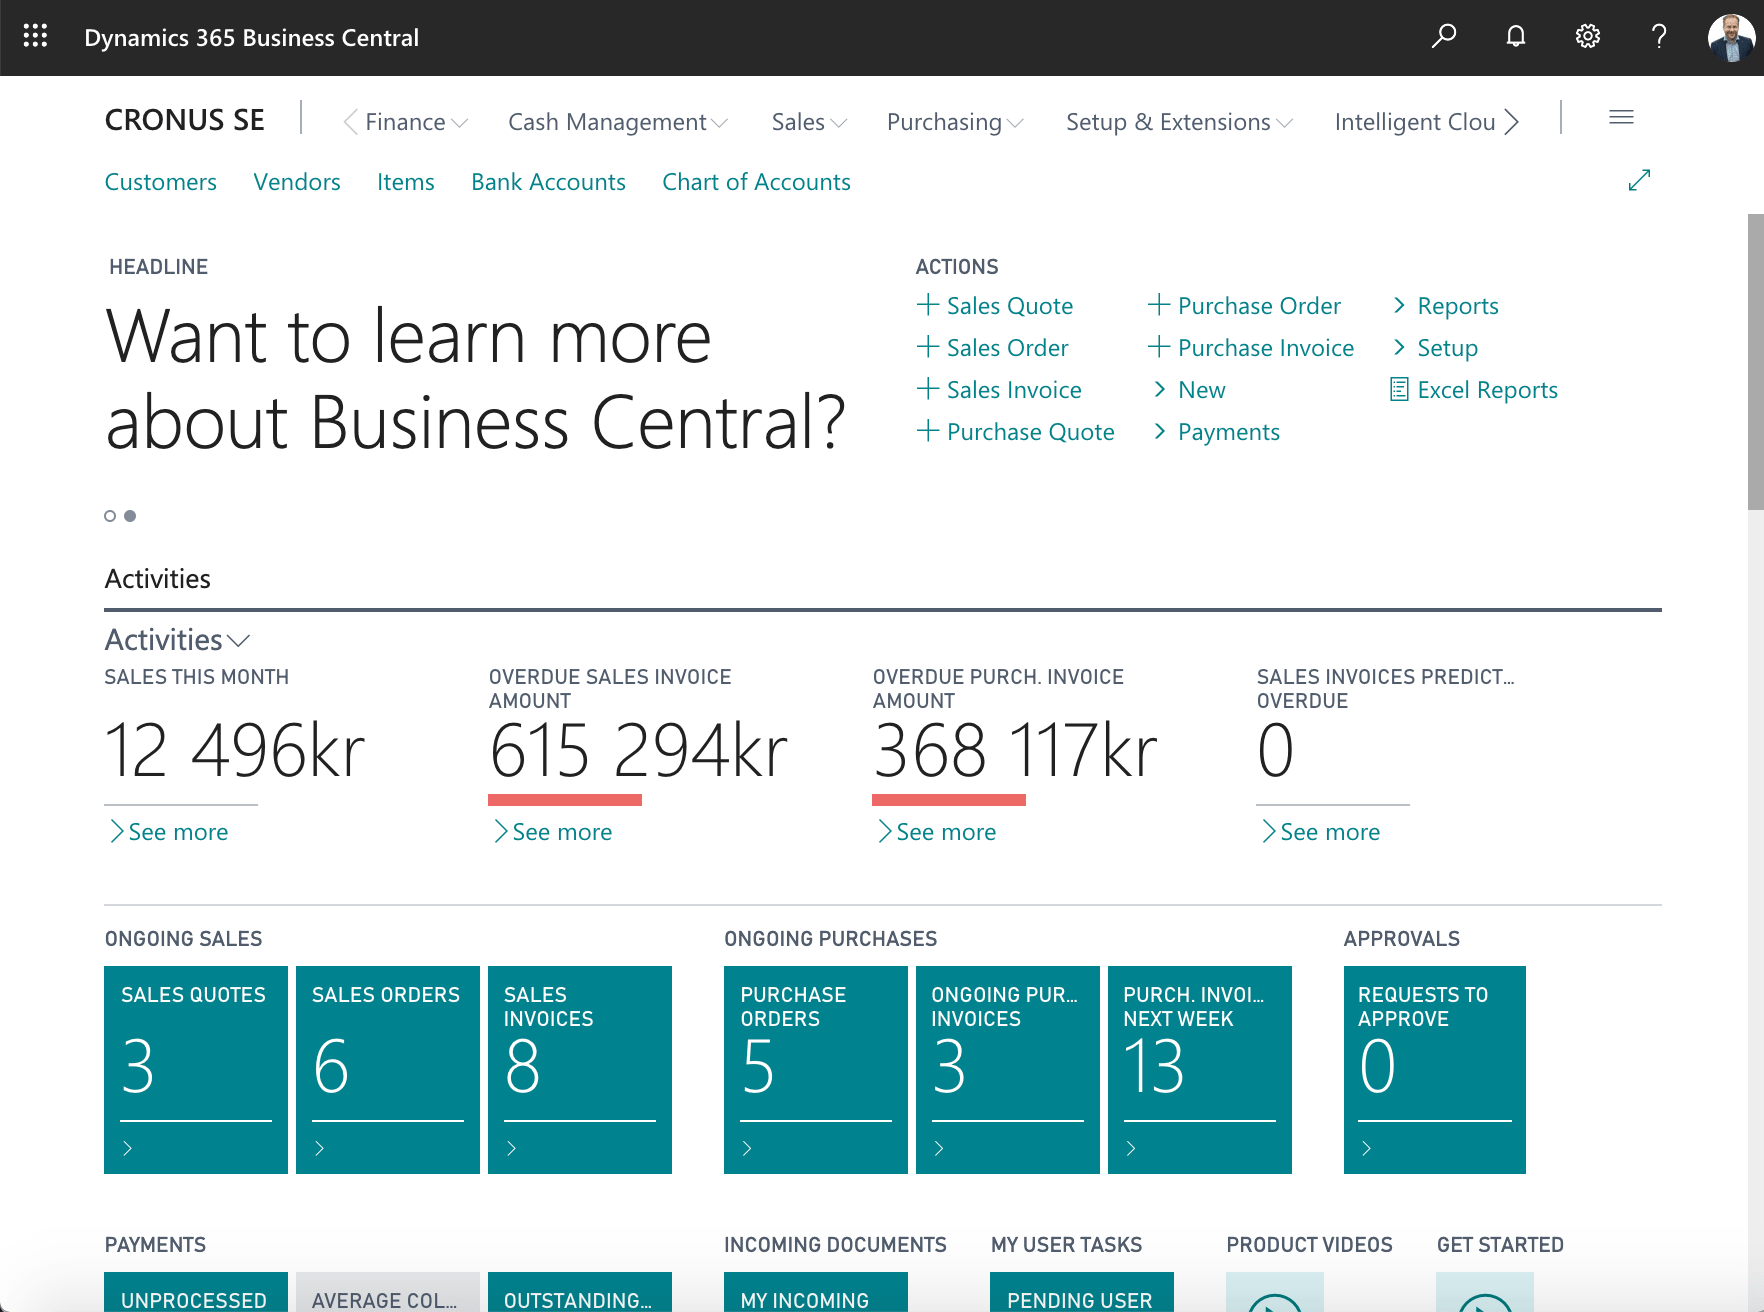
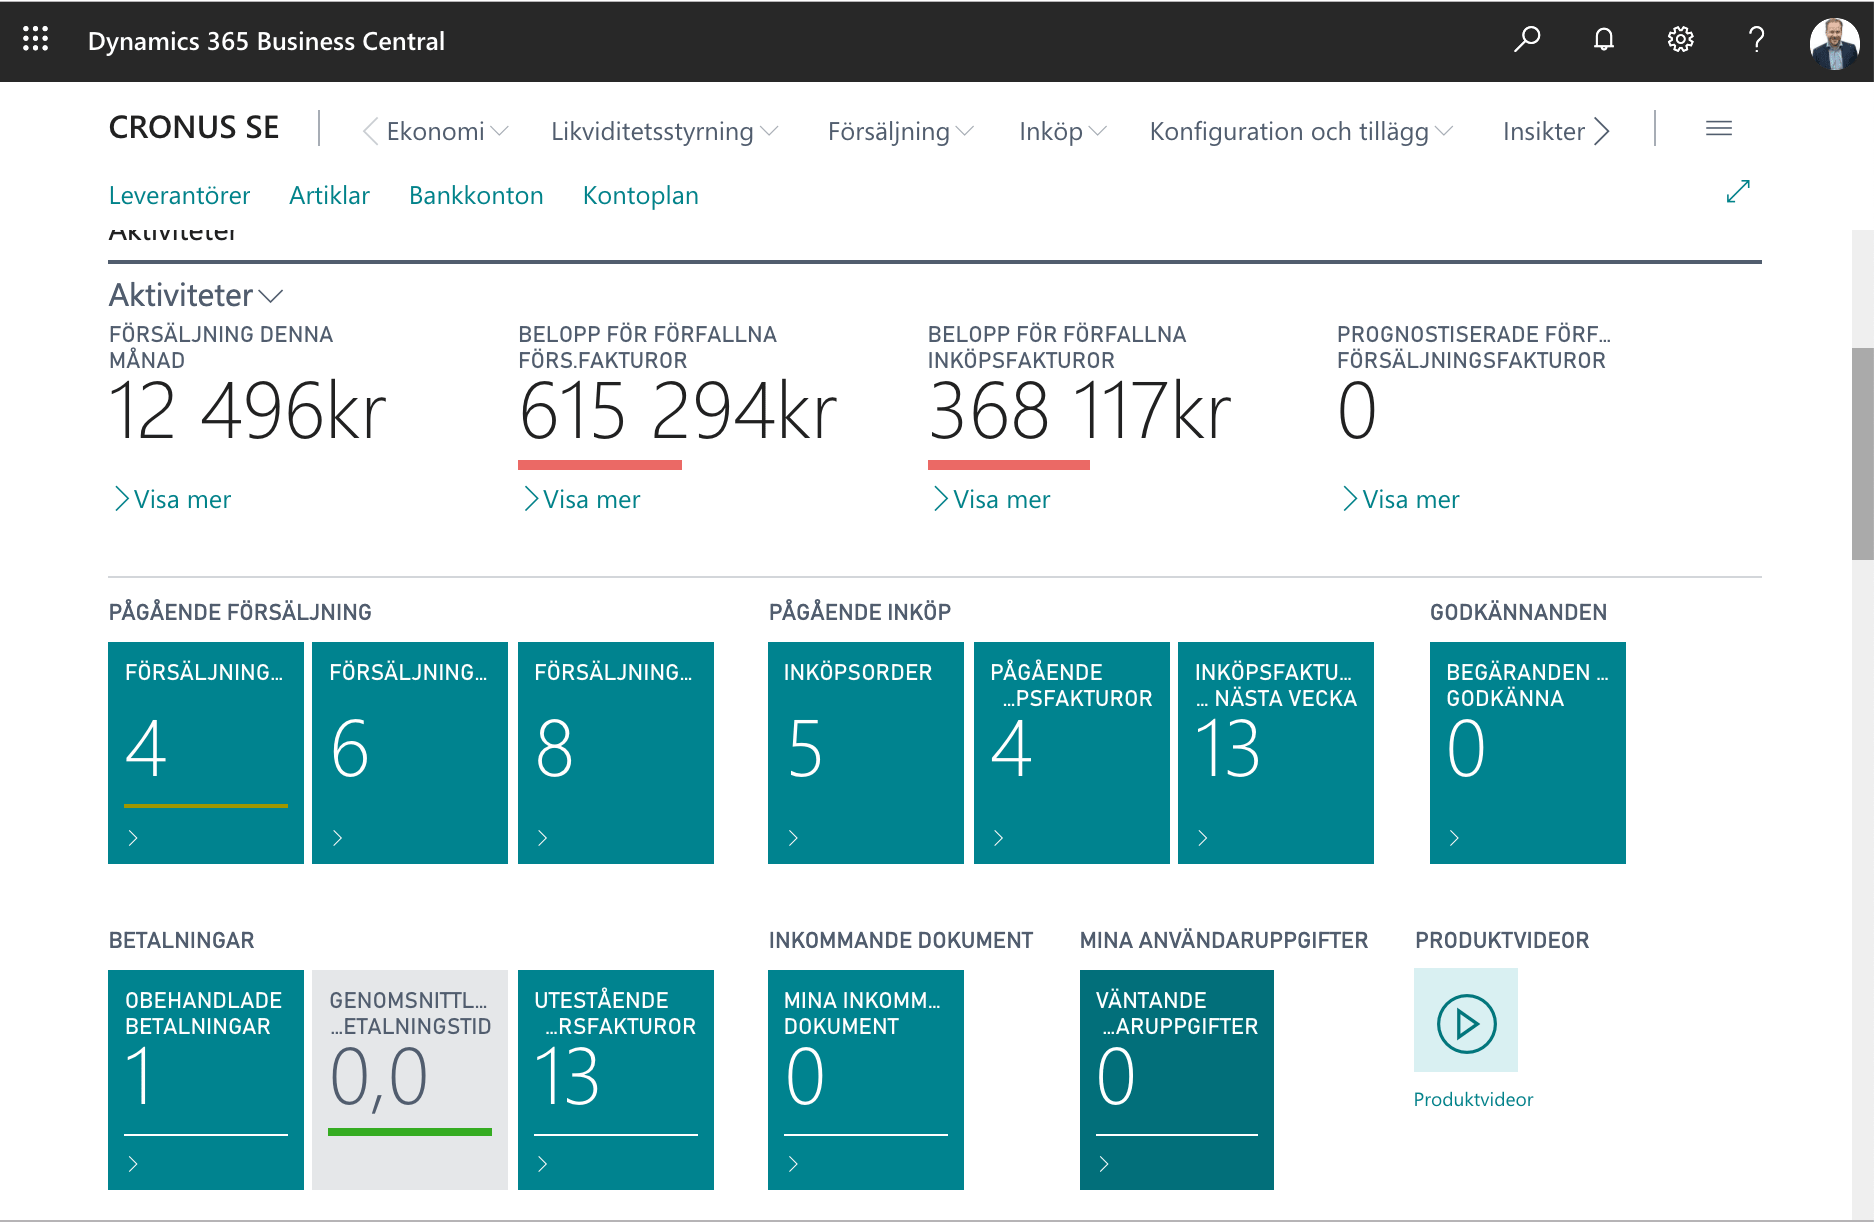
Did you know that the start page and menu system in Business Central can be designed to suit many different businesses and user groups? Start page provides easy access to statistics, common action and a menu system that makes it easy for users to find the system's functions. Allowing users to have a start page that summarizes current status with clear to-do heaps makes users' work more efficient and reduces the risk of missing important events.
Adaptation of the Role Center
Role centers can be customized for your company and your user groups. How you organize your work at the company may differ from how other companies work. In Business Central, it is possible to customize role centers based on exactly how you work.
Among the components that can be inserted on the start page are:
Menu System - At the top of the page there is a menu system where the user can easily find the system's functions grouped by areas. This grouping of functions does not have to be the same between the different role centers, but is based on the grouping of tasks relevant to the role in question.
Common actions - The most common actions that the user takes are linked directly from the start page. This means that the user does not need to click on several steps to execute an action that is performed many times a day (such as for example create a quote).
Activities - Links to different lists of documents. The link itself is displayed as a short or key figure which makes it easy for the user to see the number of documents in the list or, for example, a summary of the amount of the documents in the list. The activities can form the basis for a workflow where users can easily see what they need to do right now.
Graphs and reports - Graphs, reports as well as Power BI reports can be displayed directly on the start page.
Lists - On the home page, it is possible to place lists of specific items that the user wants easy access to. For example, it may be the project manager who simply wants to access their current projects.
Explore existing Role Centers
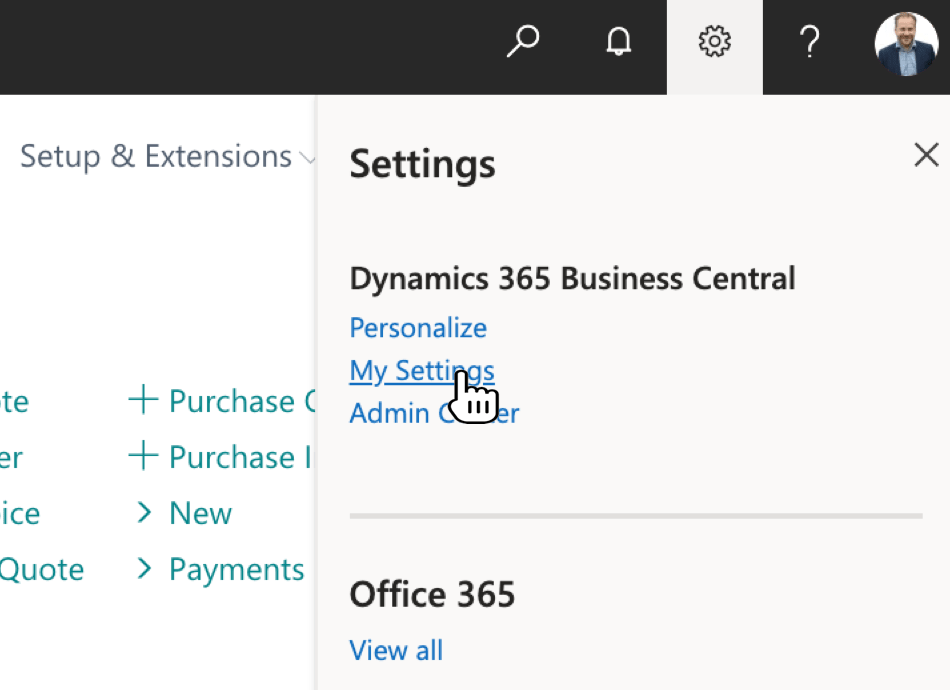
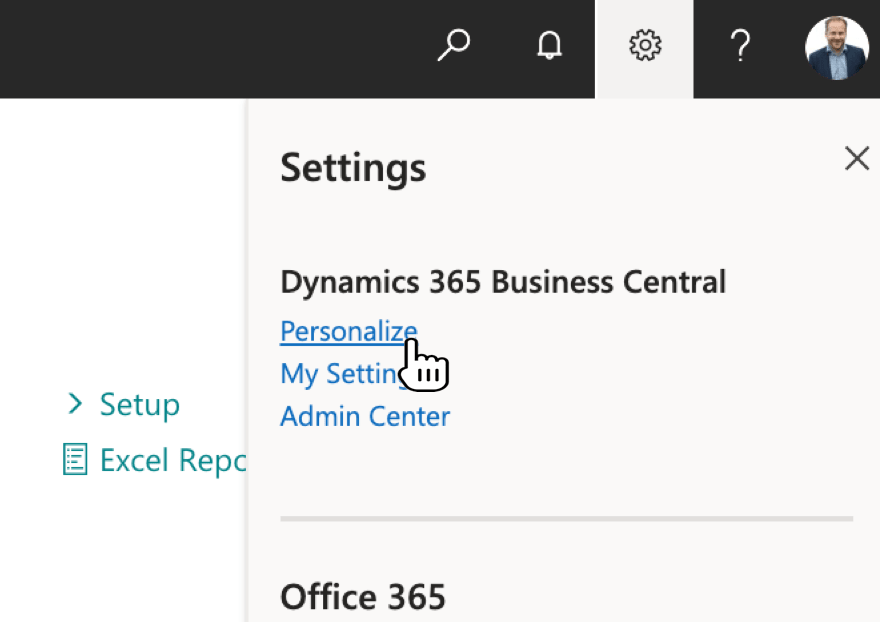
You can start by exploring alternative role centers yourself by trying to change role centers in My Settings. You can access these by clicking the gear in the upper right corner and then selecting My Settings .
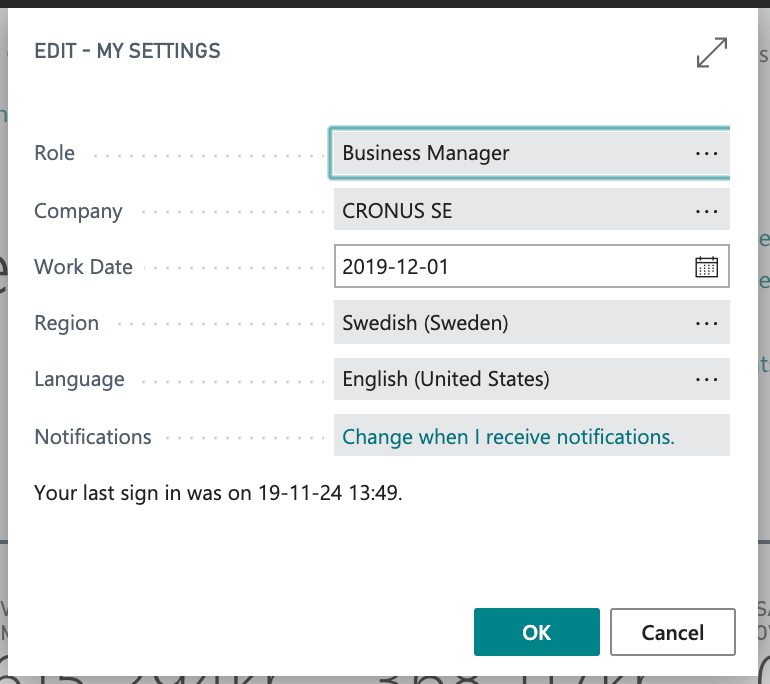
In the My Settings dialog, you can change the Role to any of the roles available in the system. You can easily test the existing roles to see which role center suits you best. If you then want to build customized role centers, you can benefit by originating from one of the existing ones in order to save time.
#2 Customize menus in the Business Center role center
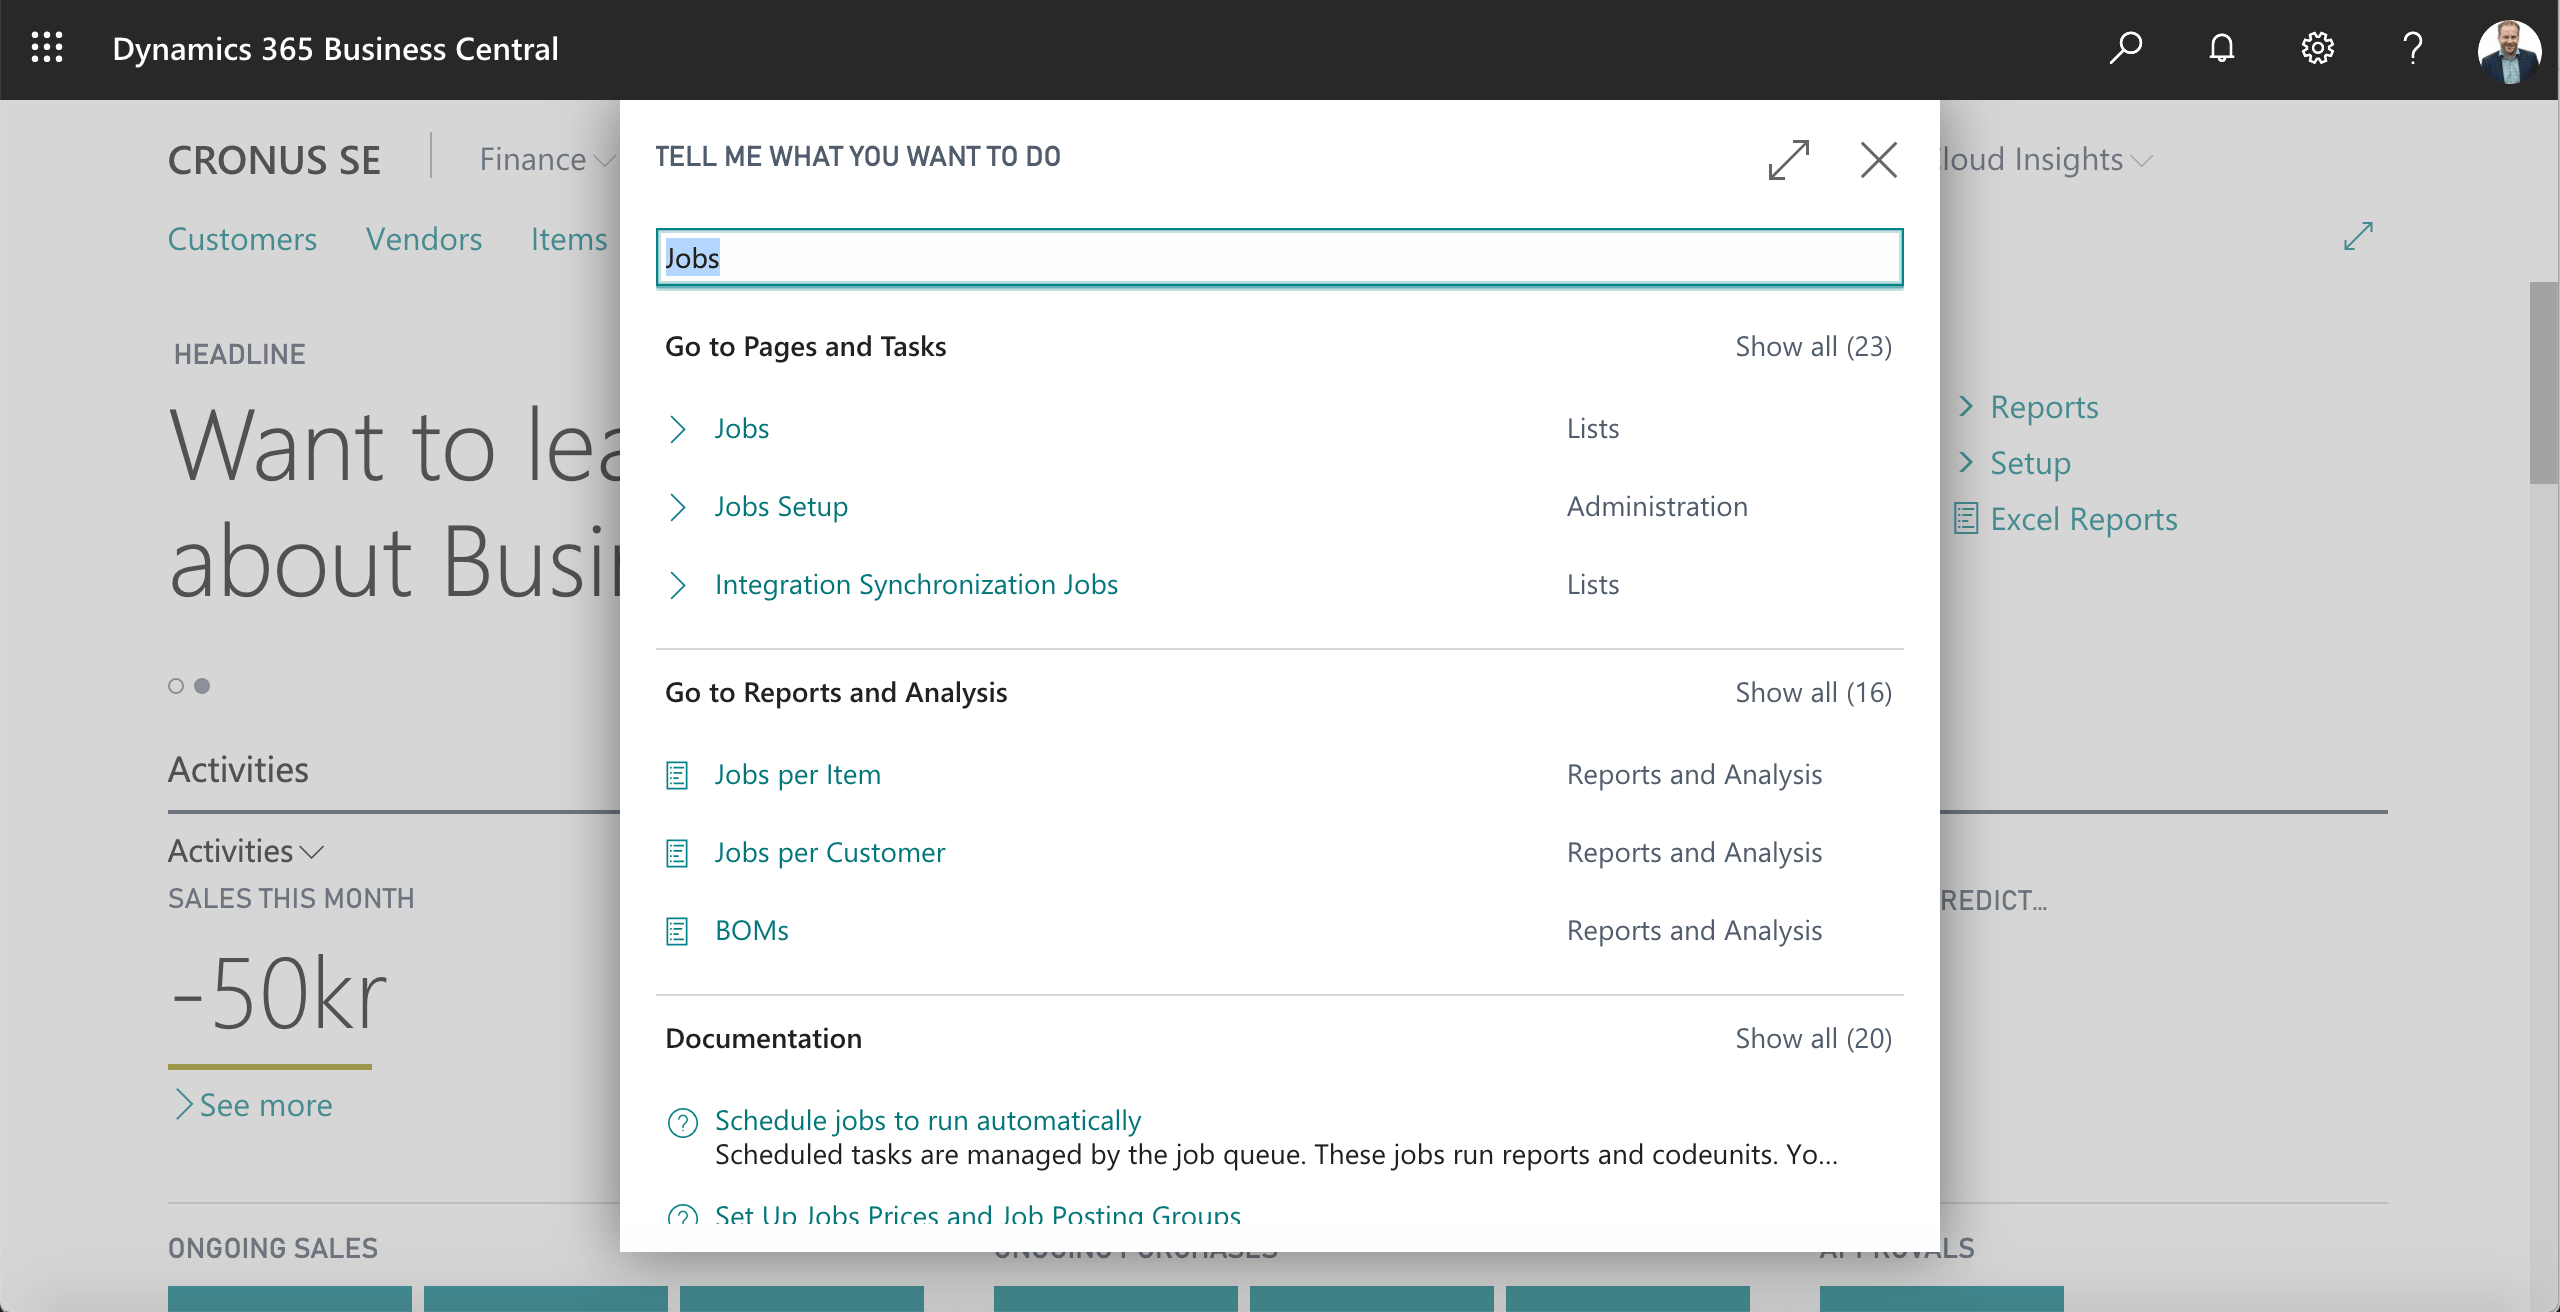
Your role center displays the menu items that show the features you are expected to use most often. In case you need to access something missing from your role center, you can easily use the search function in the upper right of the page. For example, when you type in the word "Jobs", the pages and tasks that contain the word "Jobs" are first displayed, then the reports and analysis functions that contain the word "Jobs" are displayed.
You can choose to open the page, report or equivalent by clicking on that line in the search result. What you can also do is click on the bookmark function and the current function will be added to the menu of your role center.
You can then choose to move the menu item within the menu system on your home page by choosing customize and then drag the menu item to the desired position.
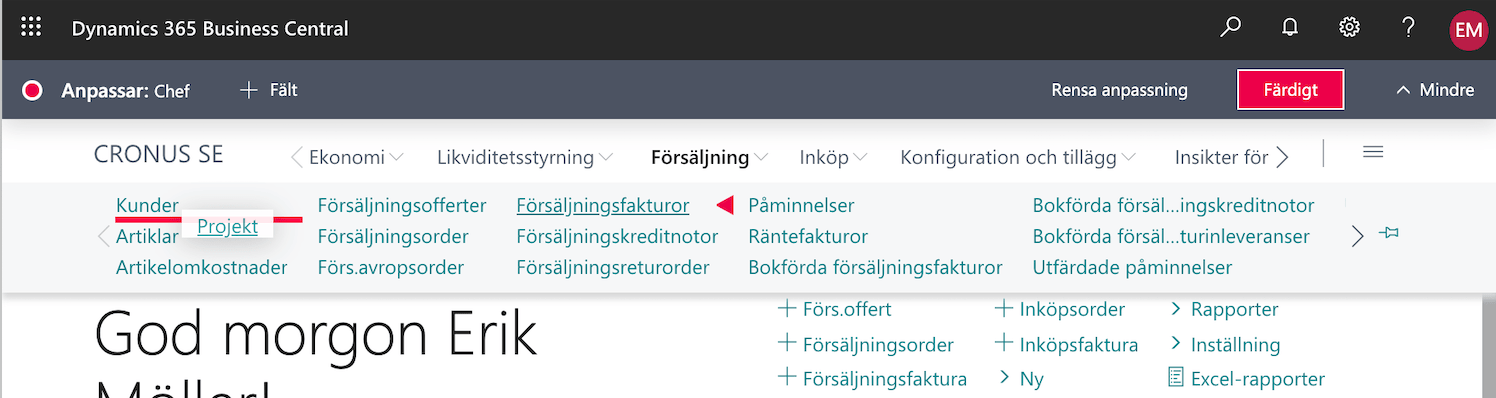
When you are done moving the menu item, click the Done button. If you need to undo and reset the menus to their original state, click the Clear Customization button instead.
#3 Personalize your own screens in Business Central
Business Central is designed to give users a simple user interface where they can easily access relevant information and features. As a user, you have great opportunities to customize how your screens will look.
Personalize role center
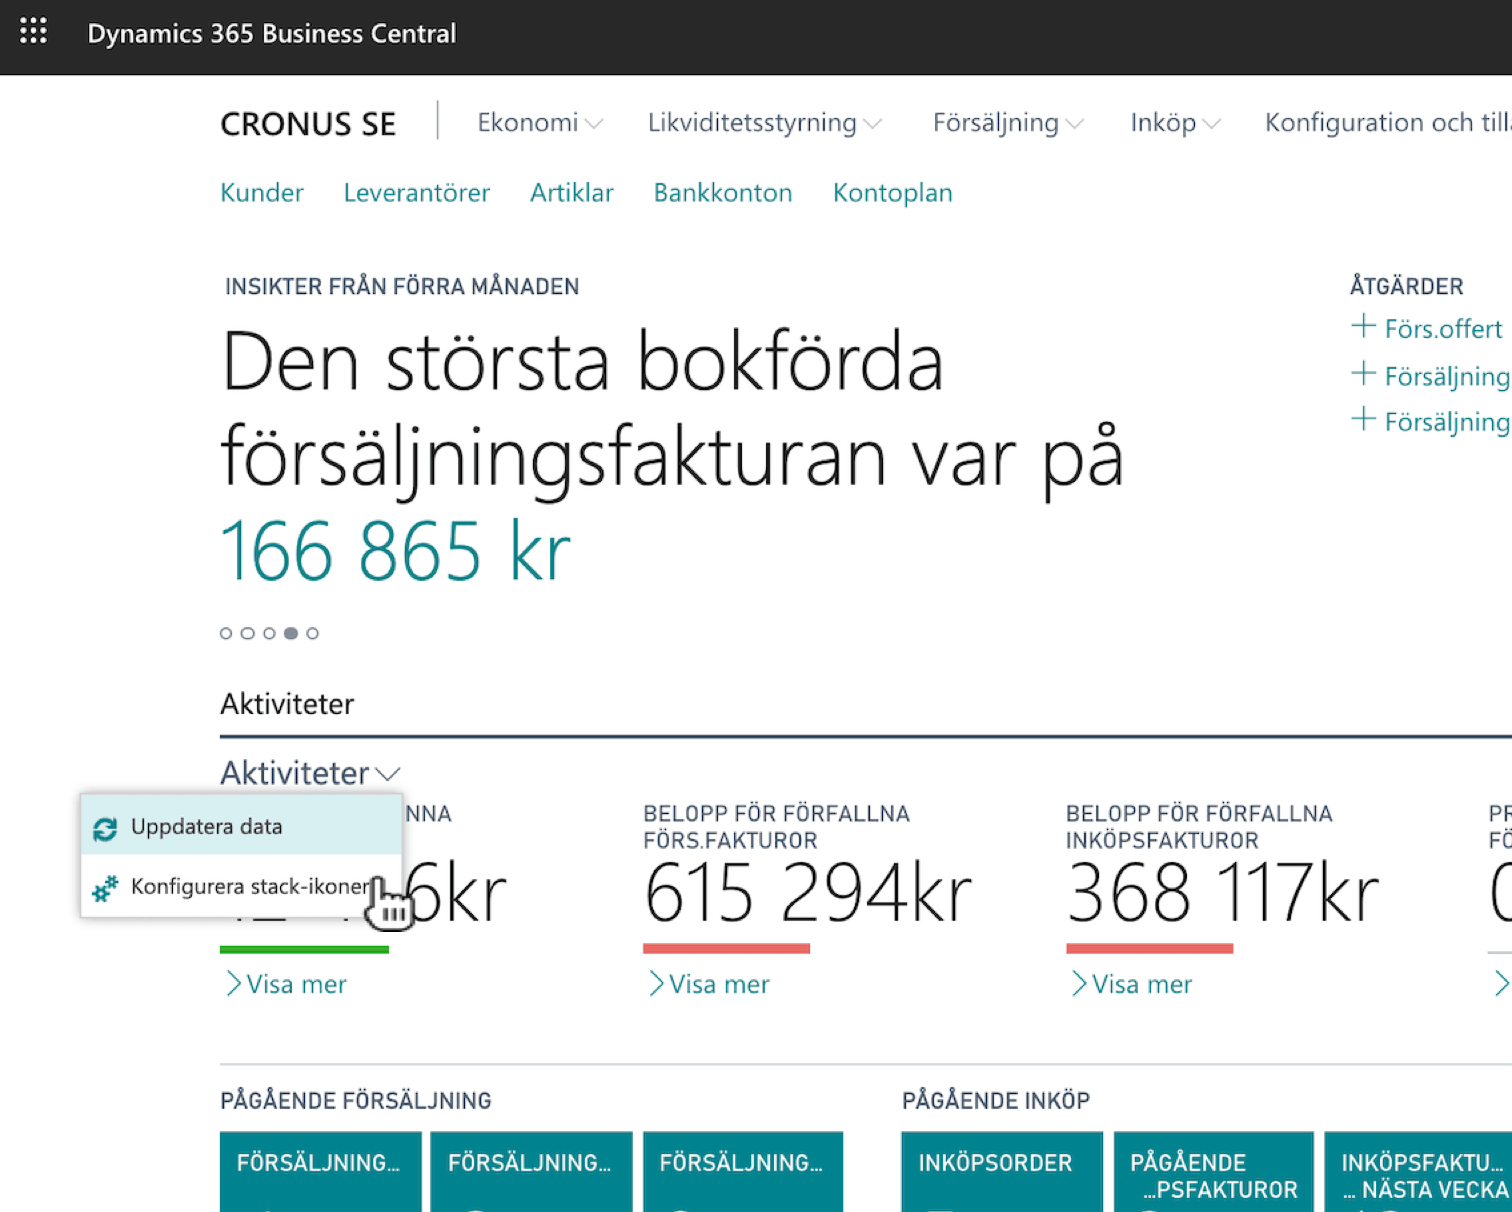
For starters, many role centers include the ability to set how the stack icons should look when it comes to what's good, medium or bad values. For example, in the Manager role center, you can set how the stack icon should look by clicking Activities and then selecting Configure stack icons.
This opens the Stack icon setup form. In this form you can set break values for the key figure in the form of low values, medium and high values. For each category, you can also set whether the key figure should be displayed, indicating whether it is Good, Bad, Ambivalent, Subordinate or Neutral.
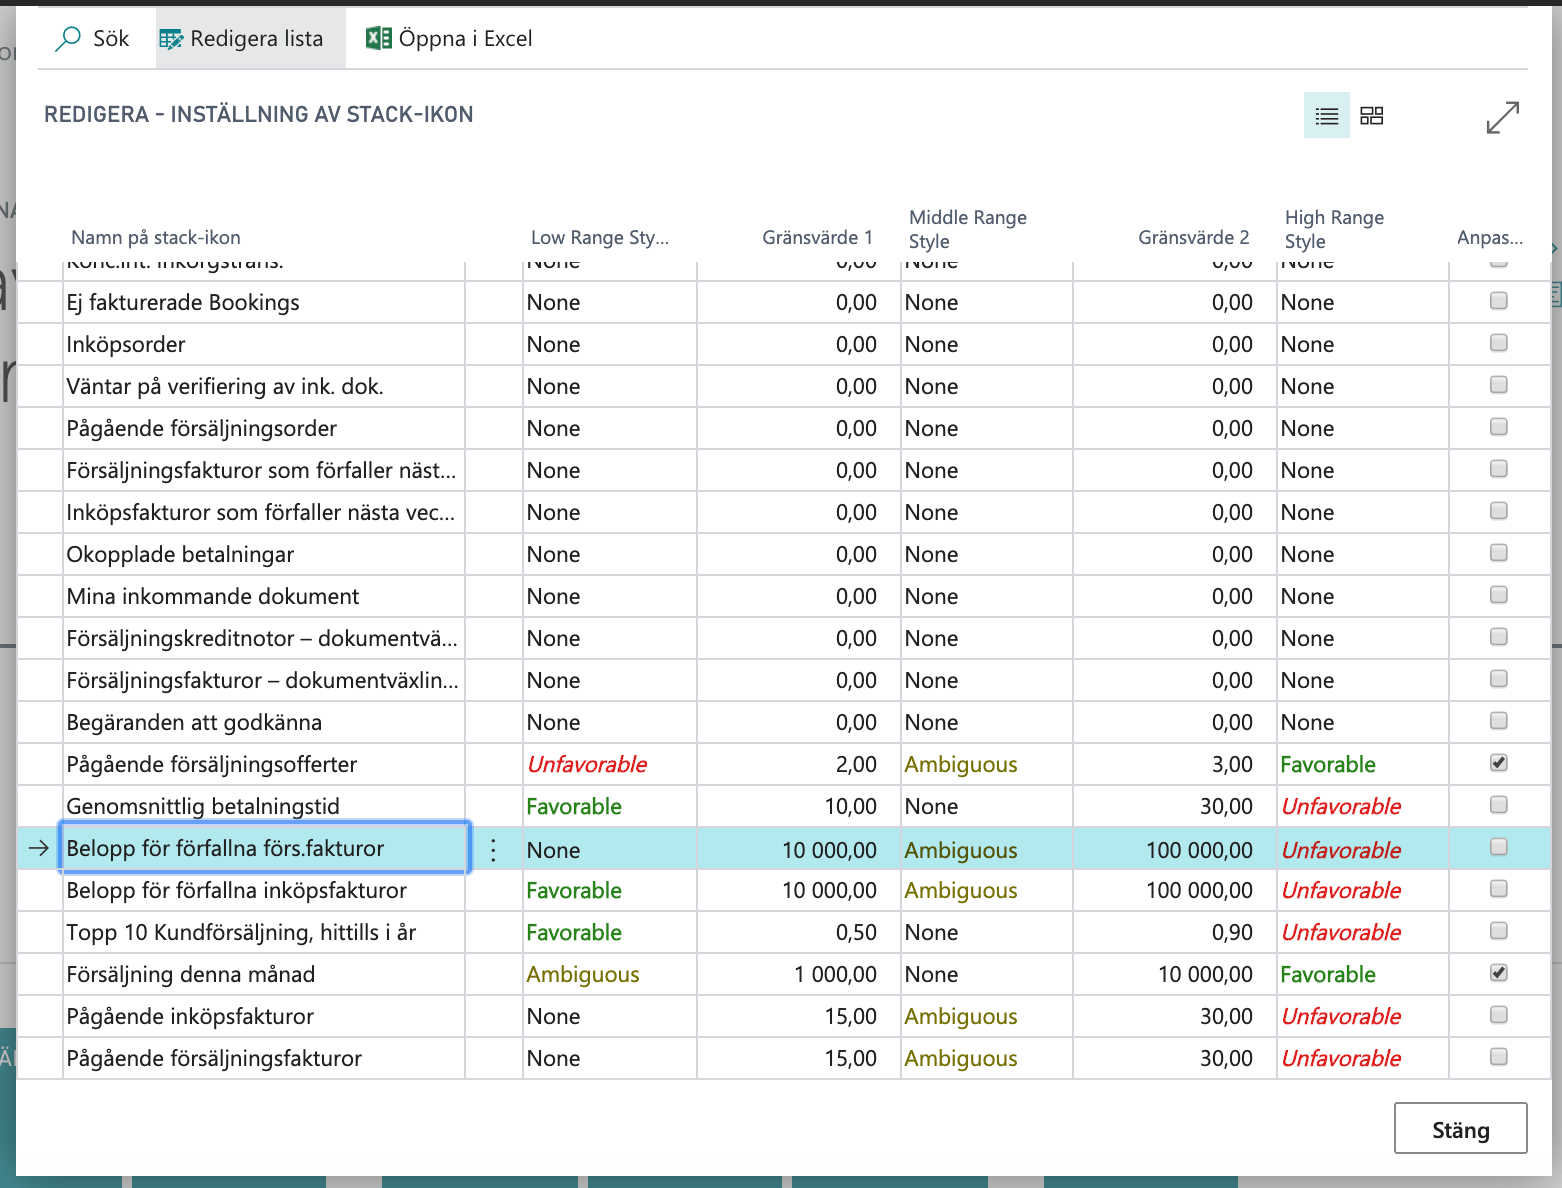
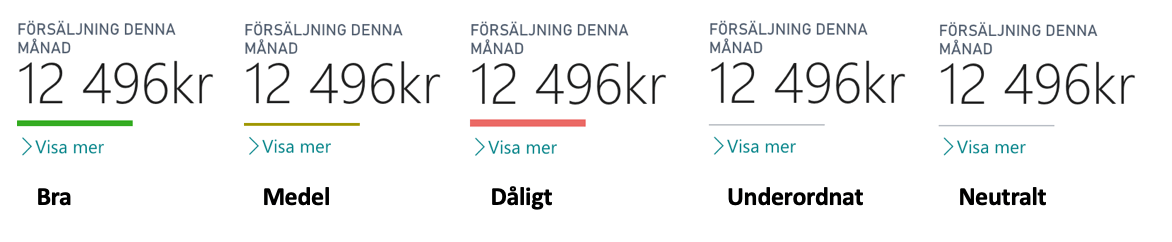
In this way, you can make the stack icons change the appearance of different values. See examples of how the same stack icon may have different looks depending on how you set the values:
Personalize lists
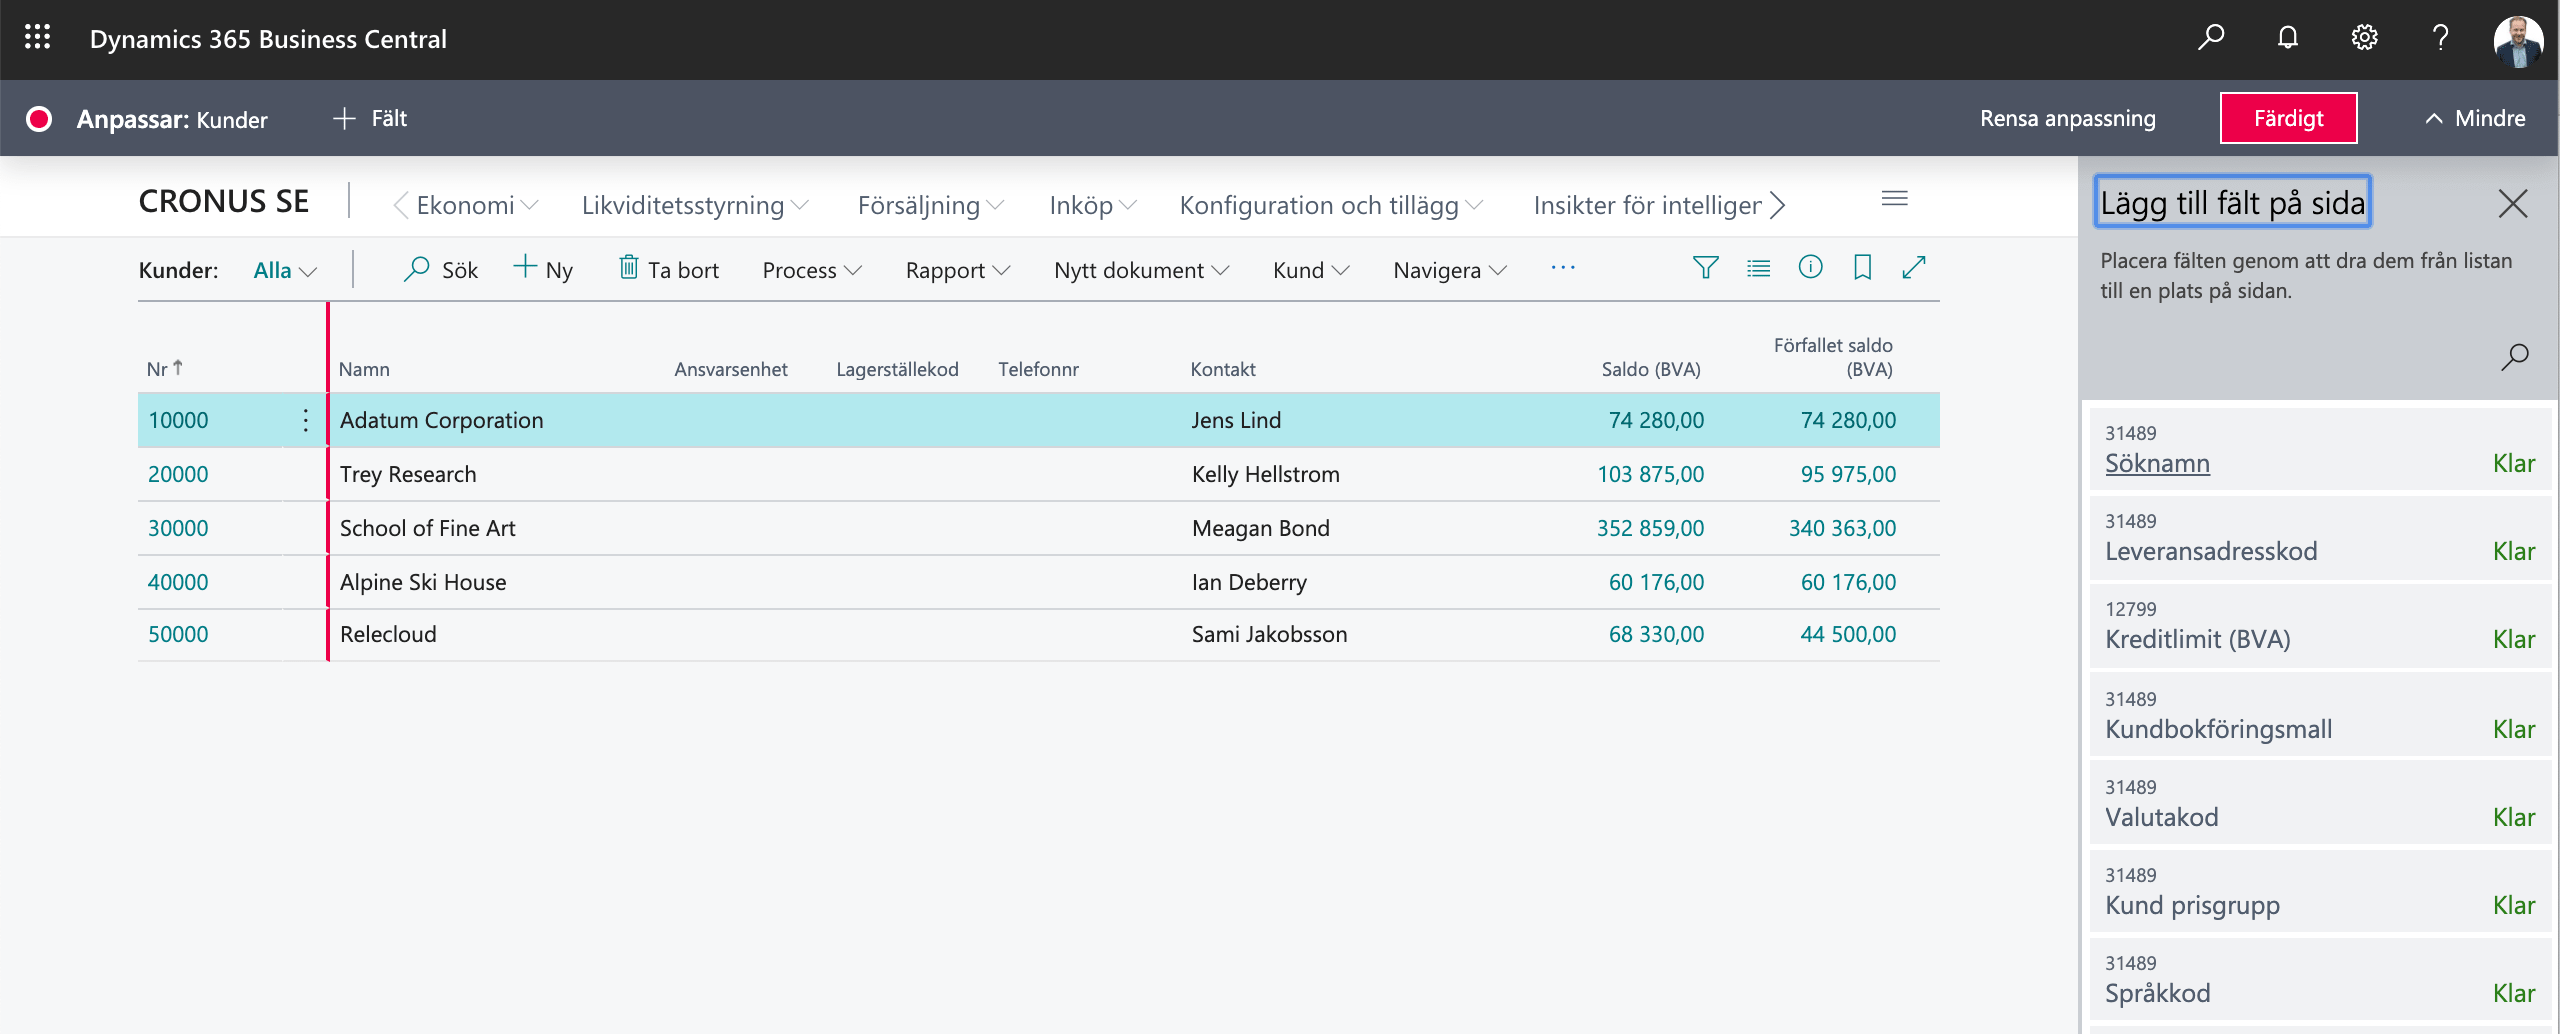
You can customize which columns to display in a list and in what order they should be displayed by choosing to click the gear in the upper right and select Personalize.

Clicking the + Fields button will display a list of fields that you can choose to drag into the list.
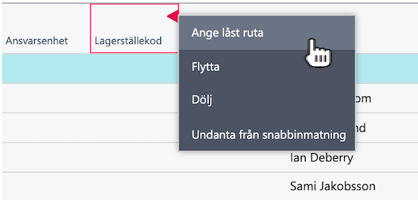
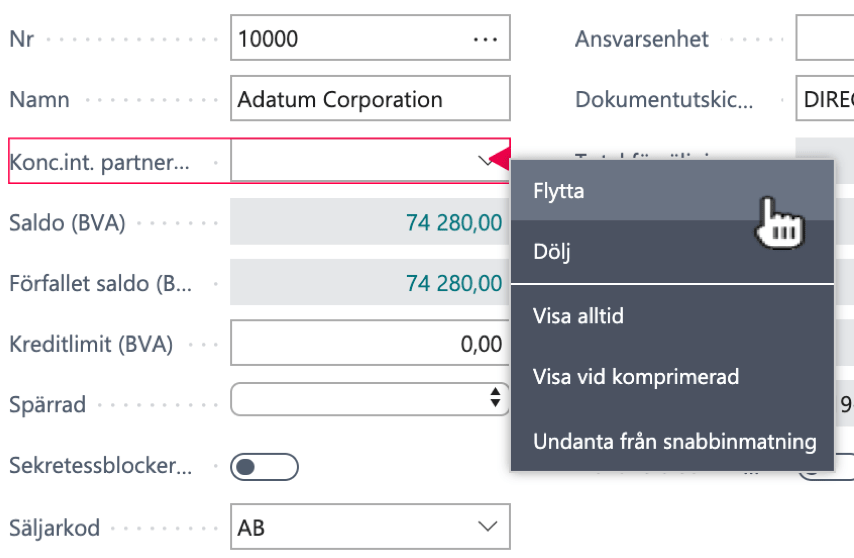
In addition to adding new fields to the list, you can move fields to other places in the list, choose to hide fields, lock / unlock the field to resize and exclude / include fields for quick entry. If you move the cursor over a field, a red arrow appears and clicking the arrow displays a pop-up menu with the various options.
Personalize forms
Just as you can personalize the layout of lists, you can also adjust which fields are displayed in forms and how they should be displayed. If you move the cursor over a field, a red arrow appears and clicking the arrow displays a pop-up menu with the various options.
#4 Work with dates in Business Central efficiently
In ERP systems, dates are important parameters that are often specified. Business Central therefore has efficient routines that allow you to quickly register dates in a way that helps you save both time and energy.
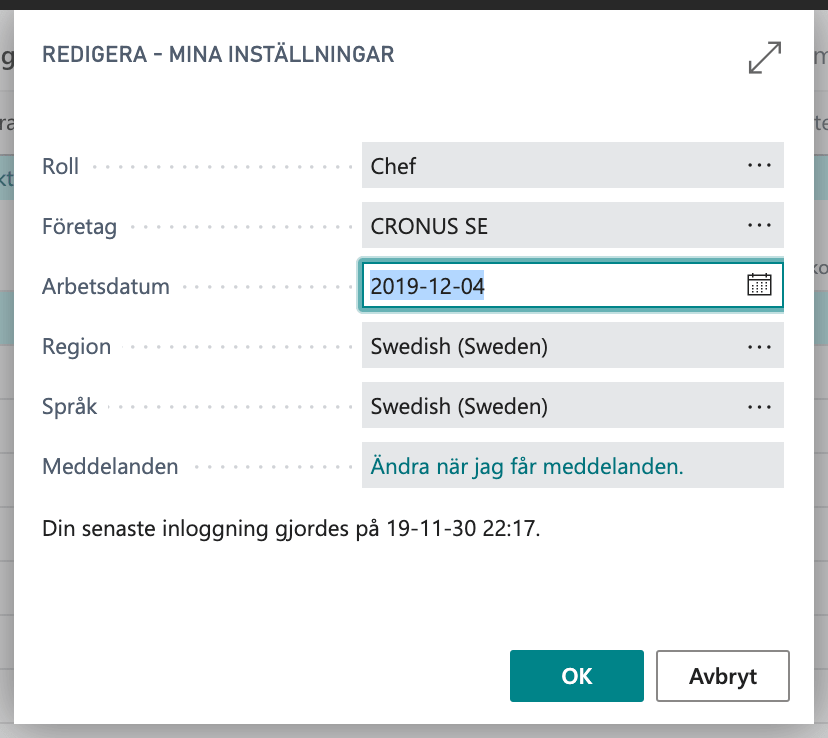
Business Central changes the date format based on the user's regional settings. To change these, click the gear in the upper right and then select the My settings option. In the My Settings dialog, you can select which Region the system should retrieve its settings from. By choosing Swedish, the date format is YYYY-MM-DD while if you instead choose, for example, the US, the date format will be DD/MM/YYYY.
In this dialog you can also specify Work date which is a function that facilitates the date registration. For example, if you are registering orders for yesterday's date, you can temporarily change the order date to yesterday's date and the orders are automatically assigned order date to the work date instead of the current date. The work date is automatically set to the current date when you log into Business Central.
BC understands the context of a date
When a date is to be registered, you can do so in its full format according to the selected regional date format. For example, if you are registering the date of December 4, 2019, this can be specified by typing 2019-12-04 . There will thus be a total of 12 keystrokes.
Business Central also understands if you enter the date in the shorter format ÅÅMMDD, in our example 191204 . It will save you 4 characters.
Business Central also understands the context of a date. If the work date is the same year, you only need to enter the month and day, ie 1204. If you are also in the same month, you only need to enter the day, ie 04 .
There are also a number of shortcuts for selecting dates. For today's date, you can enter the letter "D" and Business Central will translate it to today's date. If you want to specify a specific day of the week in the current week, you can enter the speed dial for this weekday; M = Monday, T = Tuesday, WE = Wednesday, TH = Thursday, F = Friday, SA = Saturday, S = Sunday.
#5 Use Business Central's built-in help feature
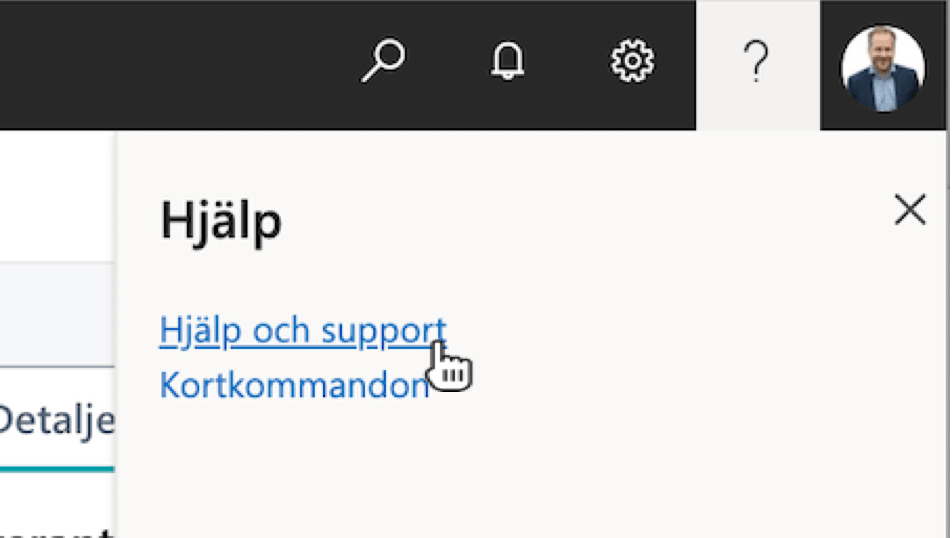
Business Central has extensive procedures to help the user find the right features and explain how the system is used in the best way. You can find online help by clicking on the question mark at the top right of the screen and choosing Help and Support.
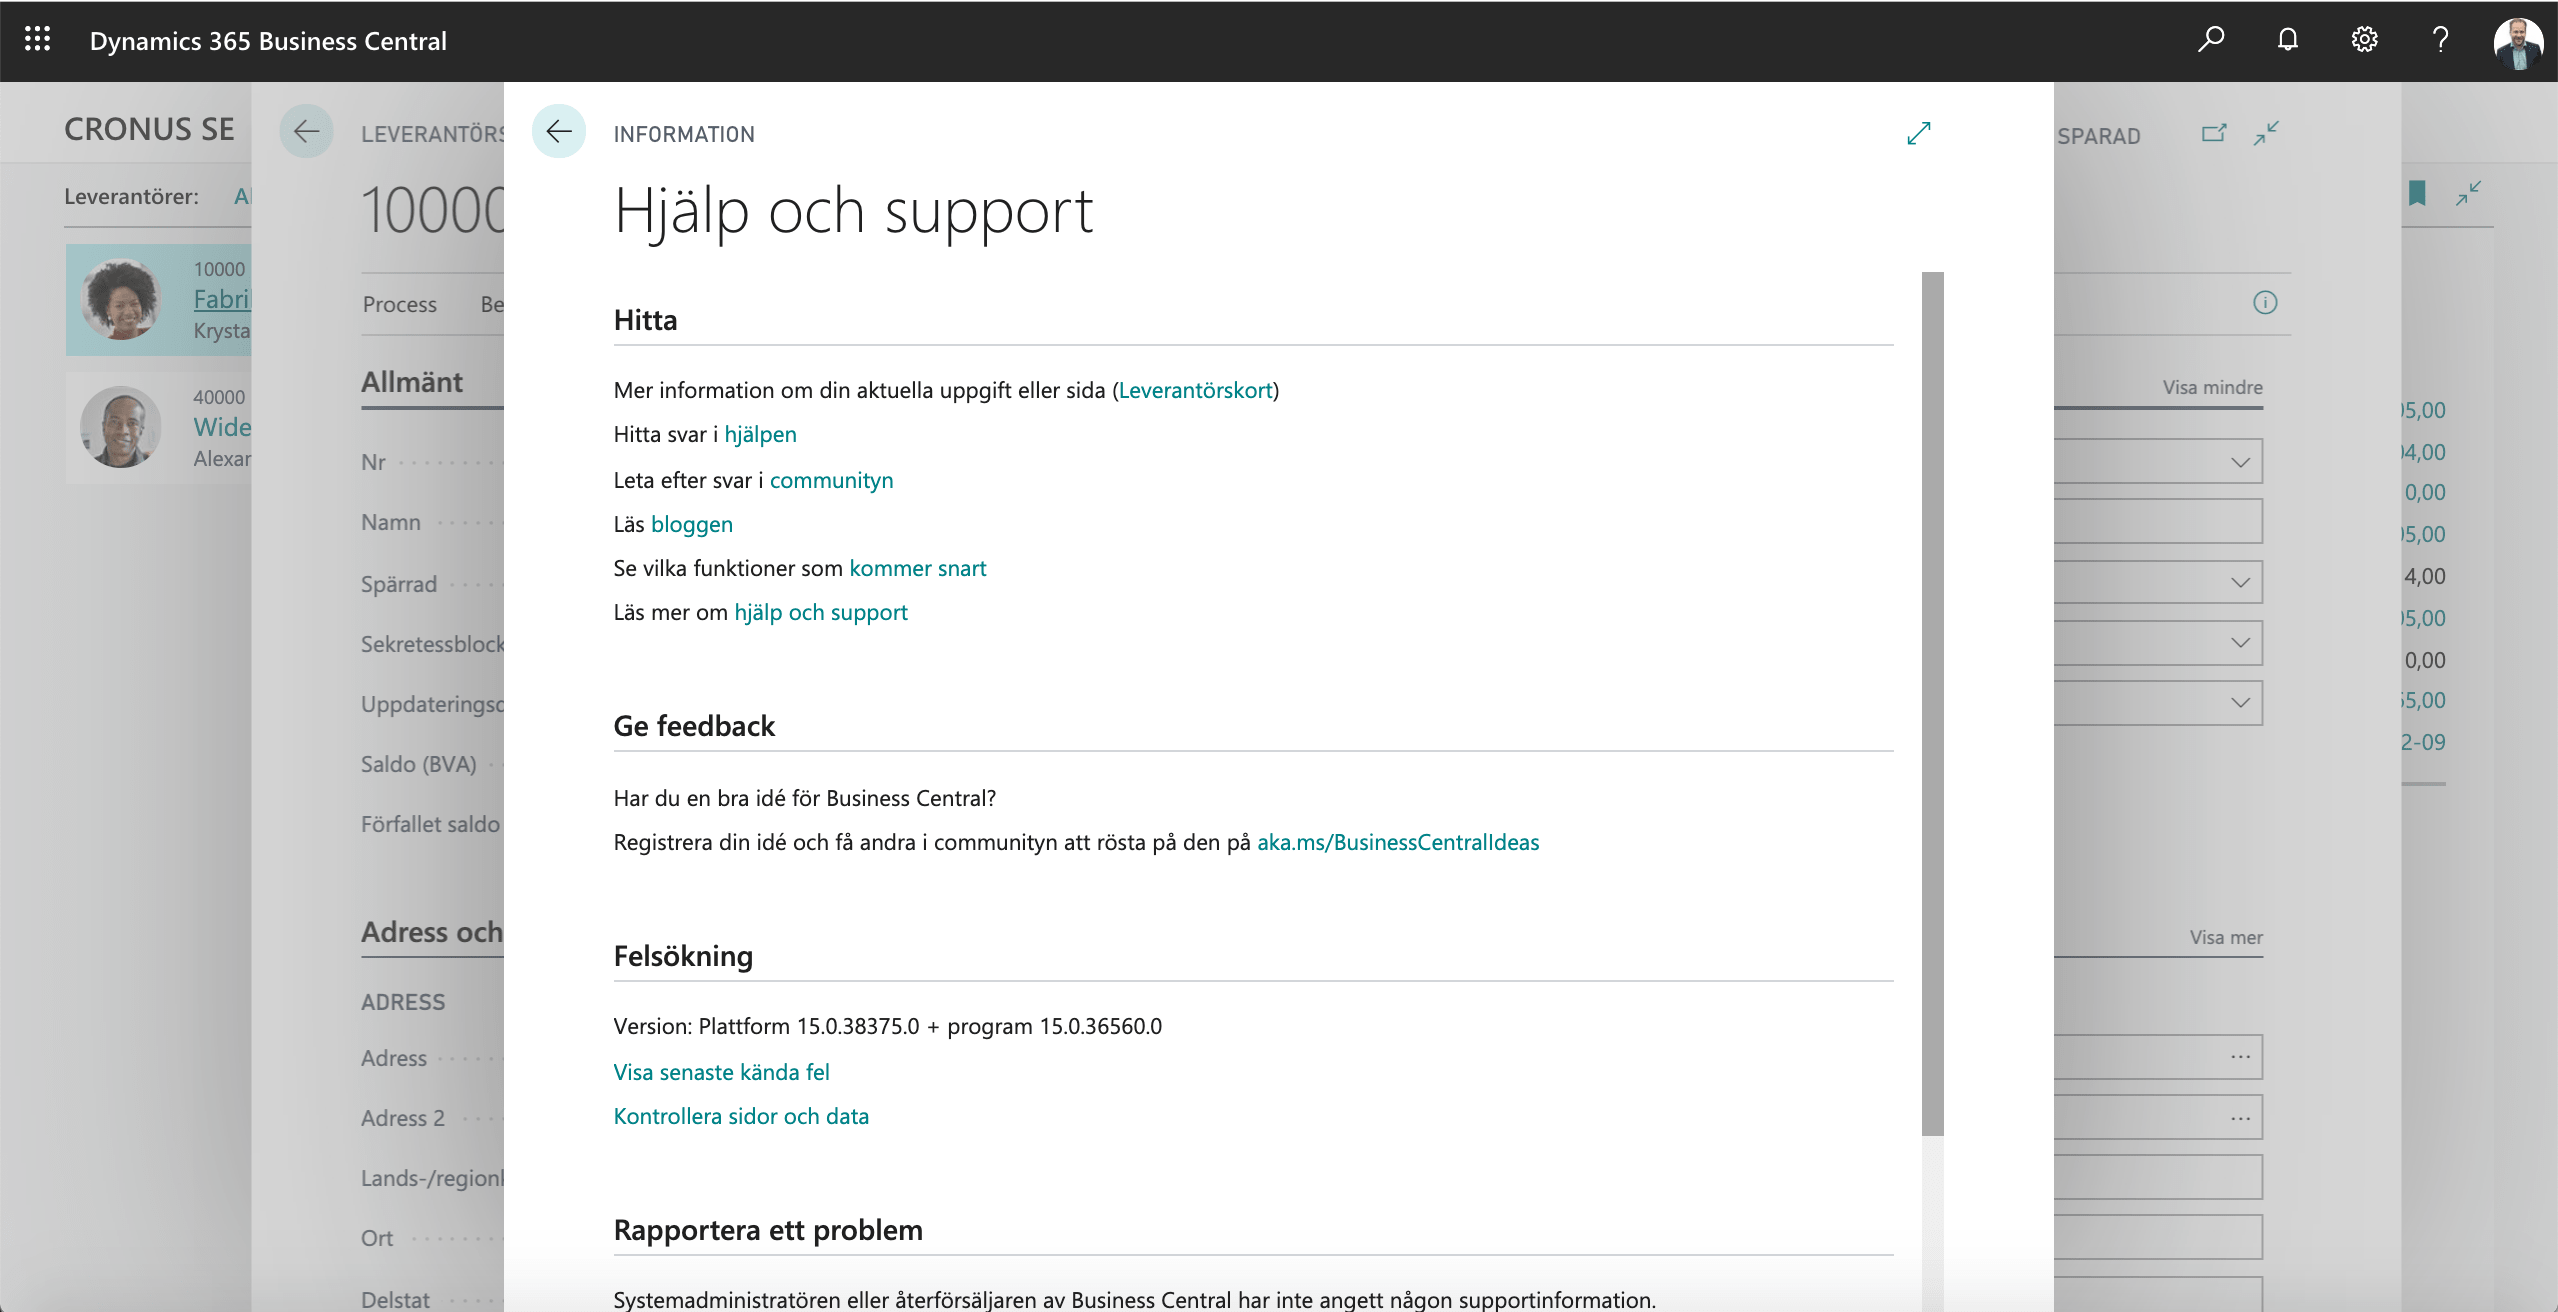
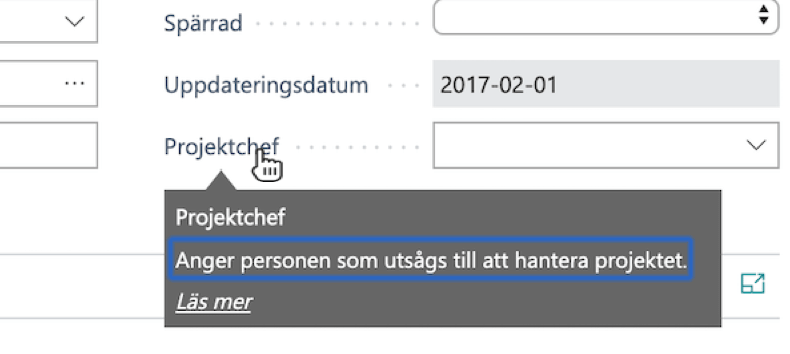
When you open the help, you will see, among other things, the link to the page/task you are currently on.
You can also easily access help about the different fields in the form by clicking on the field name. Then a smaller help text is displayed directly in the form. You can also choose to get more information about the current field by clicking the More link in the quick help text and you will quickly get to the help text for the current page.
Use the search function to find answers
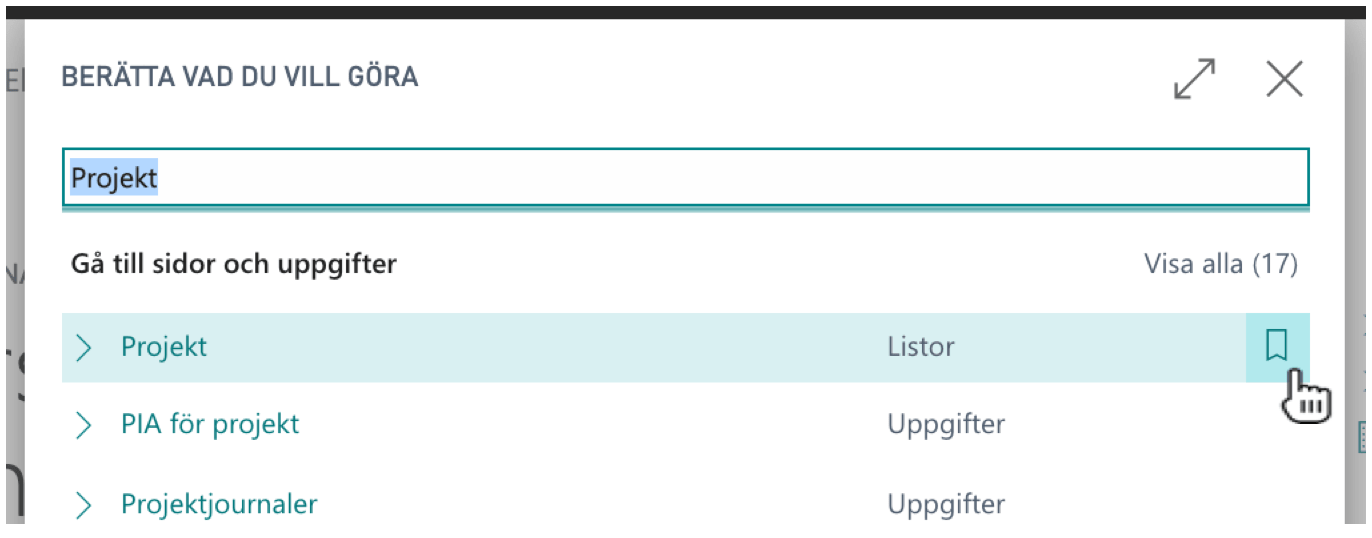
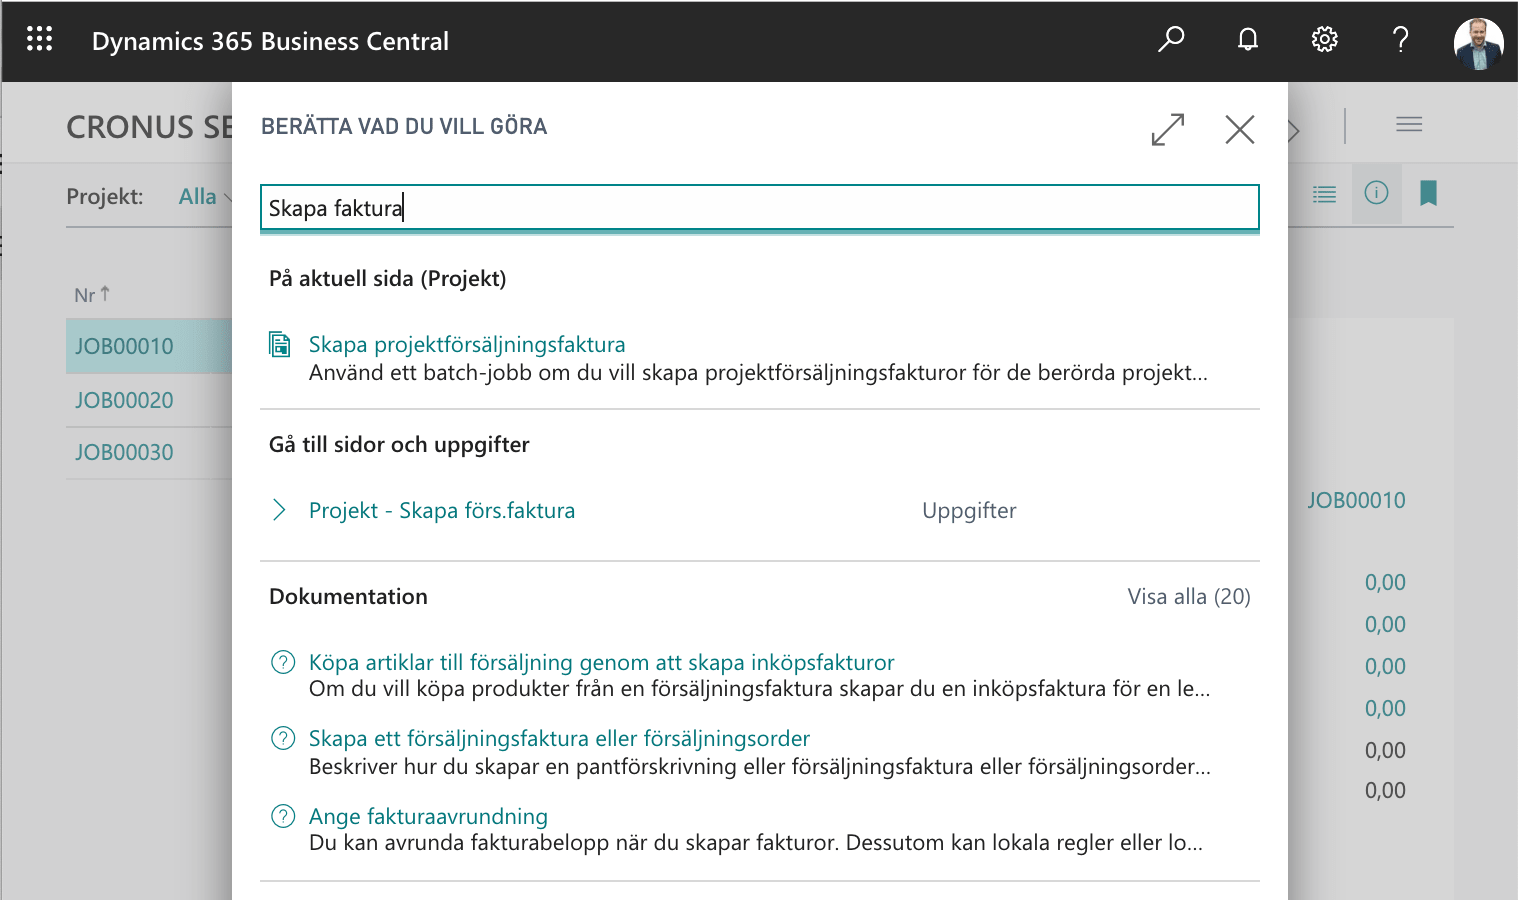
You can also use the search feature to ask questions to Business Central. For example, suppose you want to know how to create project invoices. You can then use the search function to enter your exact query:

This function also relies on where you are in the system to find relevant help sections. For example, if you are in the project list and search for "Create invoice", current actions are displayed on the page first, before links to pages, tasks and then to documentation:
#7 Open new windows in Business Central
You can open several tabs with Business Central to handle several different activities simultaneously. For example, you may want to work in several different companies at the same time or you want to have several different cards / lists open in the same company at the same time to be able to do several different activities.
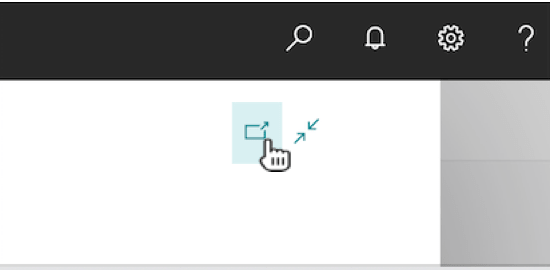
In the mode you have a card open and want to keep it open at the same time as you want to continue working with the underlying list, you can choose to click on the "Open Page in New Window" symbol. When you select this action, a new browser window opens with the current entry while the previous tab in the browser goes back to displaying the list you were previously on.
#8 Work in several companies at the same time
Do you have several companies in the same installation of Business Central that you switch back and forth between? You know that you can easily open several companies at the same time?
To open multiple companies simultaneously in Business Central, follow these steps:
- Copy the address to Business Central in the browser's address bar, then open a new tab in your browser.
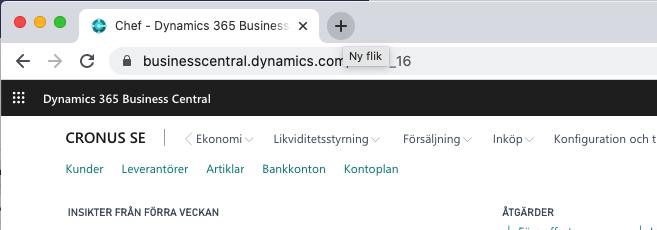
- Paste the address of Business Central into the address bar of the new tab
- Once the page is loaded, you choose to open my settings by first clicking on the gear at the top right and selecting My settings .

- In the My Settings dialog, enter the company you want to appear in the new tab in the Company field
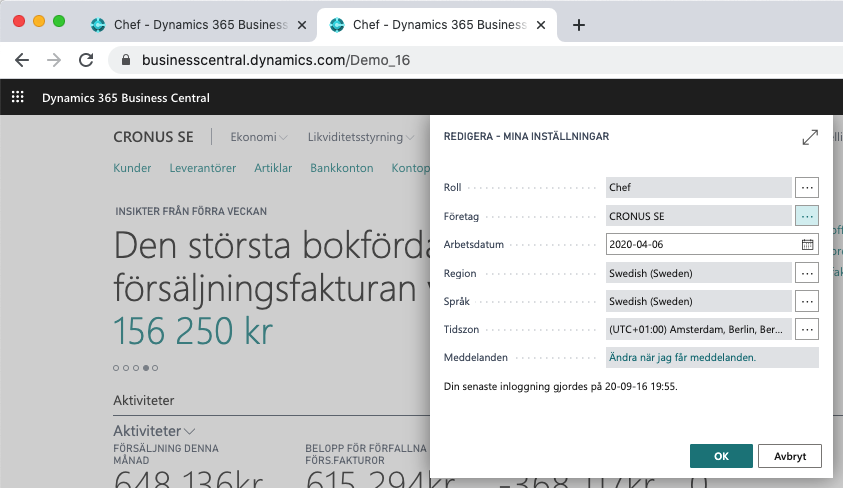
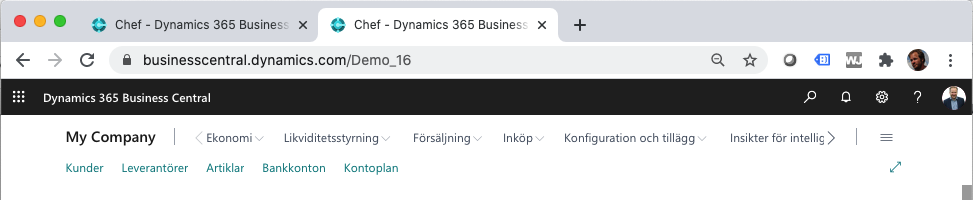
- Now you have two companies open simultaneously in two different tabs in your browser. You can switch between the two tabs at any time without having to navigate back to the right page.
#9 Preview posting in Business Central
Business Central is a system that consists of many different routines that automatically create bookings based on templates and underlying functions. This automation can make it difficult to know in advance what even bookings will result in before they are created.
Business Central therefore has a feature that allows you to preview the accounting before it is actually completed. Parallel to the usual Post and Post and Print actions is the Preview posting action. When you choose this action, the system's accounting routines are run in the same way as the usual accounting is called, but without permanently saving transactions and posted documents.

When the posting routine is executed, the Preview posting window is automatically displayed. This window is similar to the usual Analyze window with the big difference that the transactions it lists as the result of accounting are not actually created.
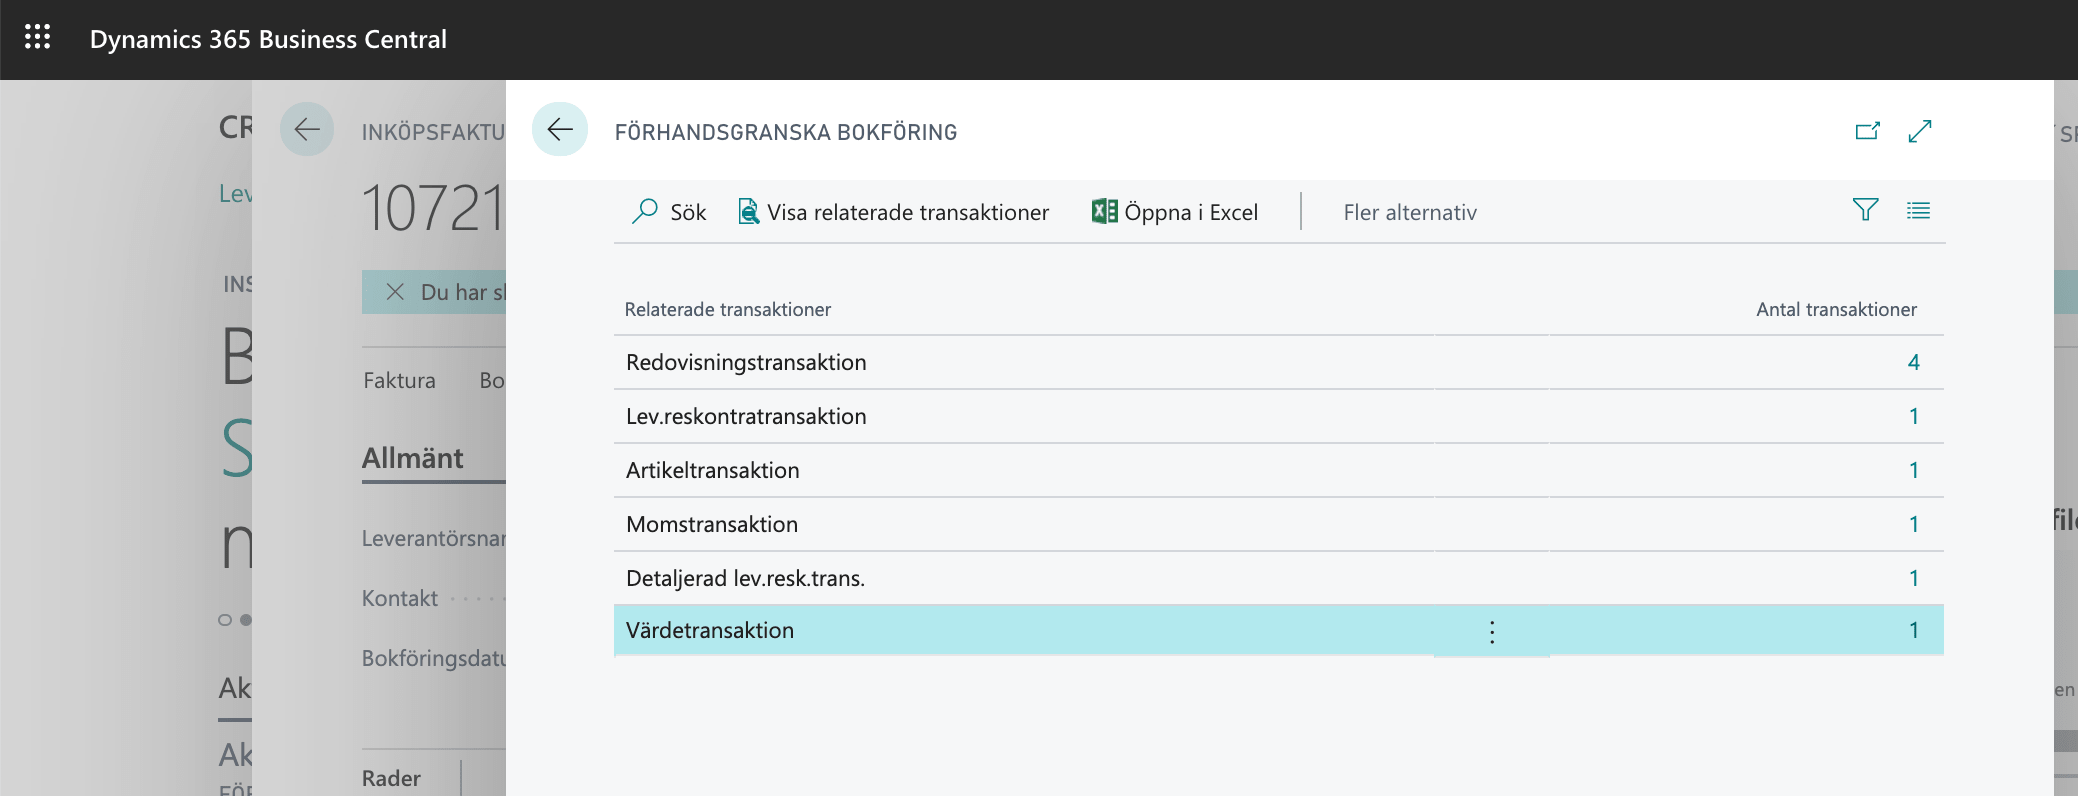
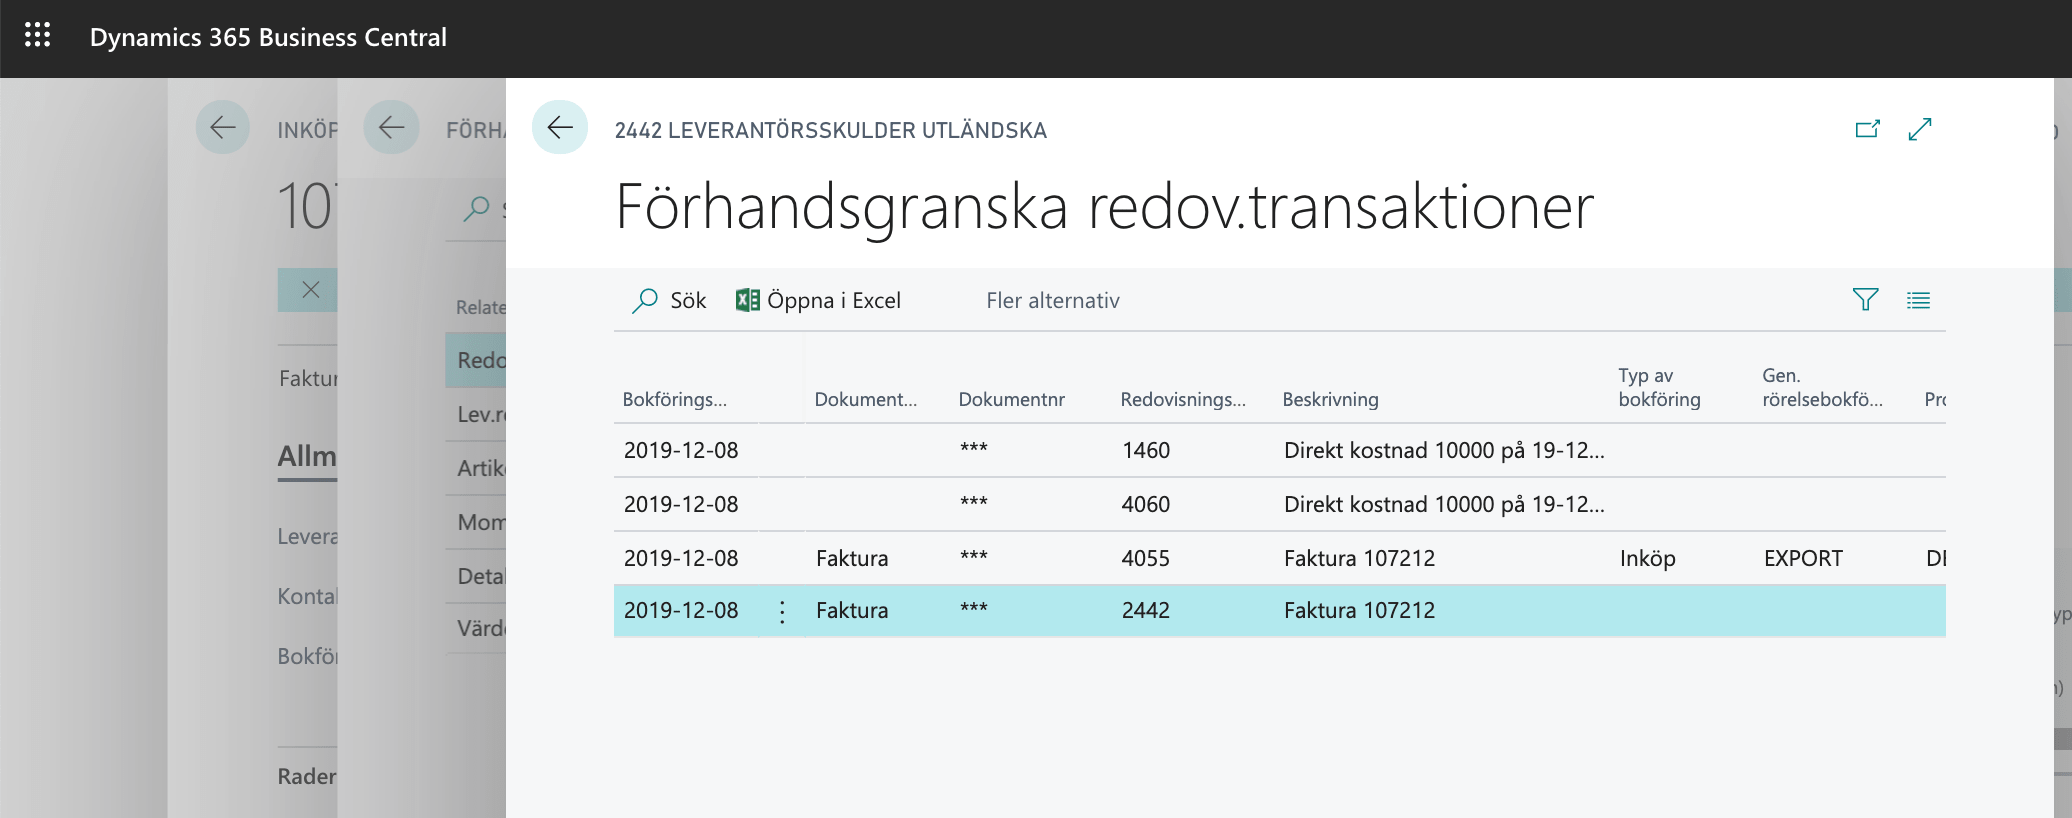
Similar to the Analyze function, you can track down the various transactions:
#10 Edit in Excel in Business Central
You can easily edit information in Business Central using Excel. This can be handy when, for example, you have to maintain records such as customer, vendors or items.
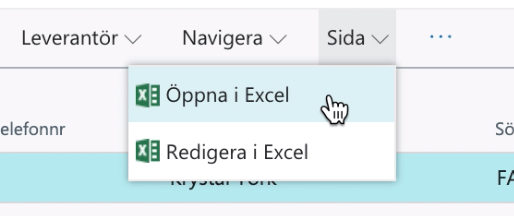
Open in Excel
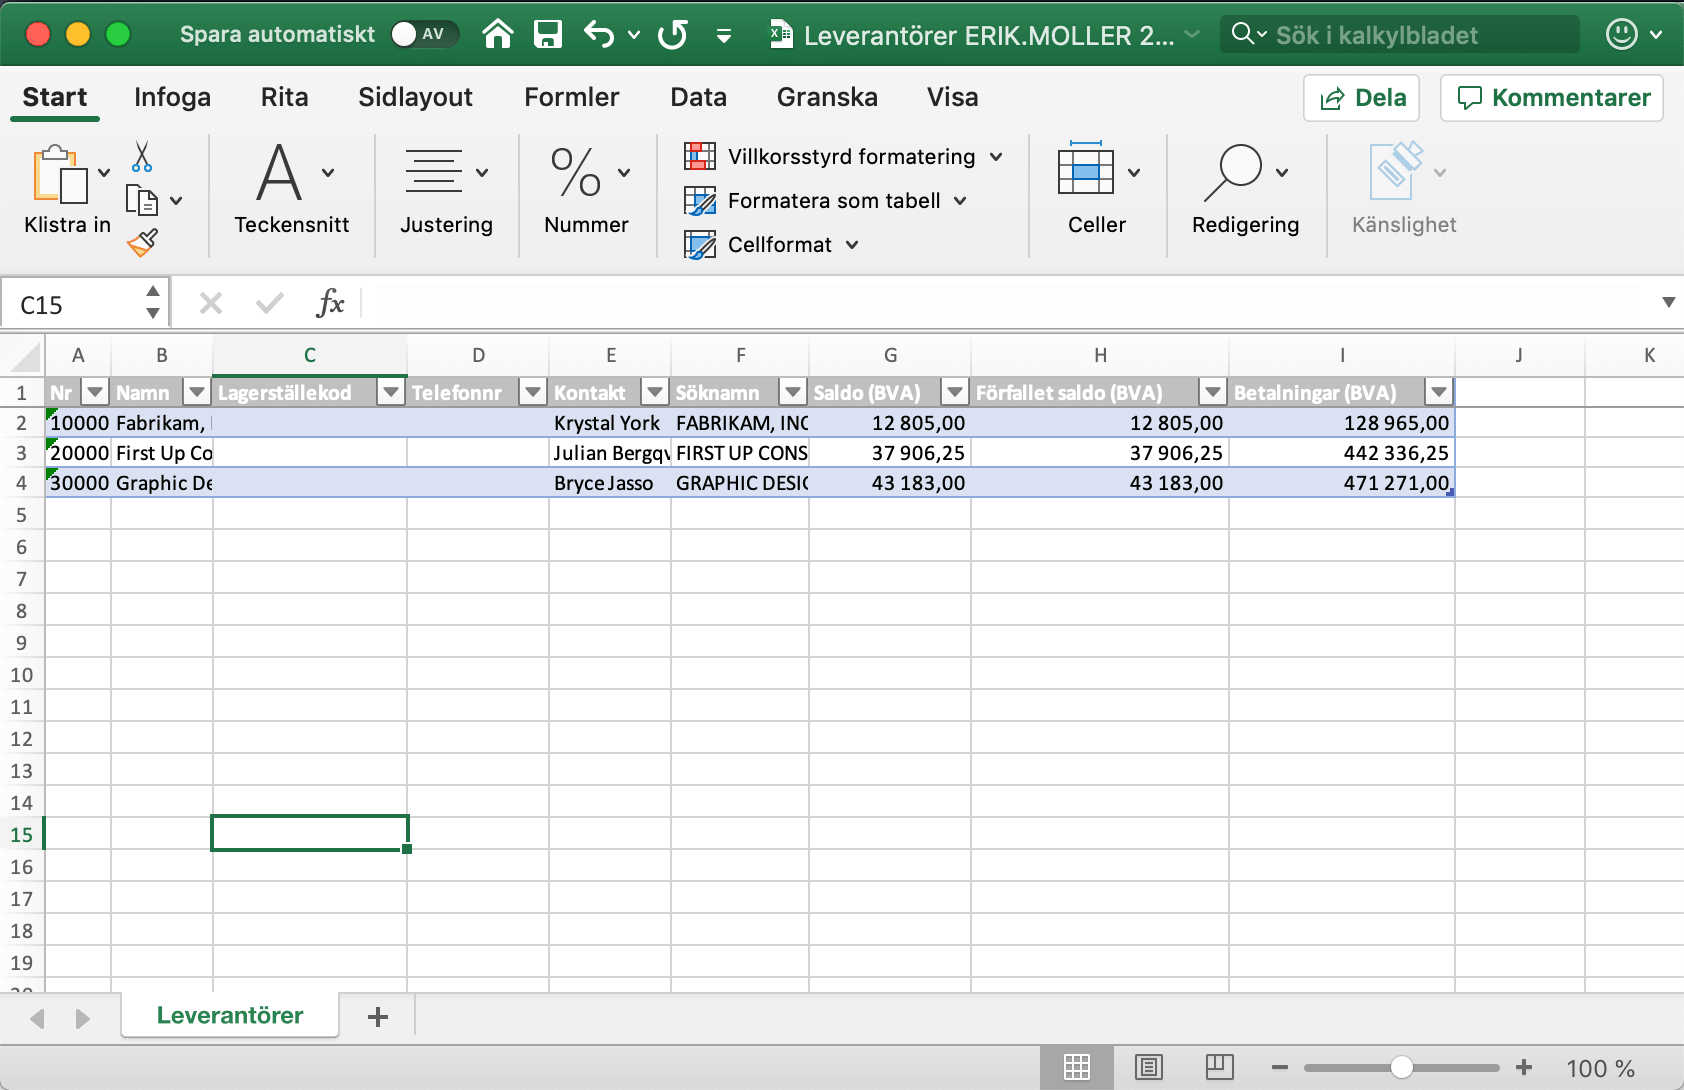
If you only want to open the records in Excel to do calculations, create reports or similar, select the Open in Excel option. The items displayed in the list (current filter) will then be added to a new Excel spreadsheet that is downloaded.
The columns in the spreadsheet are the same as those shown in the list and the calculated fields contain values based on the current summations.
Edit in Excel
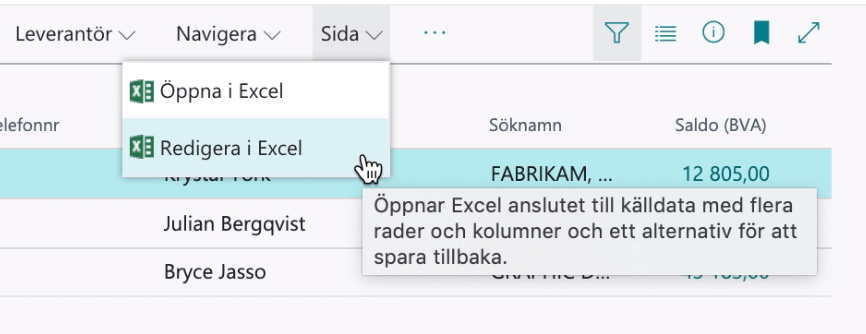
You can also choose to open the list in Excel for editing. This is done with the help of an add-in to Excel that allows you to push back updates to Business Central.
When you are in a list that you want to edit in Excel, select the Edit option in Excel.
The first time you do this, you will need to install the add-in in Excel to make this possible:

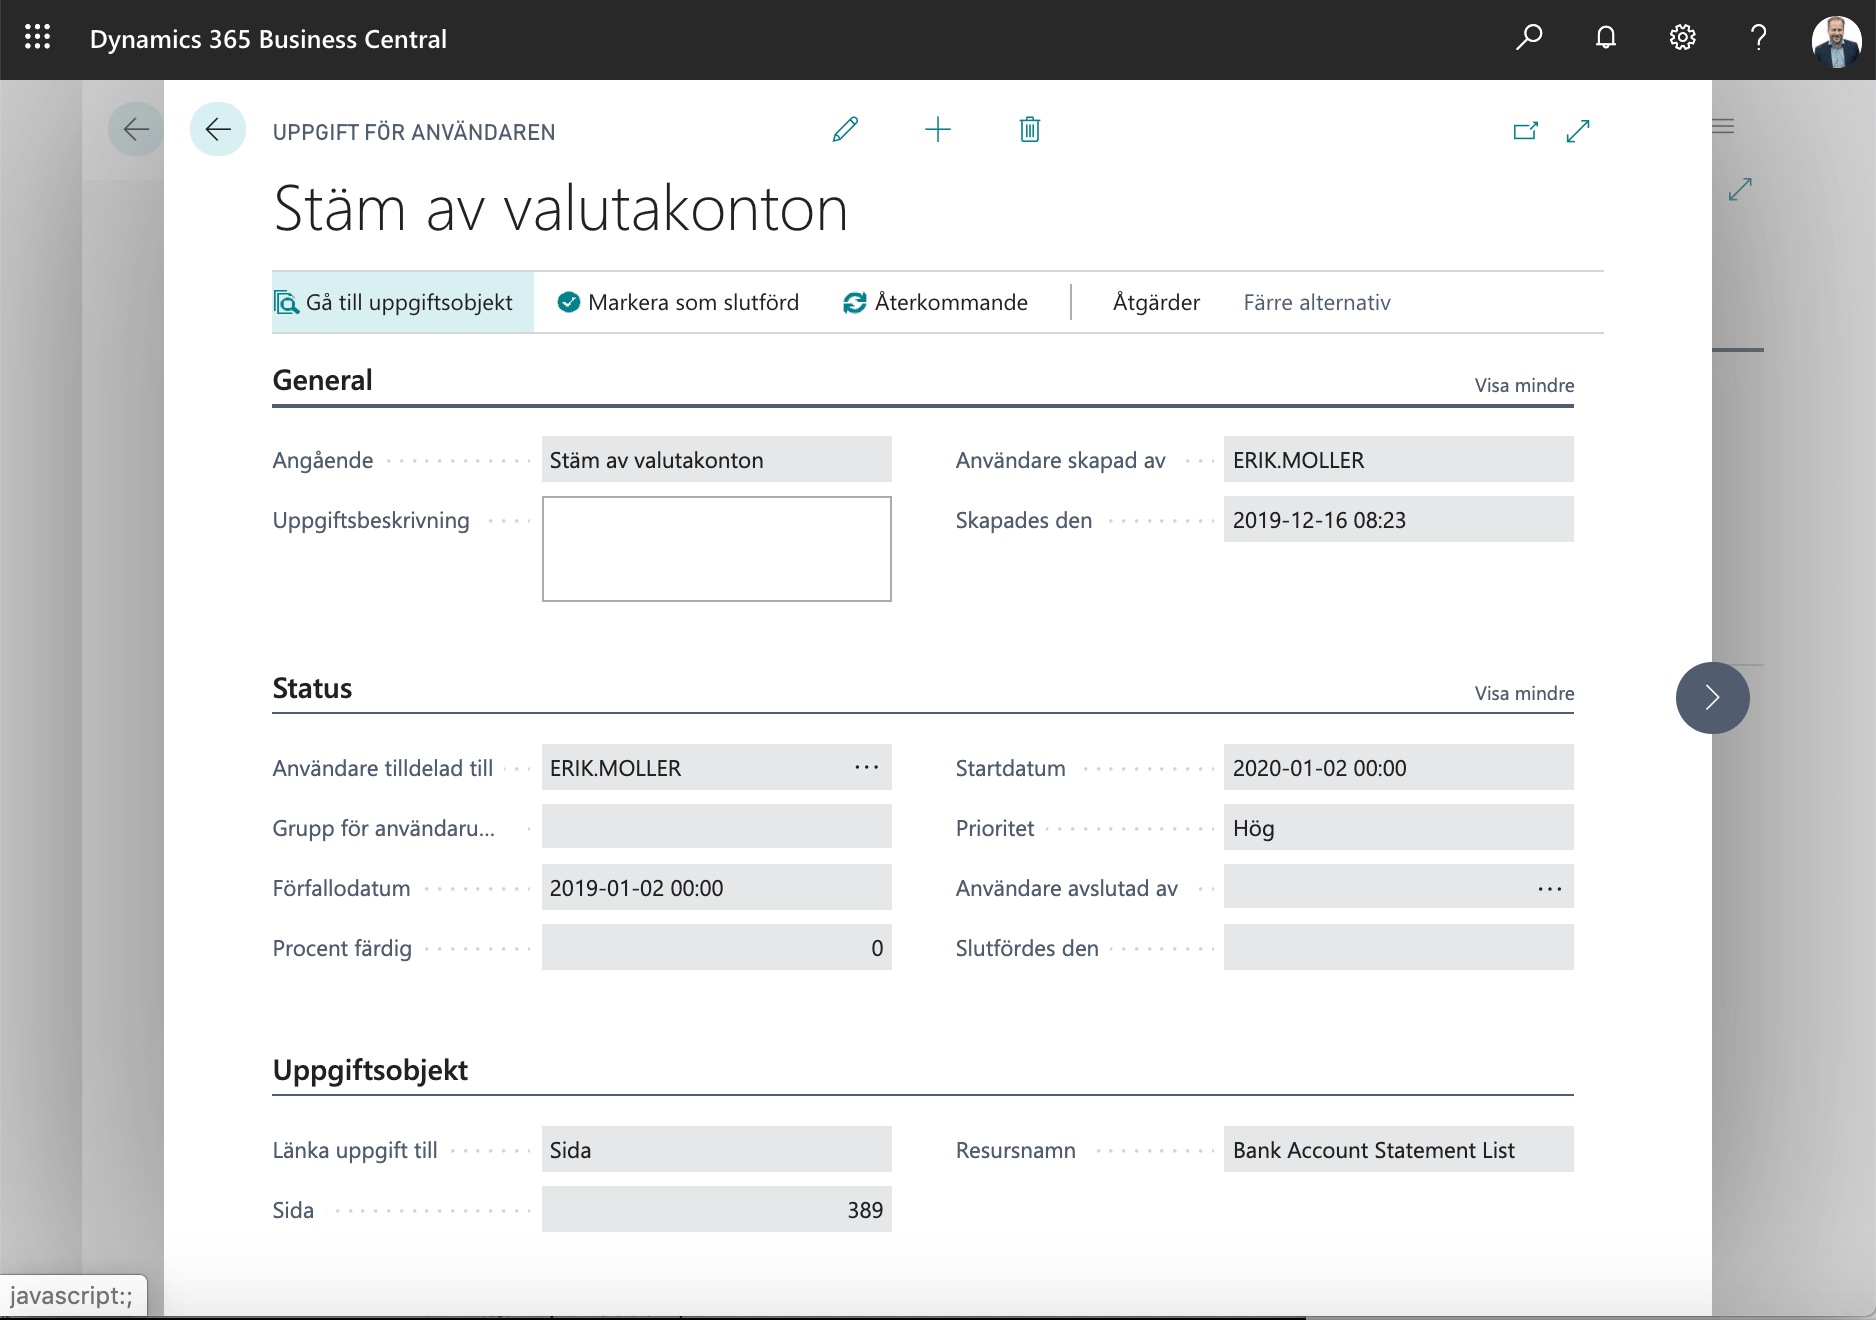
#11 User Tasks in Business Central
It can be difficult to keep track of all the activities and tasks to be performed in a business system. That's why Business Central has a feature to help you do that. You can create and assign to you or your employees tasks to be performed at specific times with information and links to the routines to be used.
To get to the list of your tasks, you can either search for User Tasks, or see the icon-stack on your homepage called Pending User Tasks.
In the list of user tasks you will see the information assigned to you or a group of users to which you belong.

In the list, you can open up tasks, mark tasks as completed and create new tasks as needed.
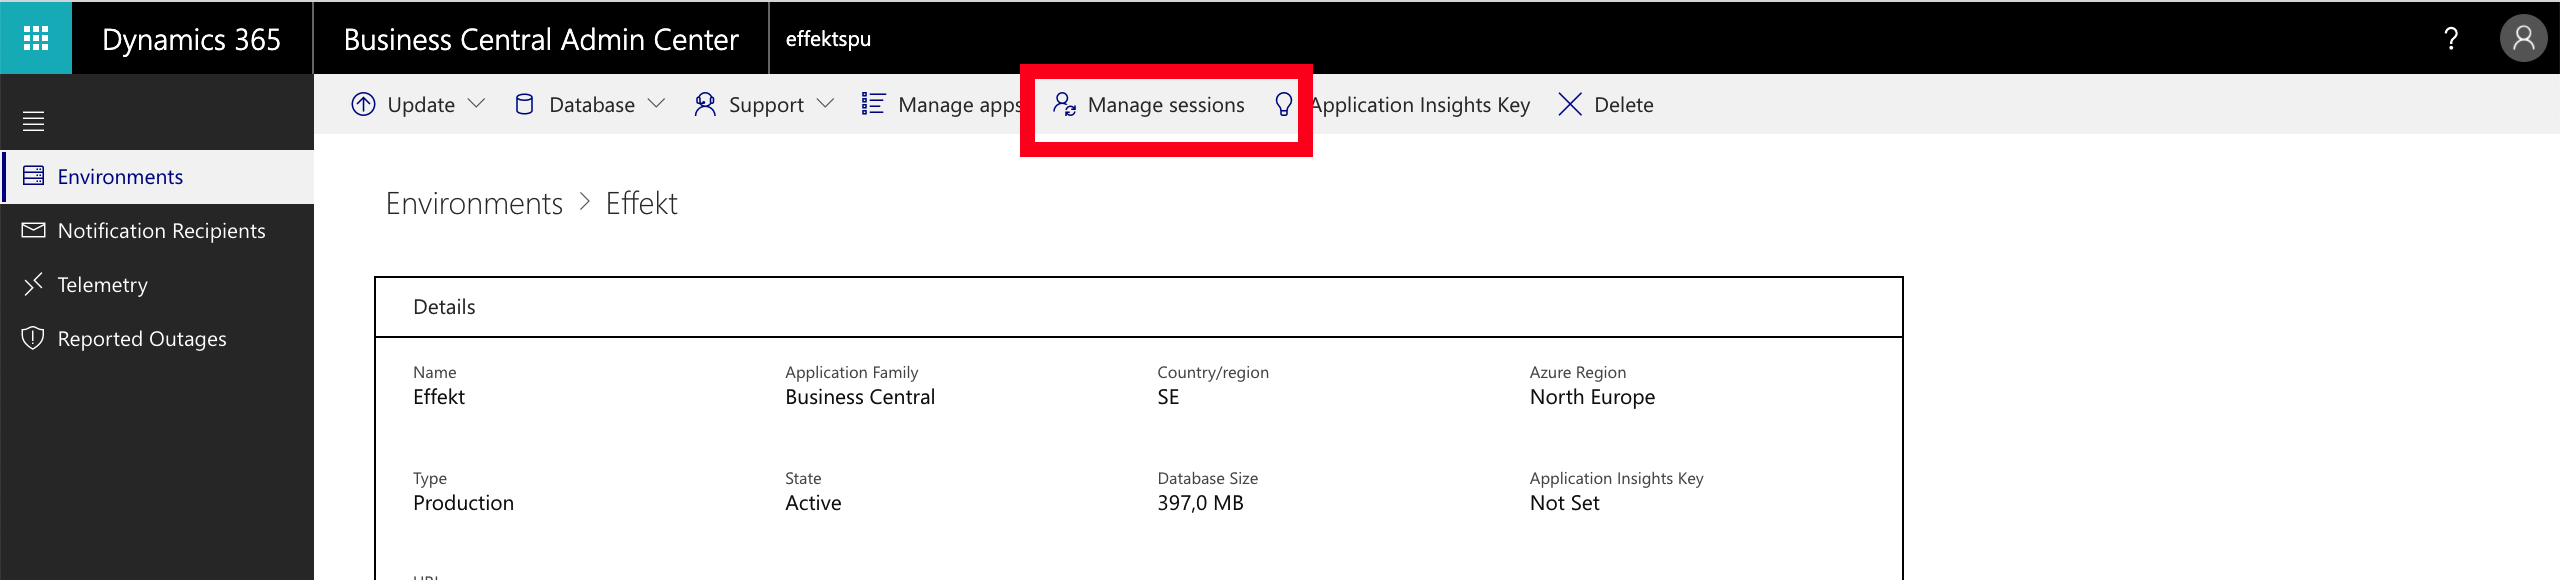
#12 Manage sessions in Business Central
Do you want to know which users are currently logged in to Business Central to see if someone is causing and locking the record you need to edit? You can easily view the list of logged in users using the Sessions feature in the Admin Center
Open an environment in the Administration Center and select the function Manage Sessions:
Now you can watch and cancel sessions:
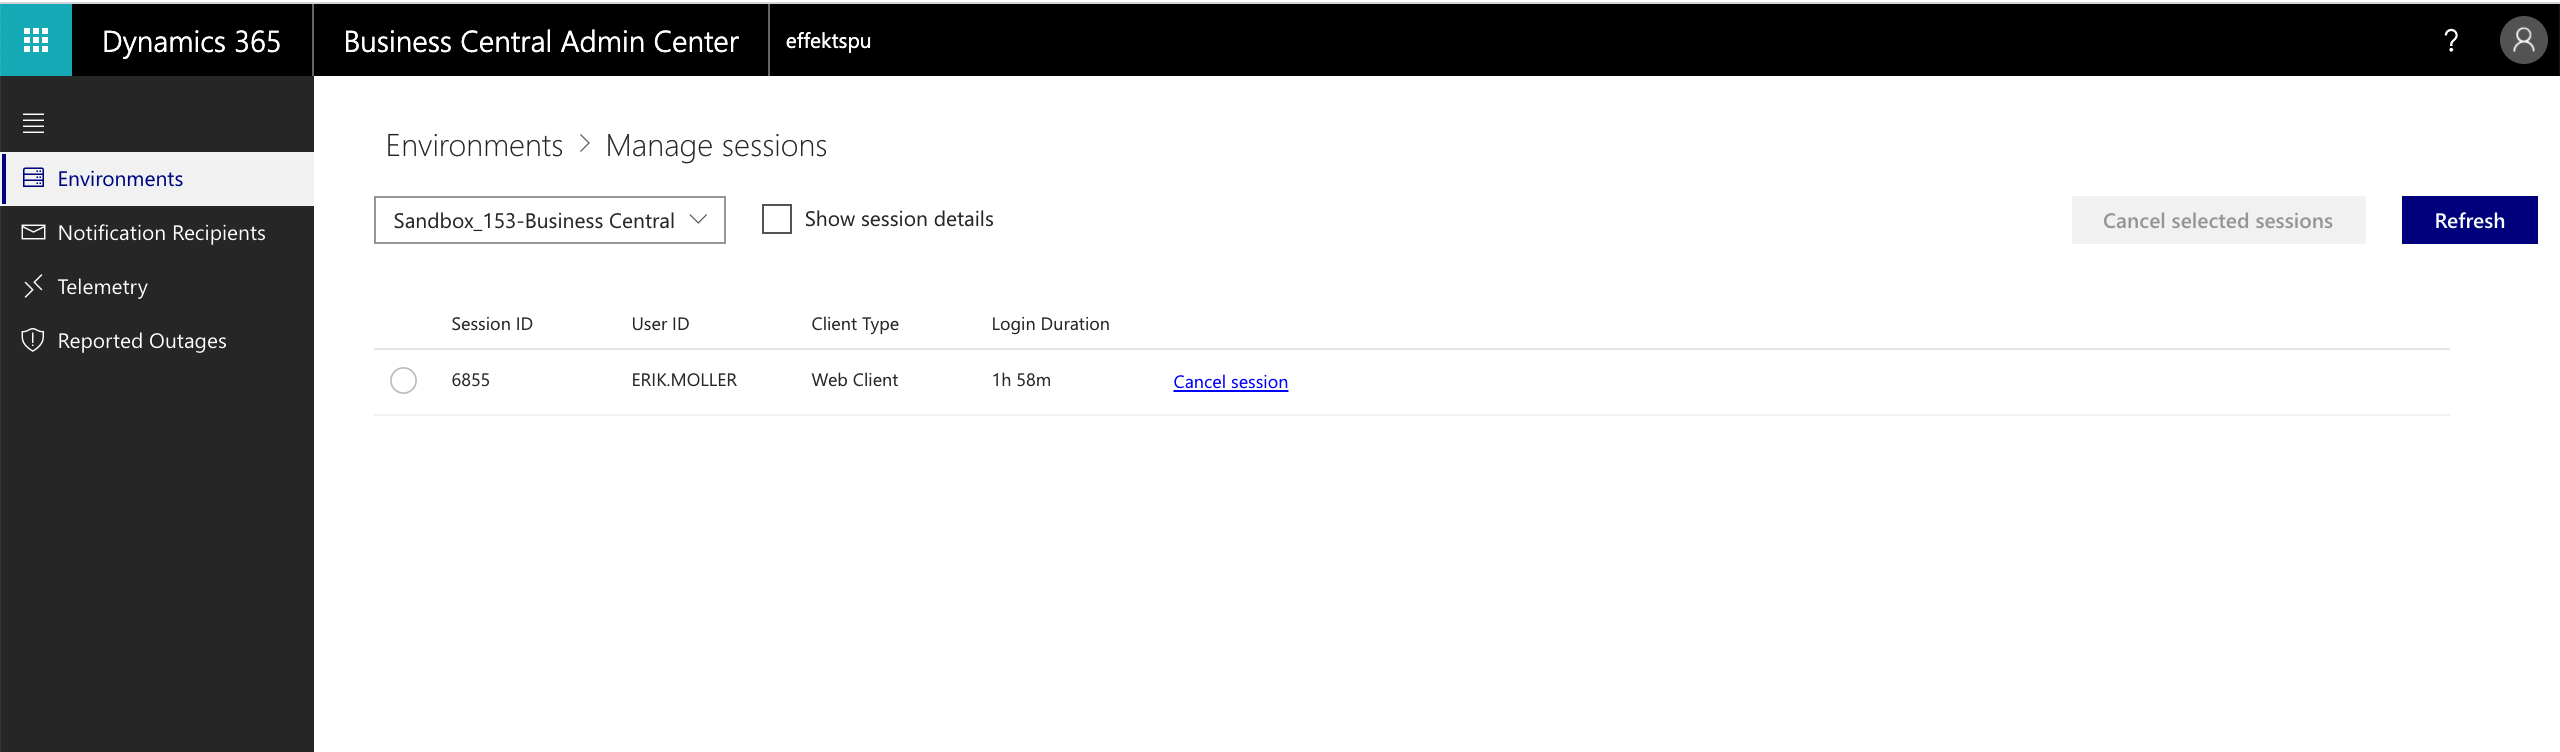
The page displays information about active sessions in an environment and allows you to cancel selected sessions.
Use the check box Show session details to show more or fewer details.
Cancel sessions
Canceling a session is sometimes the only way to remove the lock from a user. A long-term report, for example, locks data in a table and can thus prevent other users from working.
To cancel a session, select it from the list, and select Cancel Session.
#13 Types of items in in Business Central
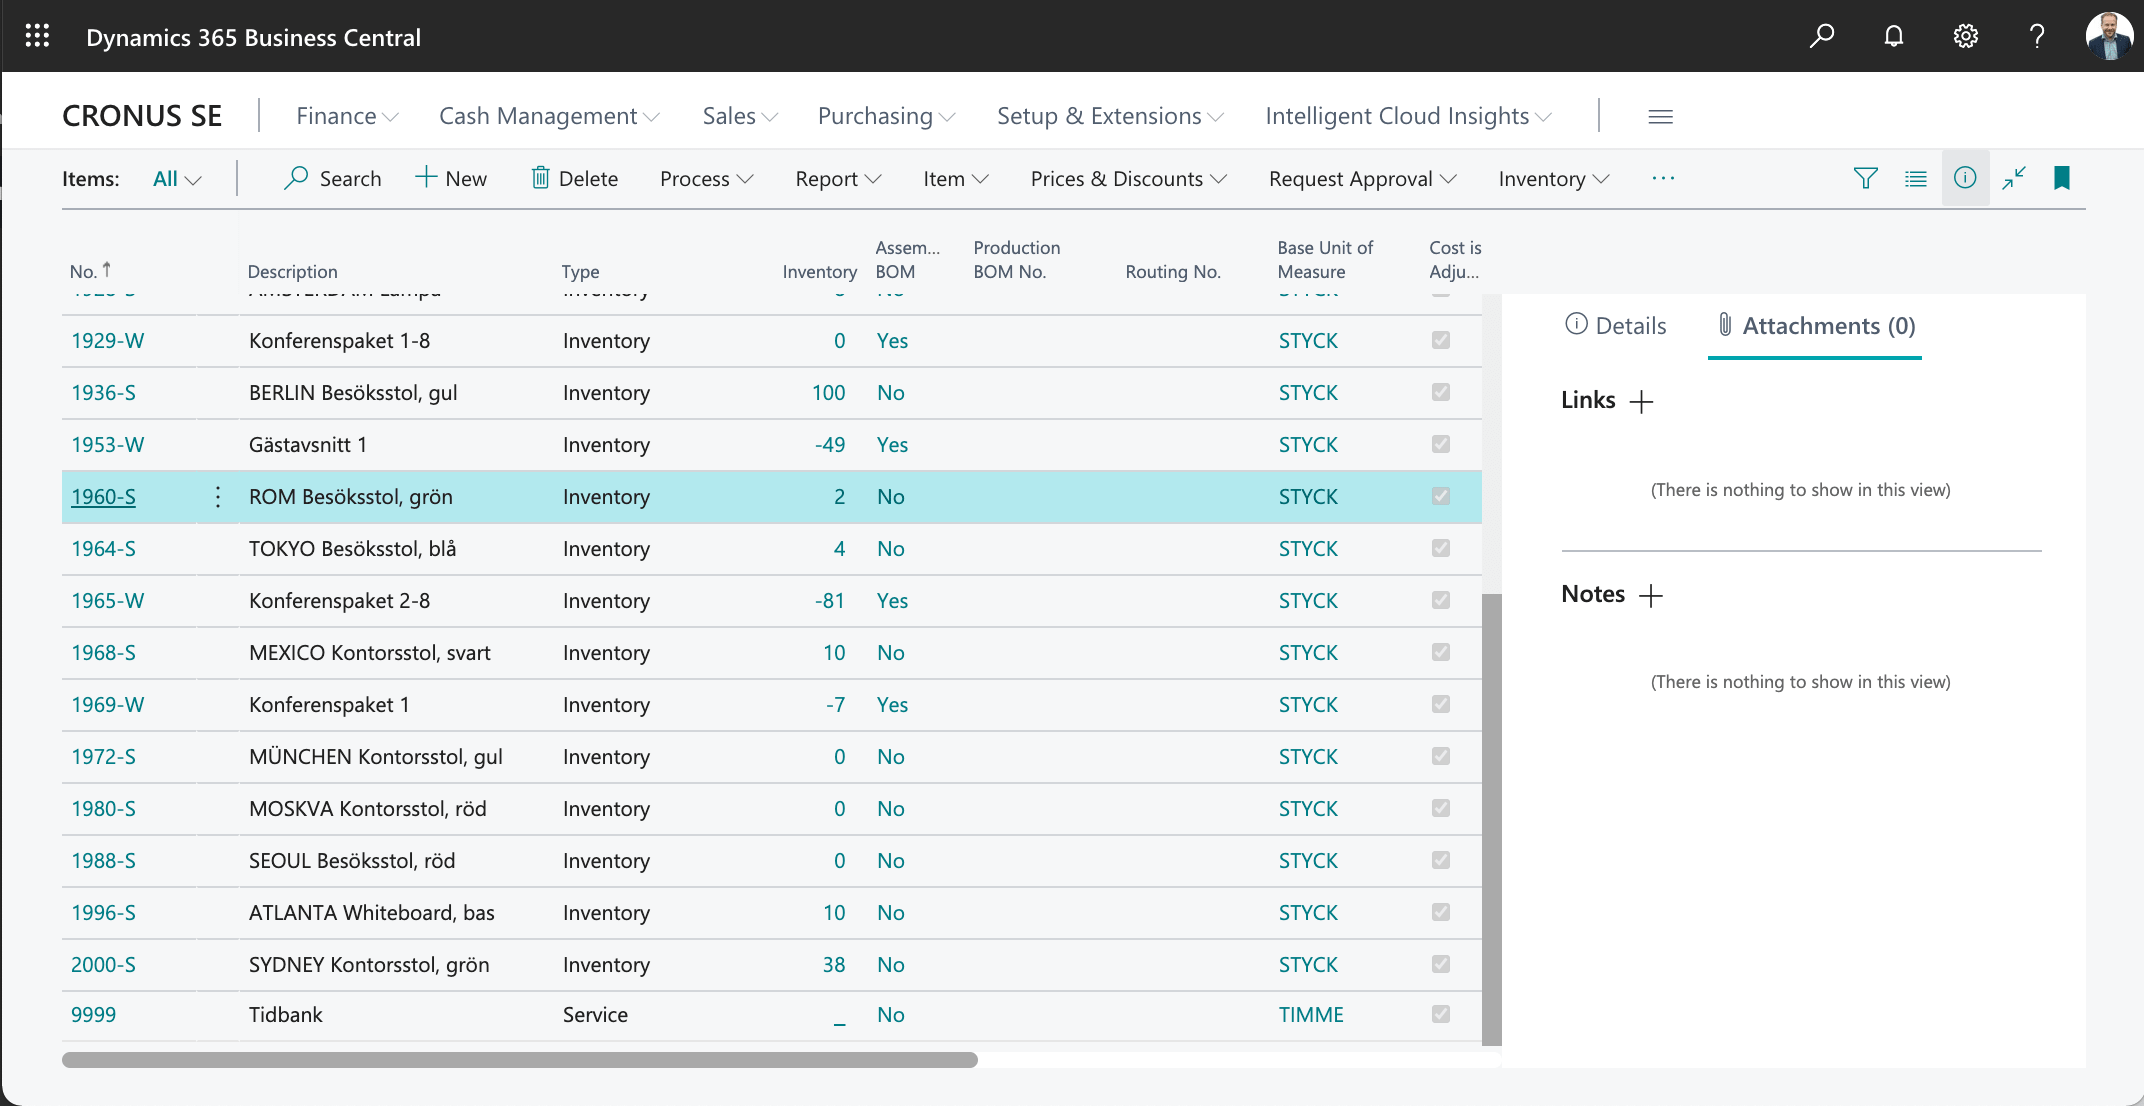
You can use items to define the goods and services that you buy and sell. By setting the settings on the item card correctly, you can control how you want the system to handle the purchase and sale of a specific item. The value in the Type field completely changes how Business Central will handle the current item
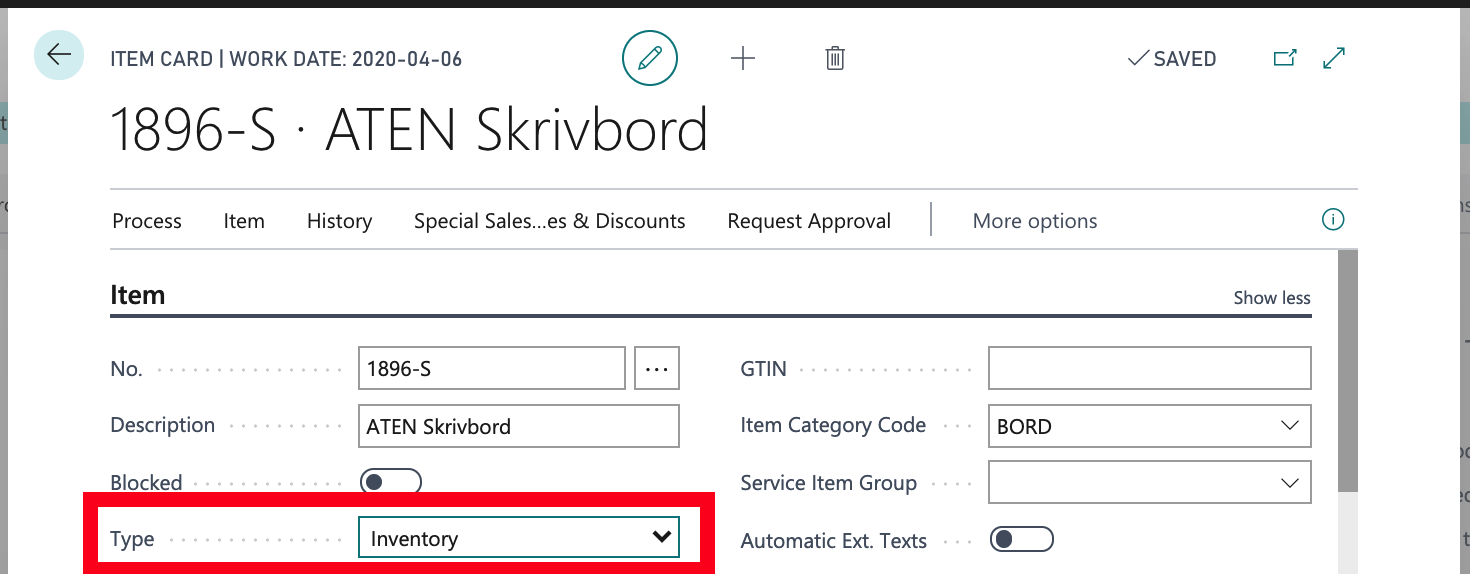
The different options for the field are; Inventory, Non-Inventory and Service respectively. Ordinary items that you buy, stock and sell are therefore marked as Inventory. Purchasing and selling these items causes inventory transactions that allow you to keep track of how many you have left in stock and at what value.
Item Types Service and Non-Inventory do not include inventory quantity and value tracking.
For example, if you want to sell and deliver a packaged service, you can choose to sell it as an Item with the Item type Service . This gives you the advantage of Business Central's advanced price and discount structure without affecting inventory and purchases with unplanned side effects.
For details on how valuation principles and what kinds of functions each item type supports, read more on the page About Item types
#14 Save scanned accounting records in Business Central
Did you know that you can save underlying accounting data directly in Business Central? This can be, for example, copies of invoices, receipts or documentation of the bookings you make in the system. This means that it is not only incoming invoices that you can load, interpret and save in the system, but also documentation about internal accounting orders.
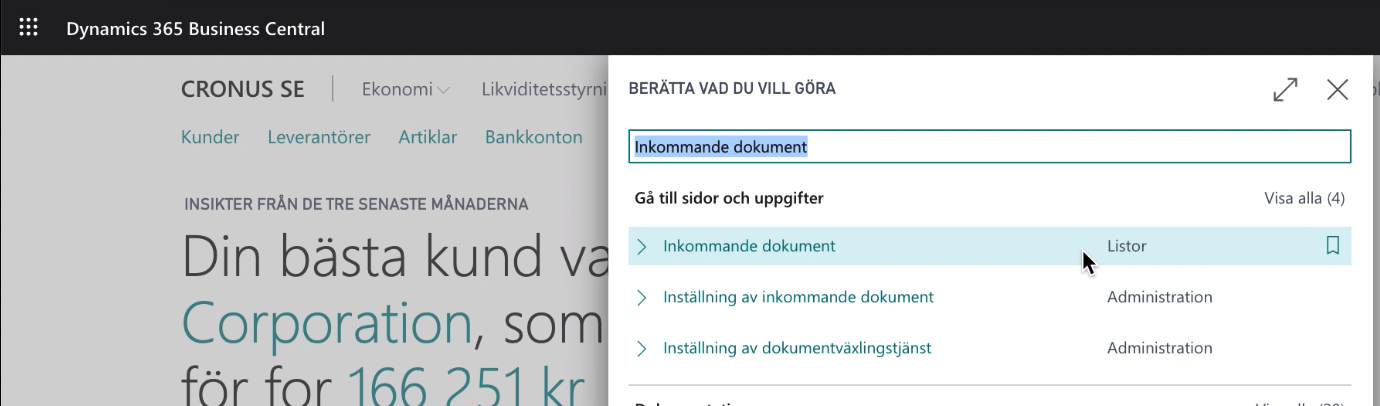
Depending on your role center, the Incoming Documents function can be linked on your start page, otherwise you can easily search for the function by selecting the search function:
The list of incoming documents stored in the system (both those that are linked to transactions or that have not yet been linked) is then displayed. You can quickly toggle the filtering of the list to show only processed or raw files by selecting the Show option.

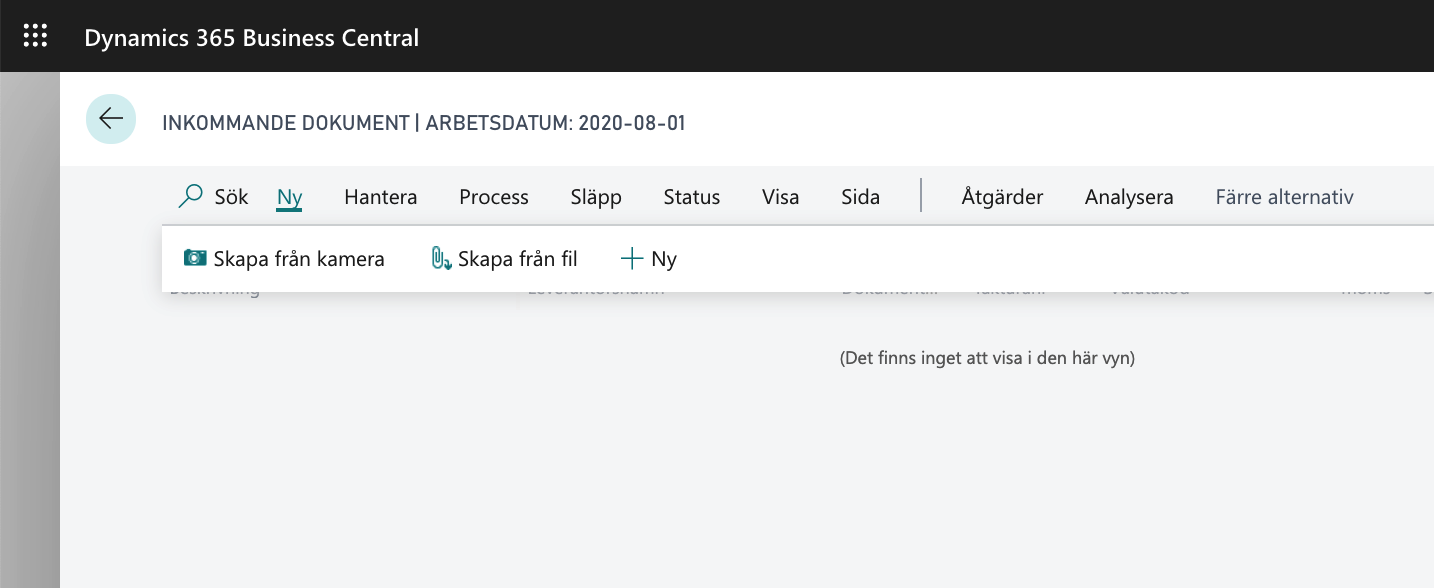
To insert a new file in the list, select the New menu. You can then choose to upload an existing file (for example, a document describing an accounting order) or scan an image using your camera or scanner connected to your computer.
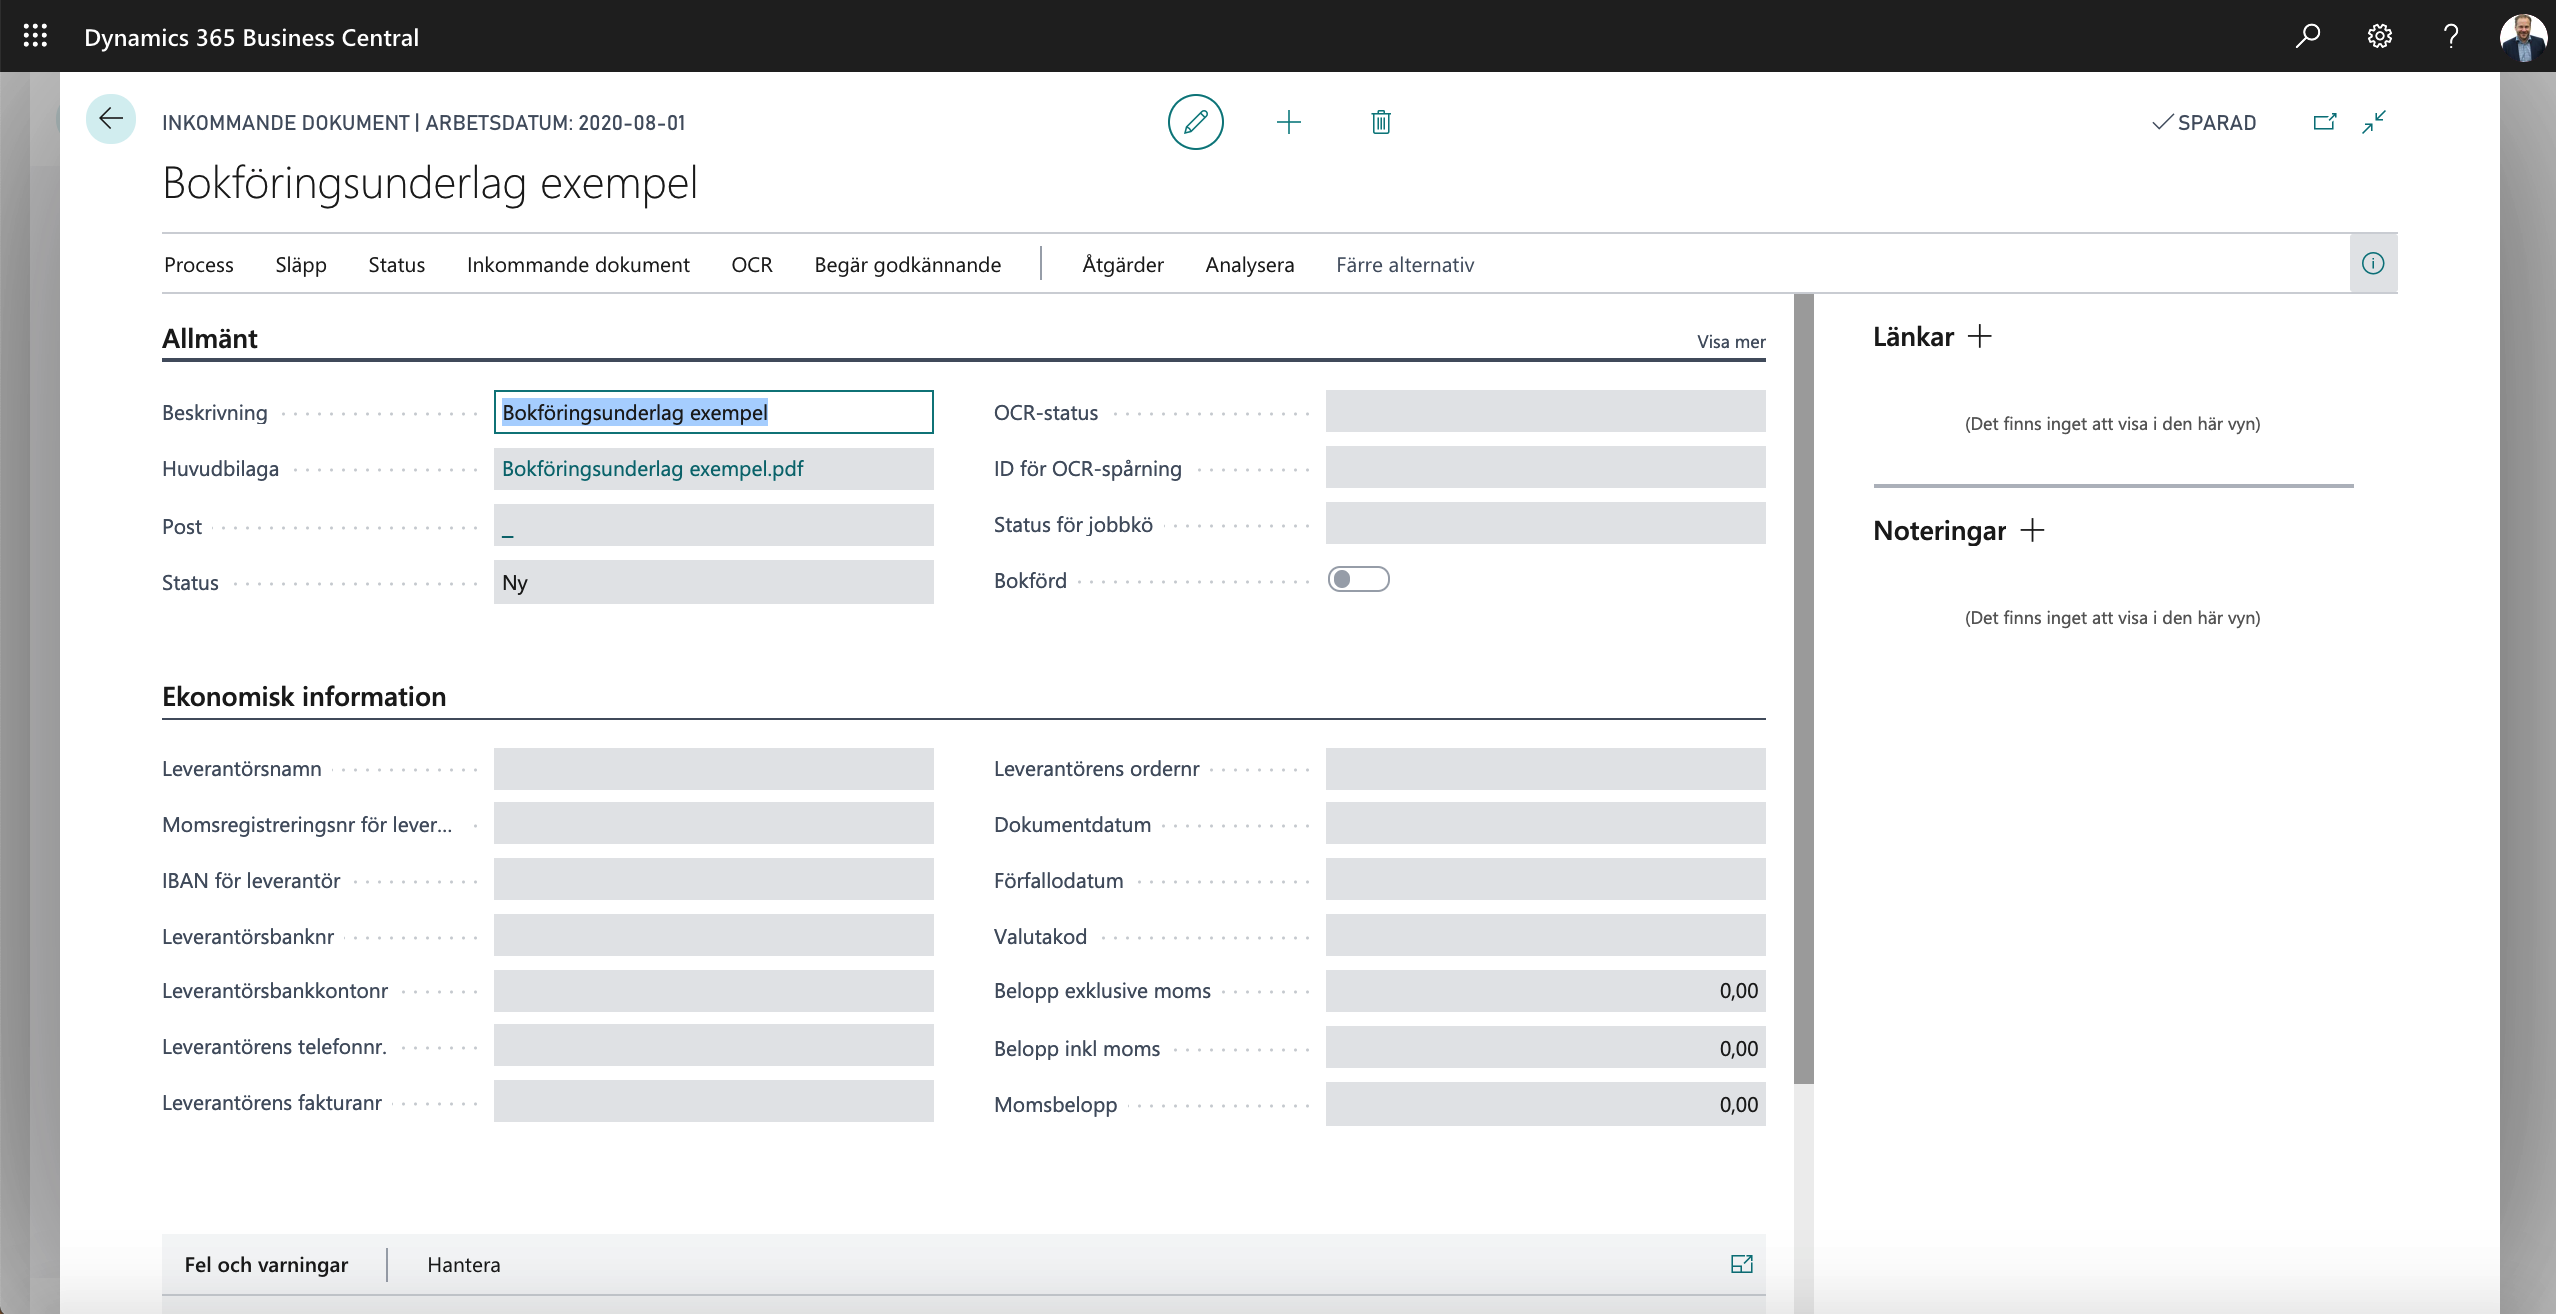
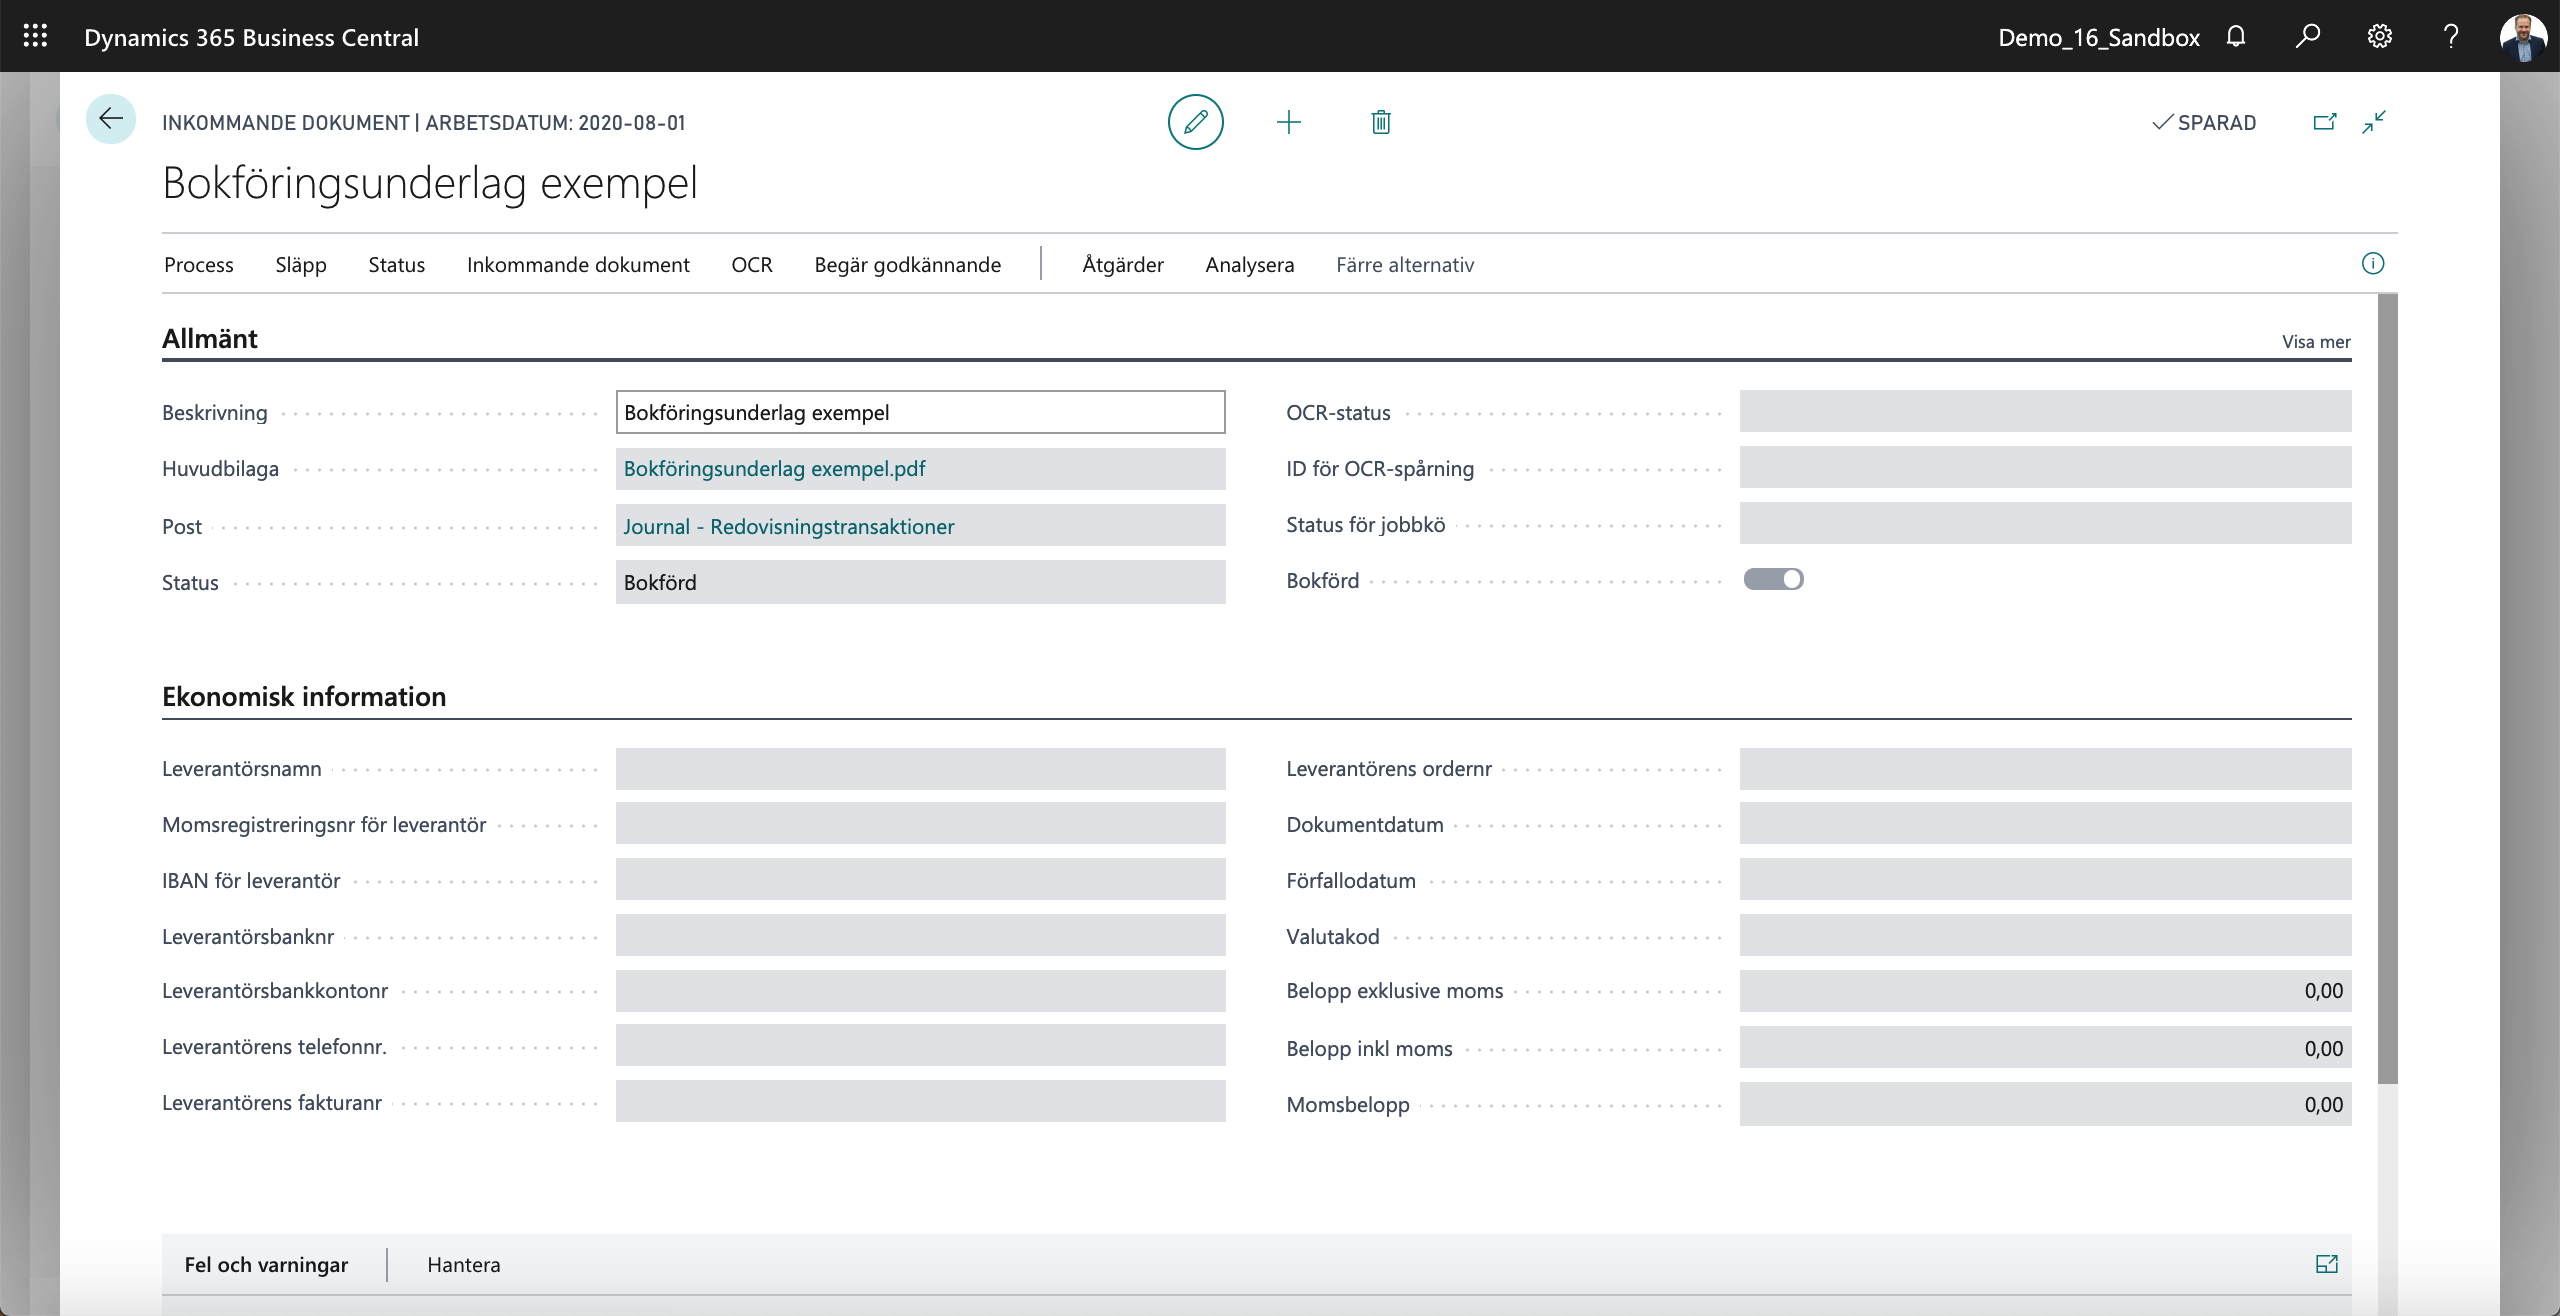
After uploading the file, the form for the incoming document is displayed. In this form you can make additional notes, upload additional files that belong to that main file and see the status (if the incoming document is linked to a posted transaction and/or posted document).
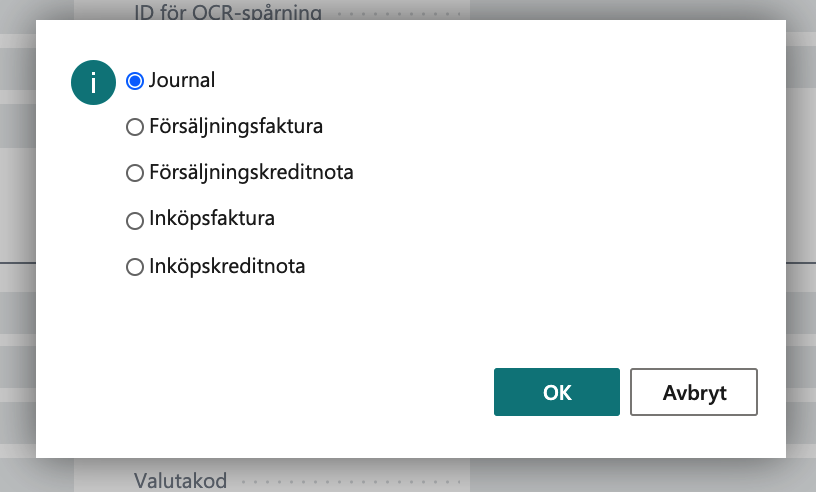
In the situation where, for example, it is a scanned purchase invoice that you have imported, there is the option to let the system interpret this and automatically create a purchase invoice entry in the system. In this case you have uploaded description of a bookkeeping order, choose instead to create entry manually in the form of an accounting journal:

Given the setting you made for the Incoming Documents function, an accounting journal will be opened with a new entry that already contains the link to the incoming document. You can of course adjust this journal before you post it.
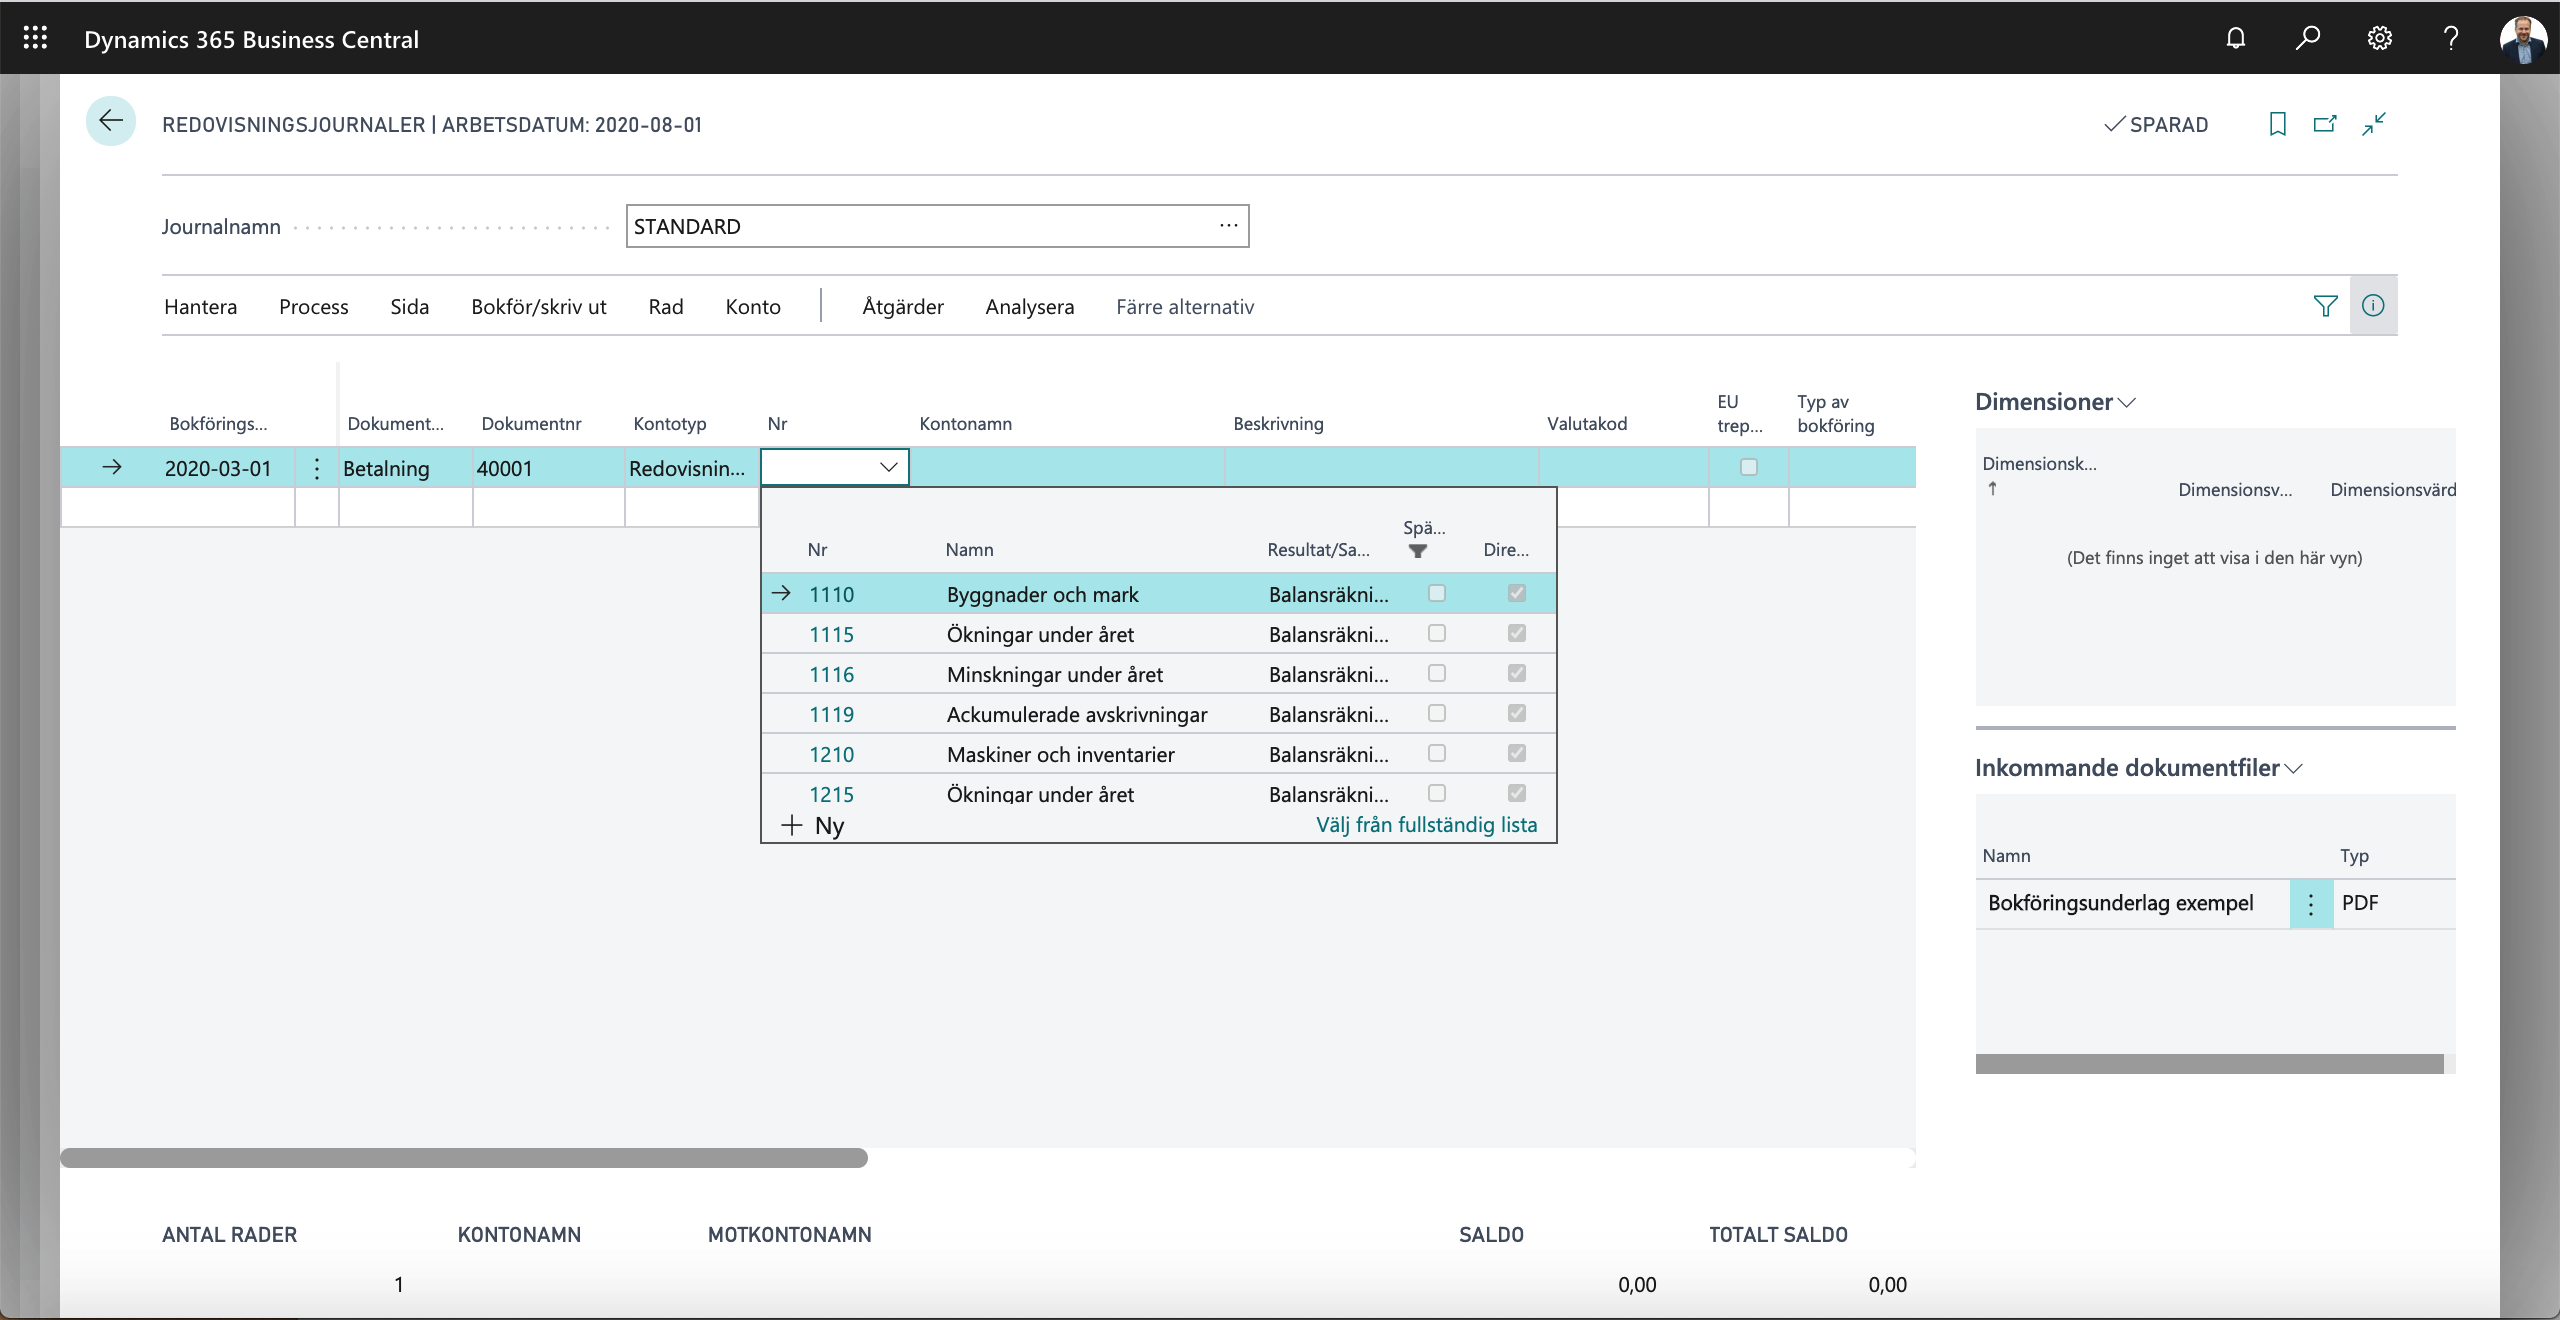
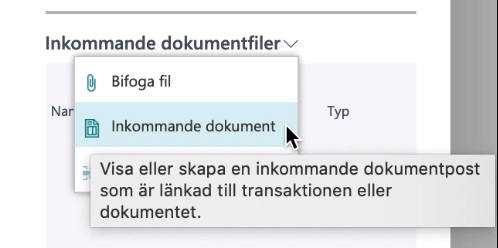
It is also possible to link Incoming files directly from a journal by selecting an already uploaded file or directly creating an Incoming document from the journal.
When you have then posted the journal, the information on the form for the Incoming document is automatically updated. You can see that the record is posted and choose to show these transactions. You also have access to the incoming document showing the system's Analyze function.
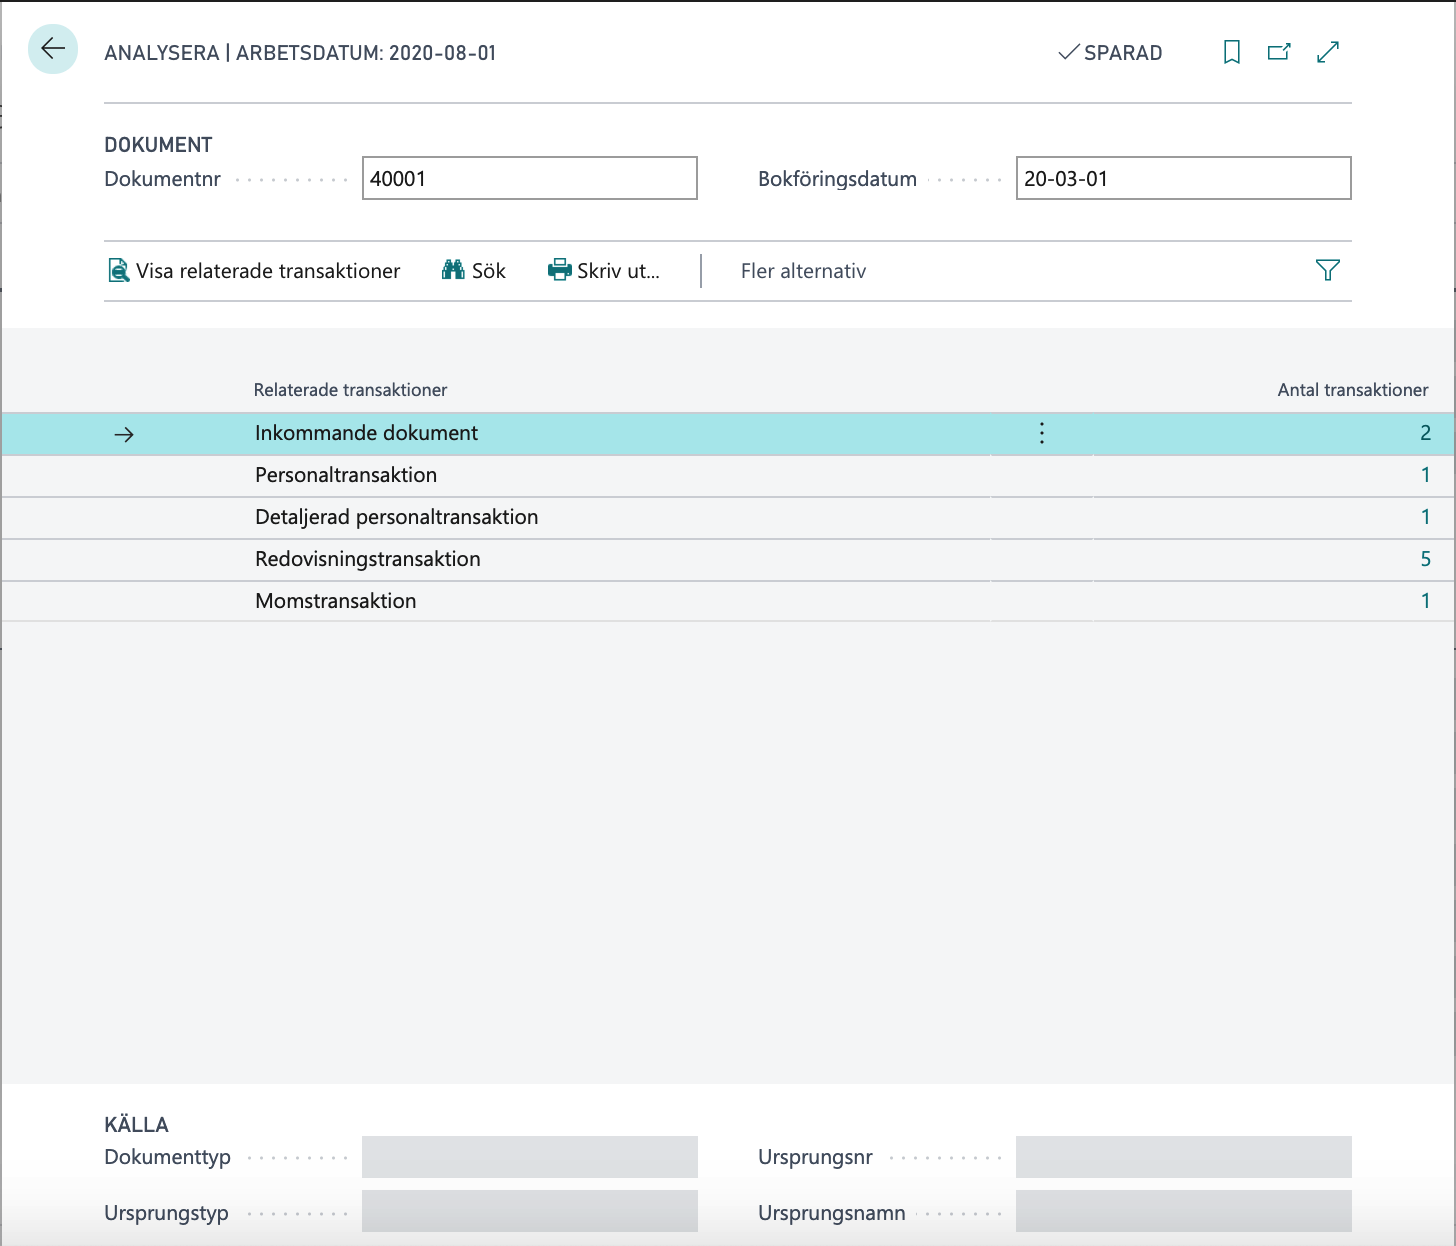
From the form Incoming documents, you of course have the opportunity to view the attached file or files afterwards. This means that you become less dependent on searching for paper copies of accounting orders and can easily access the documentation immediately when you analyze a booking.
#15 Print to Business Central Email Printer
Cloud-based systems are easy to get started with and require very little configuration. But how do you set up, for example, the path to local printers to make printer selections for different reports?
By using the "Send to Email Printer" extension, you can configure connection to printers that can receive email. This allows you to easily set up printer selection in a distributed environment where you have, for example, users in different offices, home users, etc. who do not share a common local network.
Verify the Extension "Send To Email Printer"
Go to the list with Extensions and verify that the "Send To Email Printer" is installed and enabled:

Set up an email printer
On the Printer Management page, you can see the printers that are set up and you can open the settings page for each printer to edit an existing installation or set up a new printer.
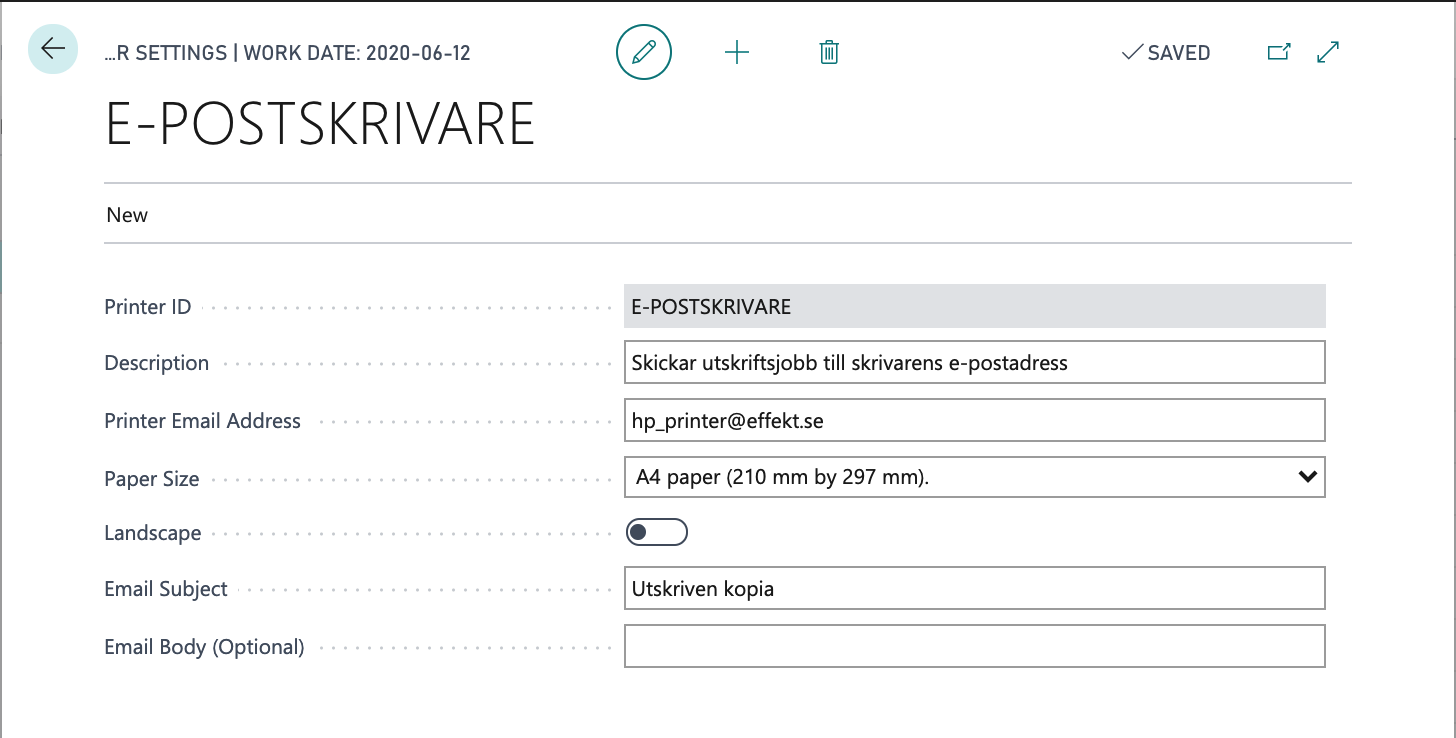
This feature requires that you have a correct SMTP configuration. You can access this settings dialog by clicking on the "Configure SMTP" link at the bottom of the page.
If you have several printers, you can add them by clicking on the plus sign at the top of the dialog. This requires that you have the ability to configure your printers so that they each have an individual email address.
Configure printer selection for users and reports
You can choose to pre-configure specific printers for a specific report as well as different printers for the same report for different users. By selecting the Printer Selection function, you have the option of making detailed settings for this:
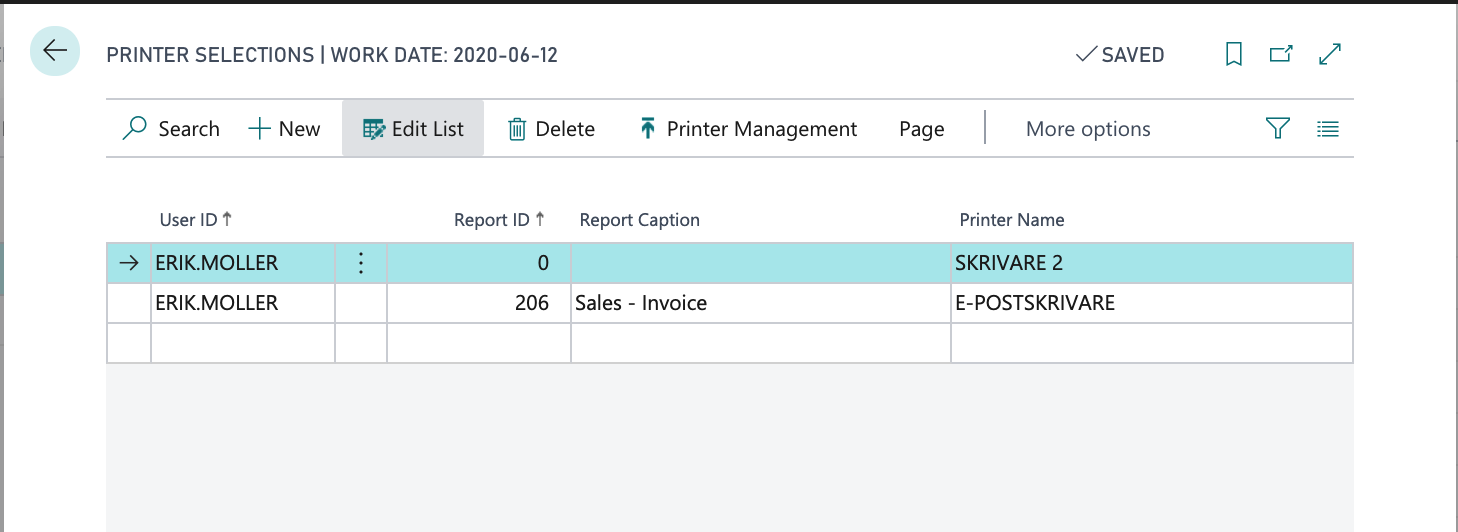
In the example above you see how the printer "E-POSTSKRIVARE" is used for the user ERIK.MOLLER when printing sales invoices at the same time as the printer "SKRIVARE 2" is used for all other prints by the user.
#16 Activate the system change log
Has it happened to you wonder what got the information to changed in the system. You know that you are not the one who changed the information and everyone else is sure that it is not them either. Could the information have been changed by itself?
With the change log configuration in Business Central, you can do this and easily turn on a log of changes to specific information.
Change log setting
In the change log, you can turn on logging, inserting, changing and deleting information in tables and even individual fields. But first you need to turn on this logging.
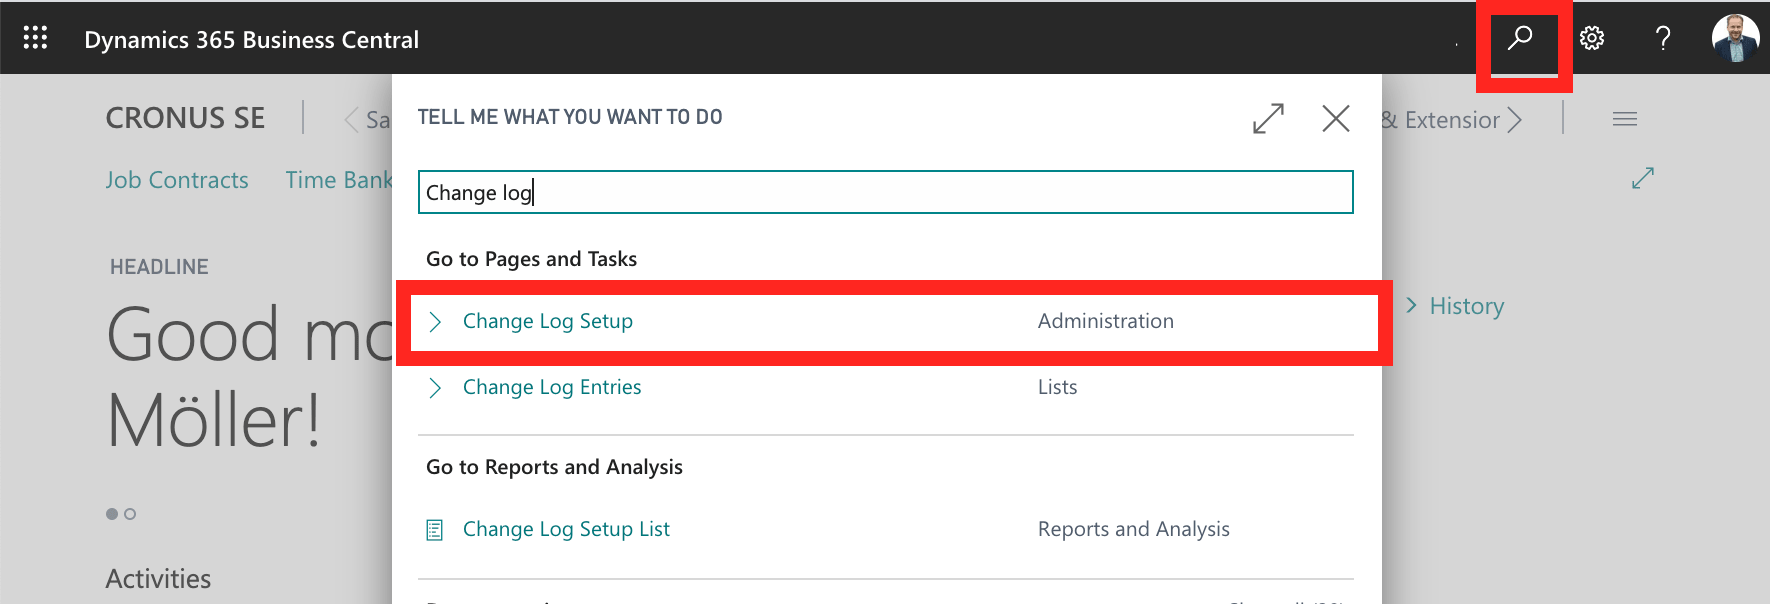
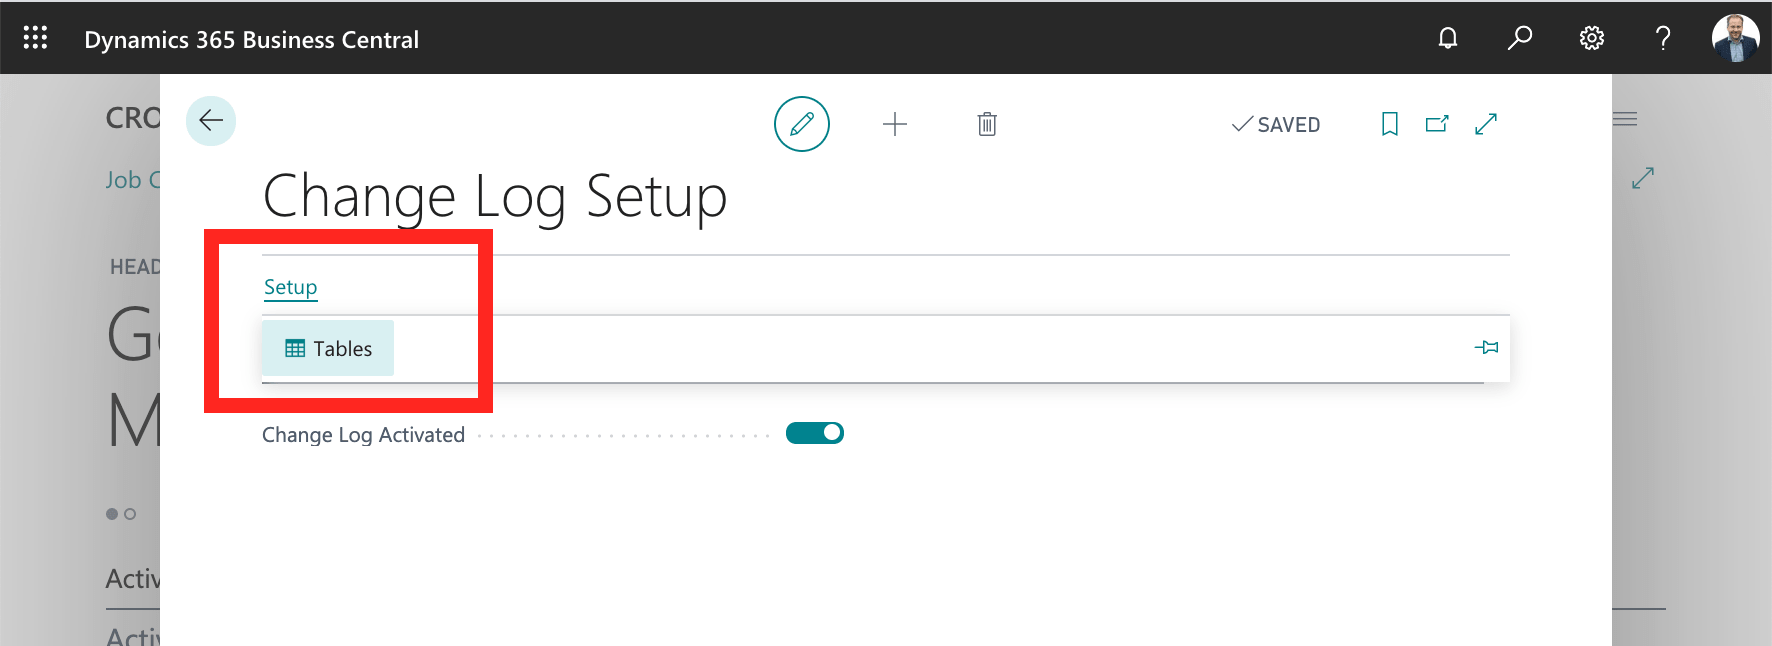
Start by opening the change log settings dialog.
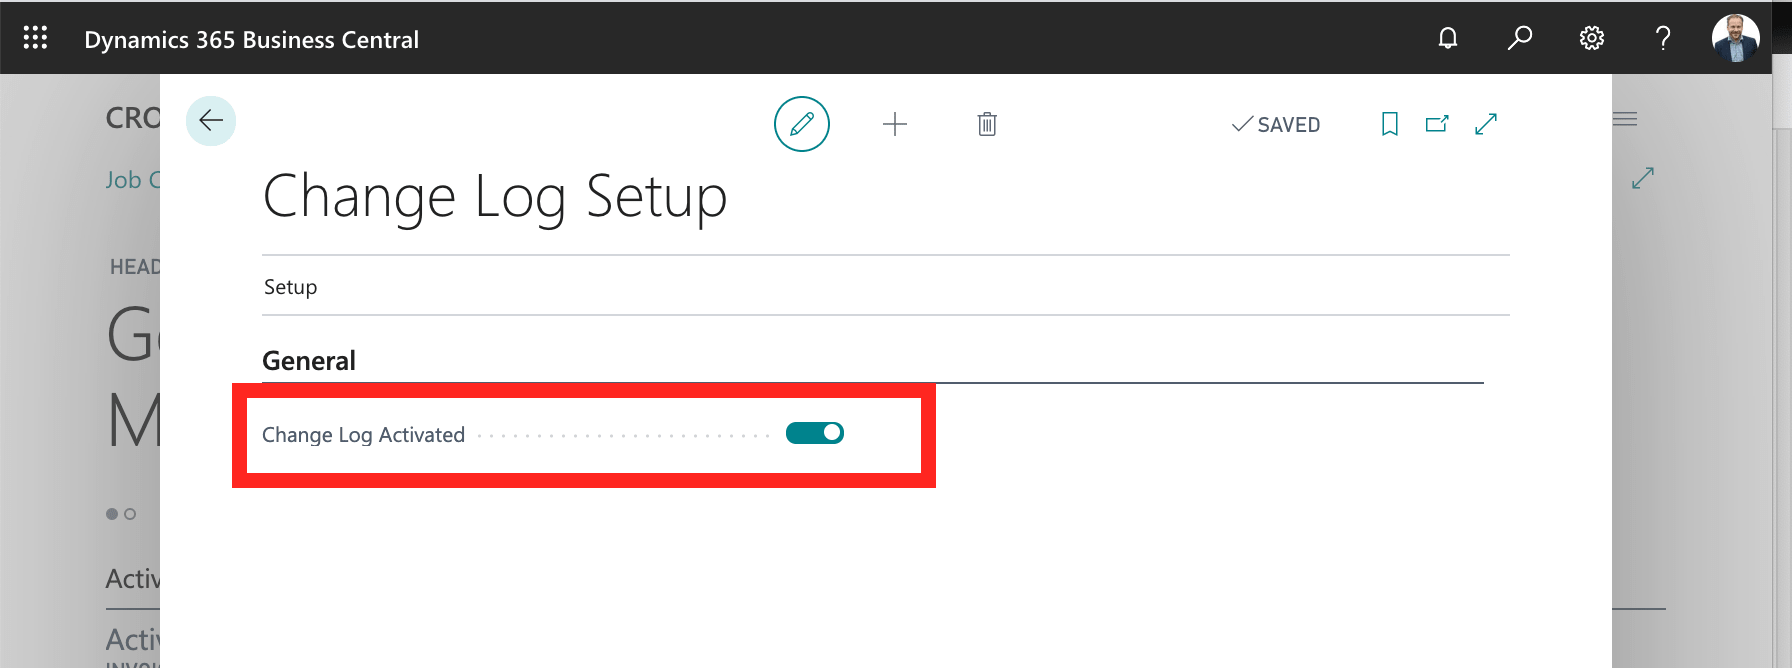
In this form, you start by enabling the change log feature by checking the Change log enabled box.
Note that if you enable the change log, the system may slow down. If you enable logging of tables and fields in which many changes are made, the change log grows quickly. For example, you should not log tables that the system itself creates, such as transaction tables.
Now you can go ahead and activate the logging in specific tables. Select the Configure / Tables feature.
This opens up the list of system tables where you can enable / disable logging per table.
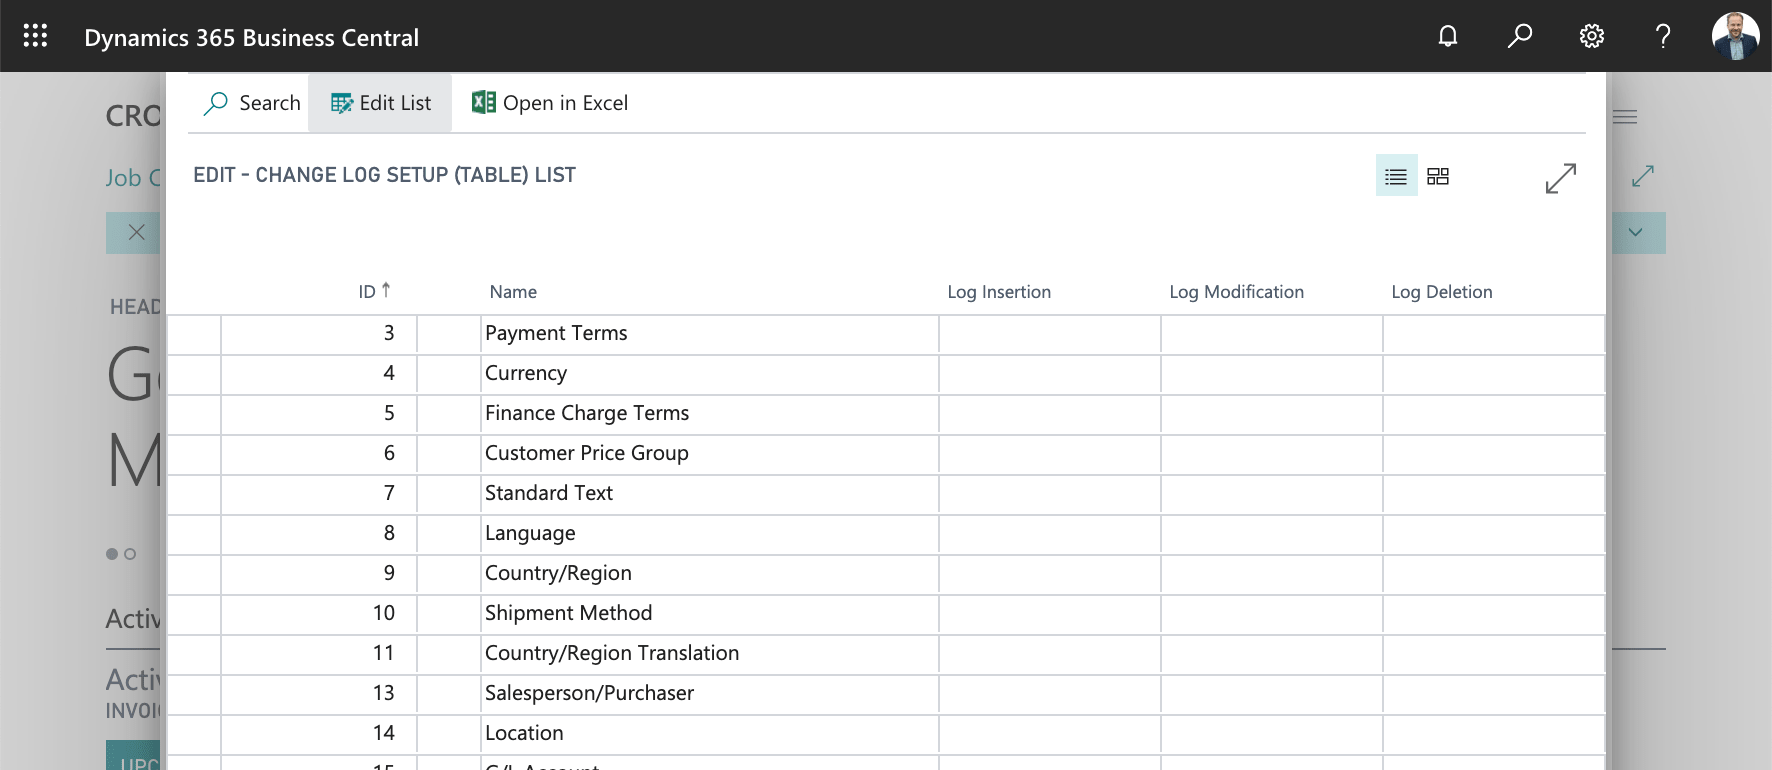
For each table, you can now choose whether you want to log in when users insert, change or delete rows by changing the setting in the corresponding field. For example, if you want to log all changes to the system chart of accounts, change the settings for Table 15 General Ledger Account as follows:
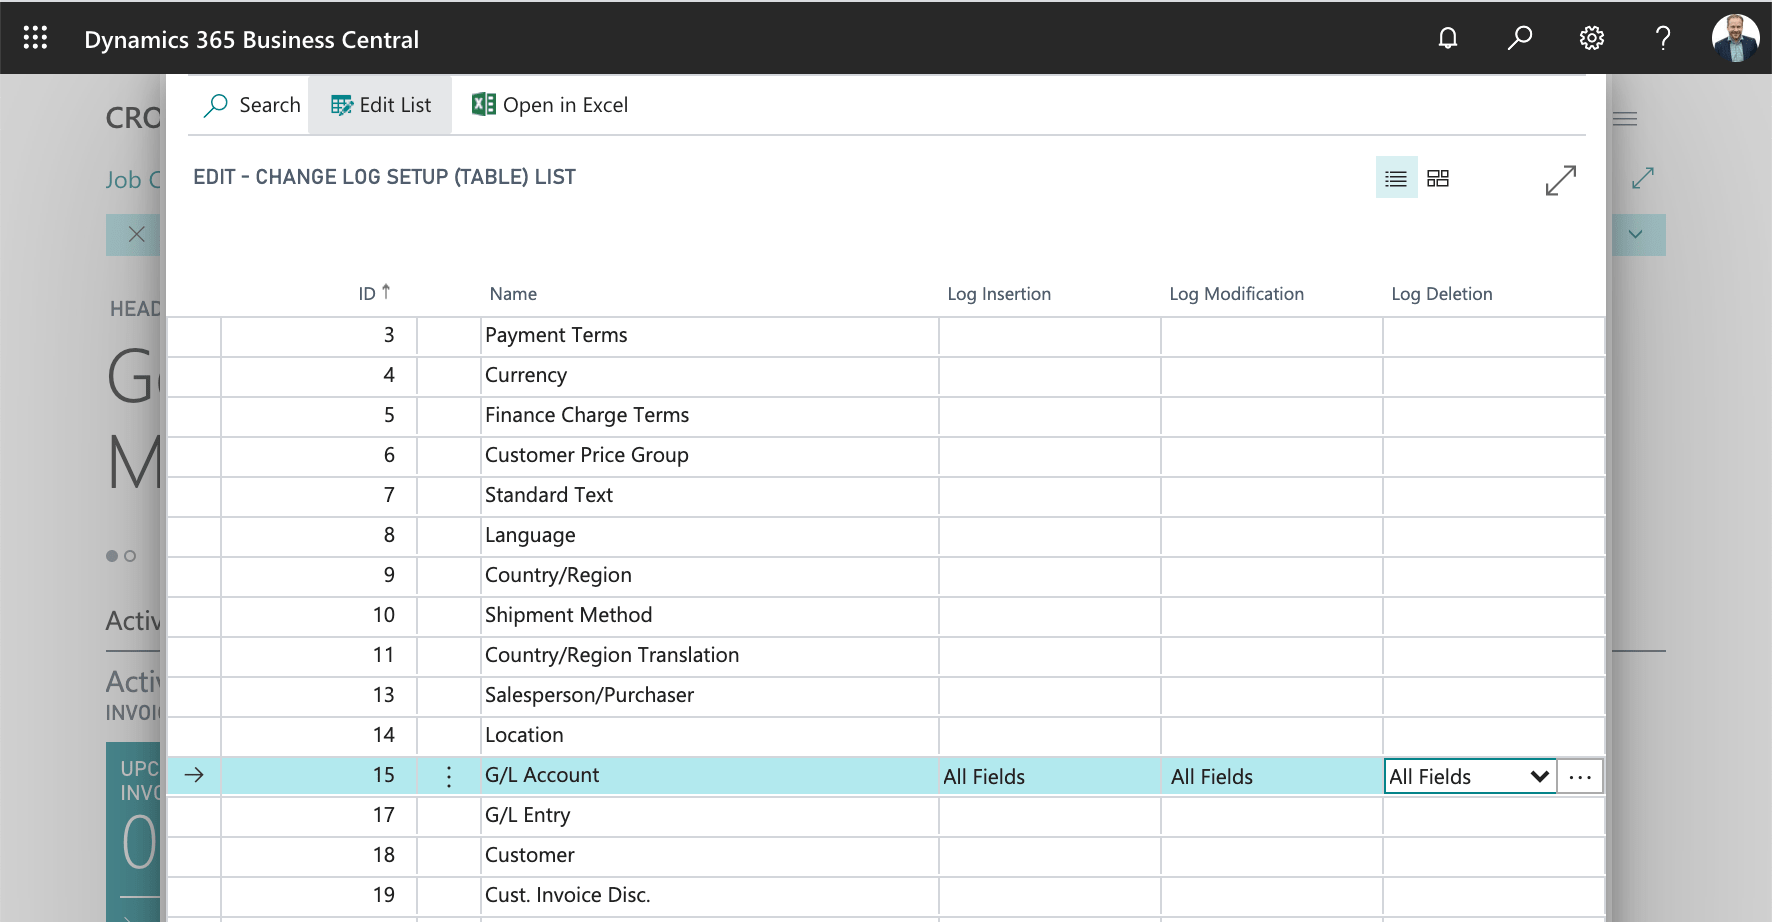
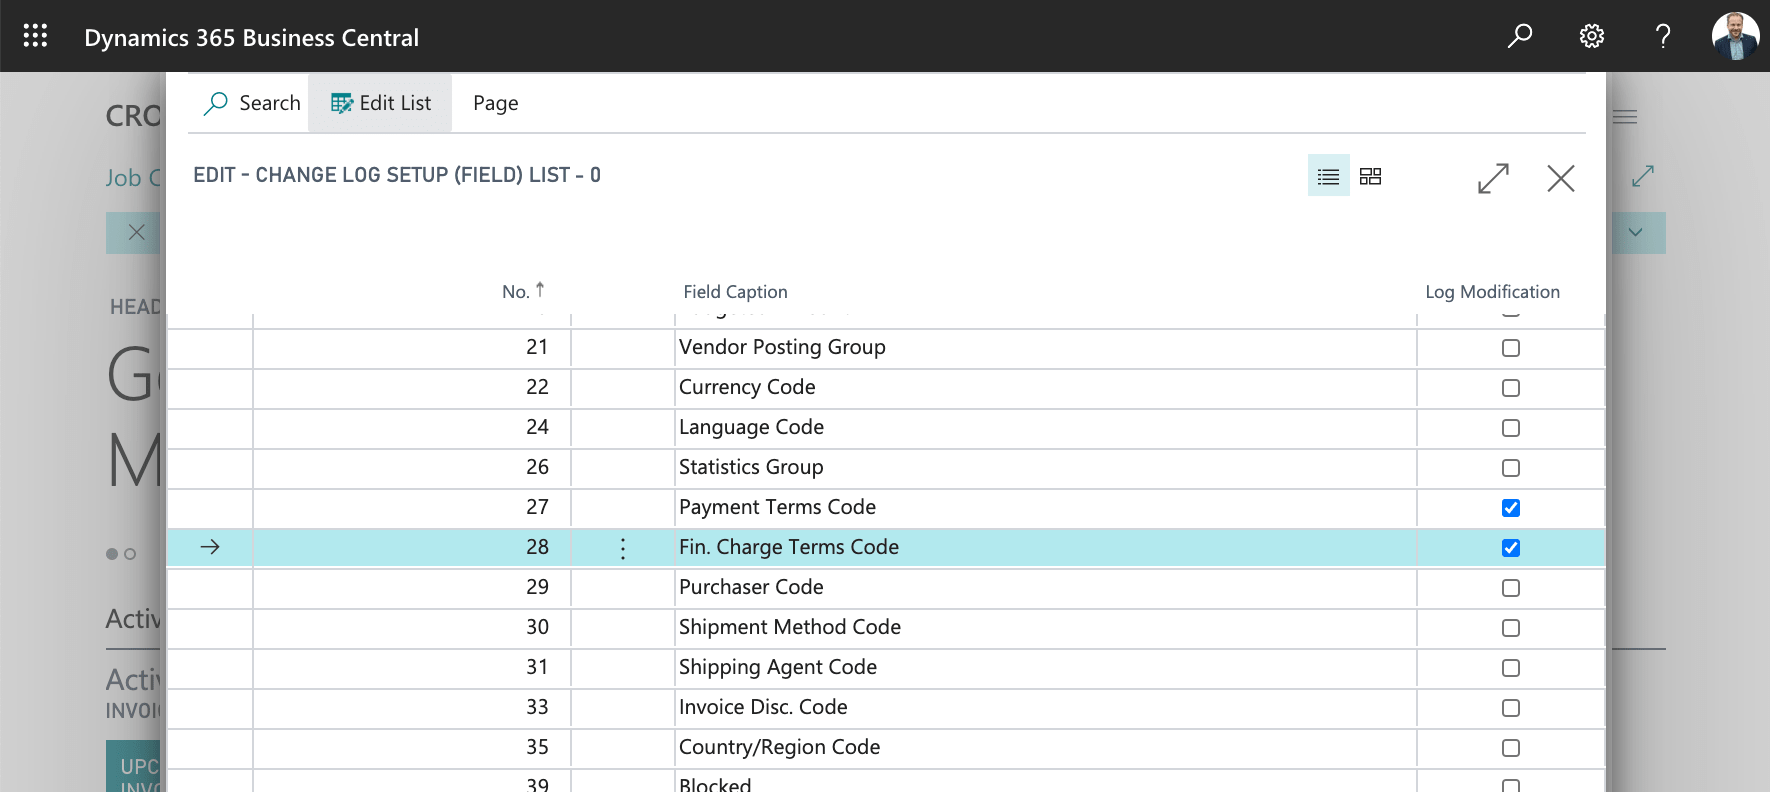
Sometimes you may be interested in just logging on specific fields that are extra sensitive. This can be, for example, payment terms, interest terms and a bank account number of a supplier. To only log changes to some of the fields, change the setting instead of All fields to Some fields . You can then set which fields by clicking on the three dots next to the selection (Assist edit).
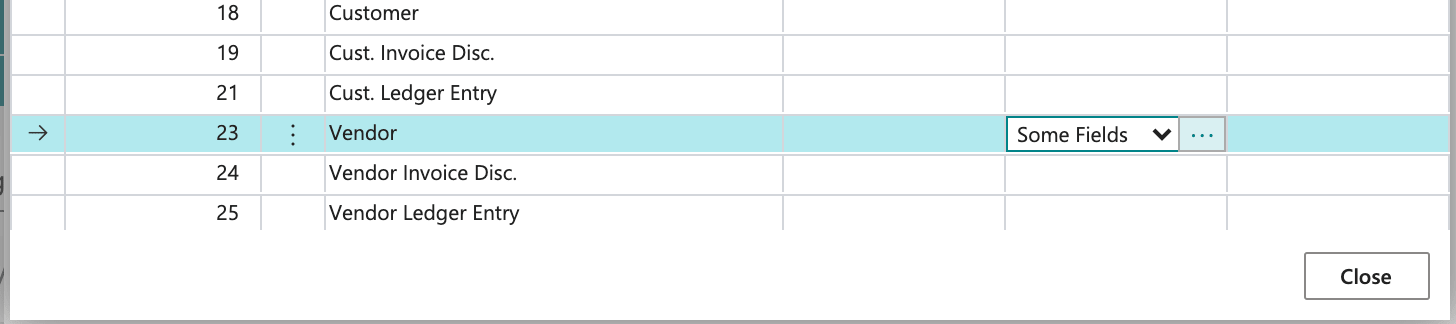
This opens the form with all the fields in the table where you can choose which fields are to be covered by the logging.
The adjustments of the logging settings begin as soon as users log in to the system. Changes made by already logged in users will not be affected by the change until they log in to the system again.
Review the change log
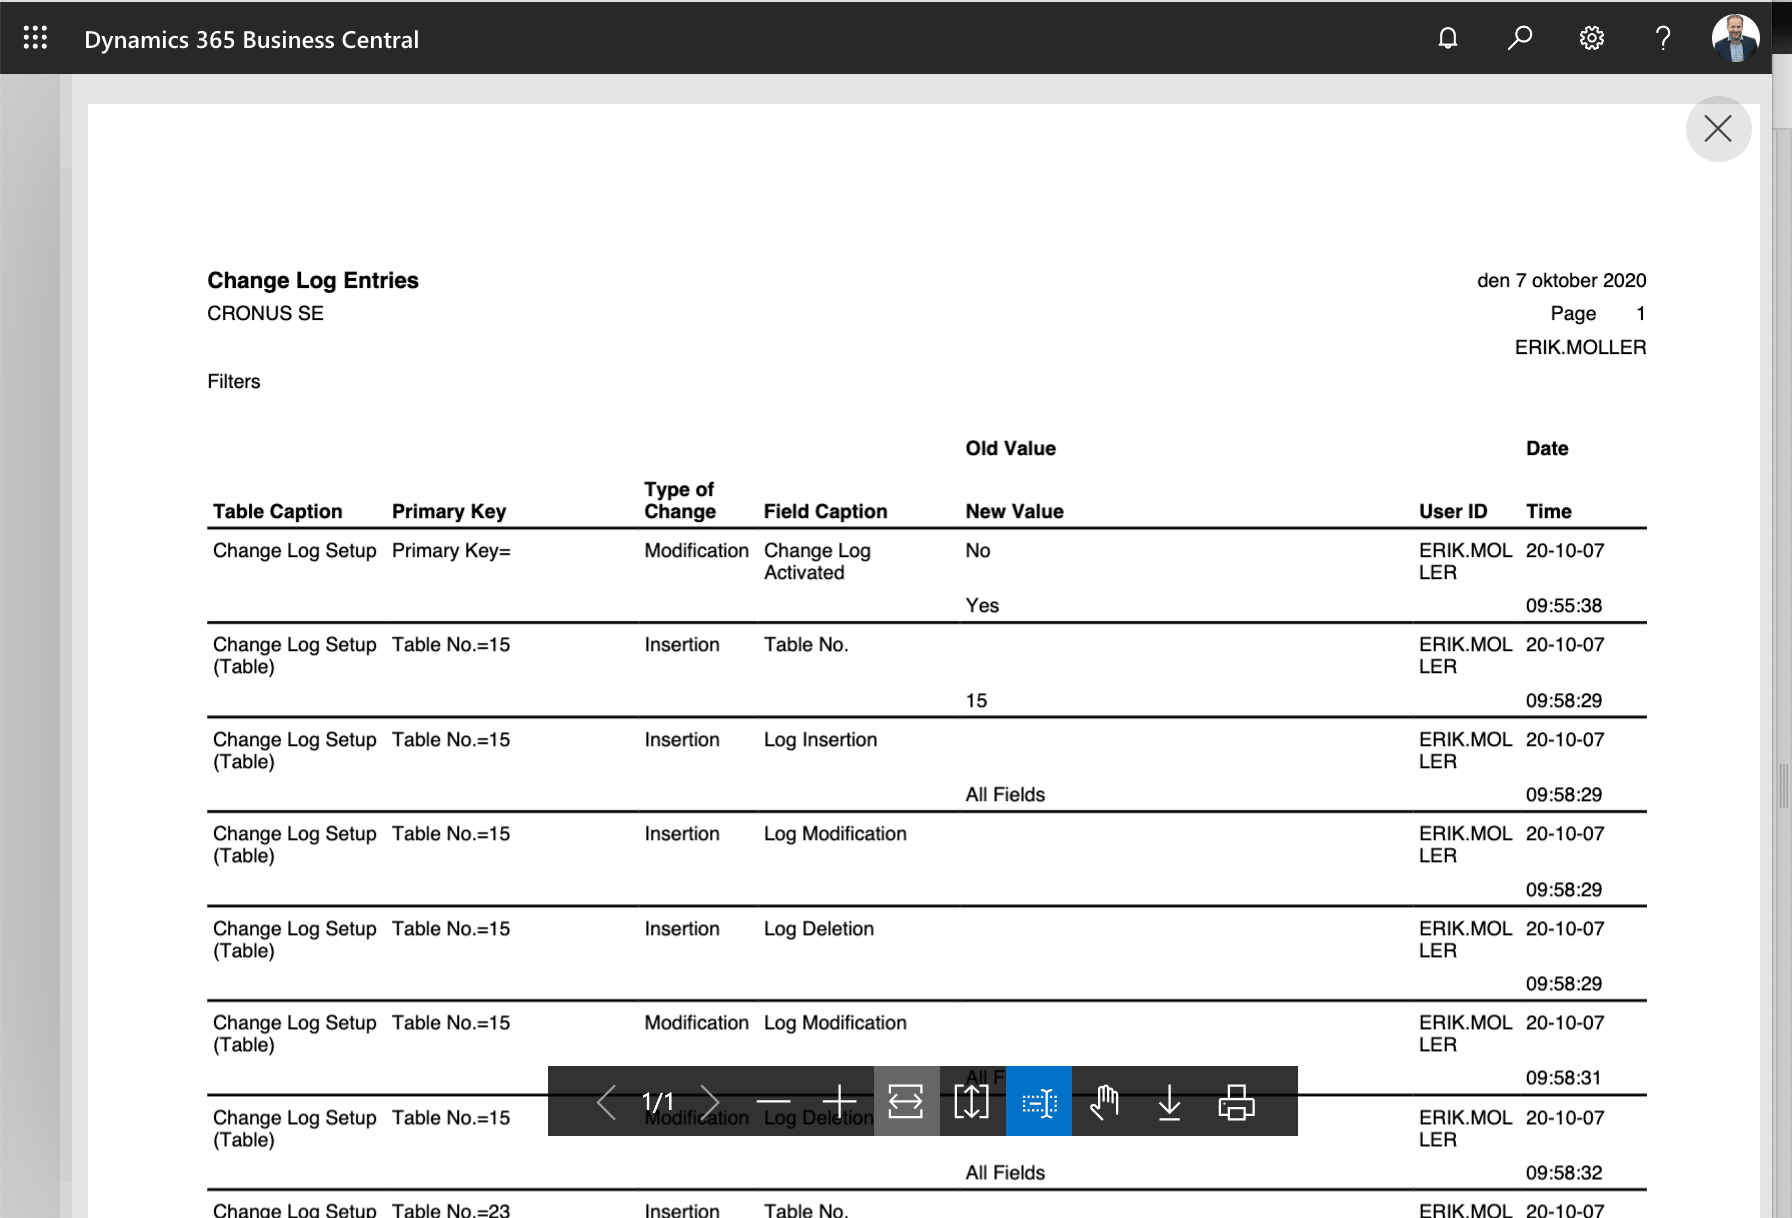
To view the log, select the Change log transactions feature.
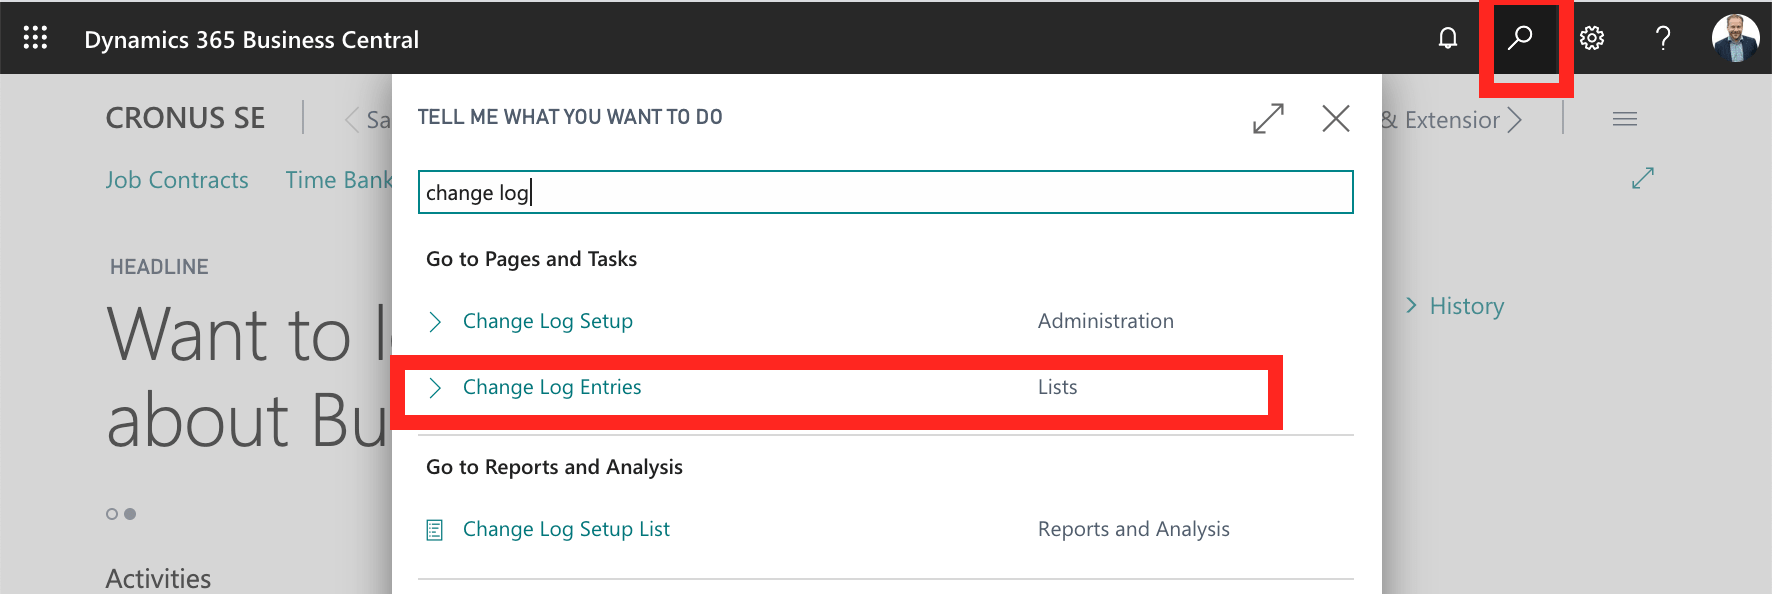
This form shows all log entries created in the system.
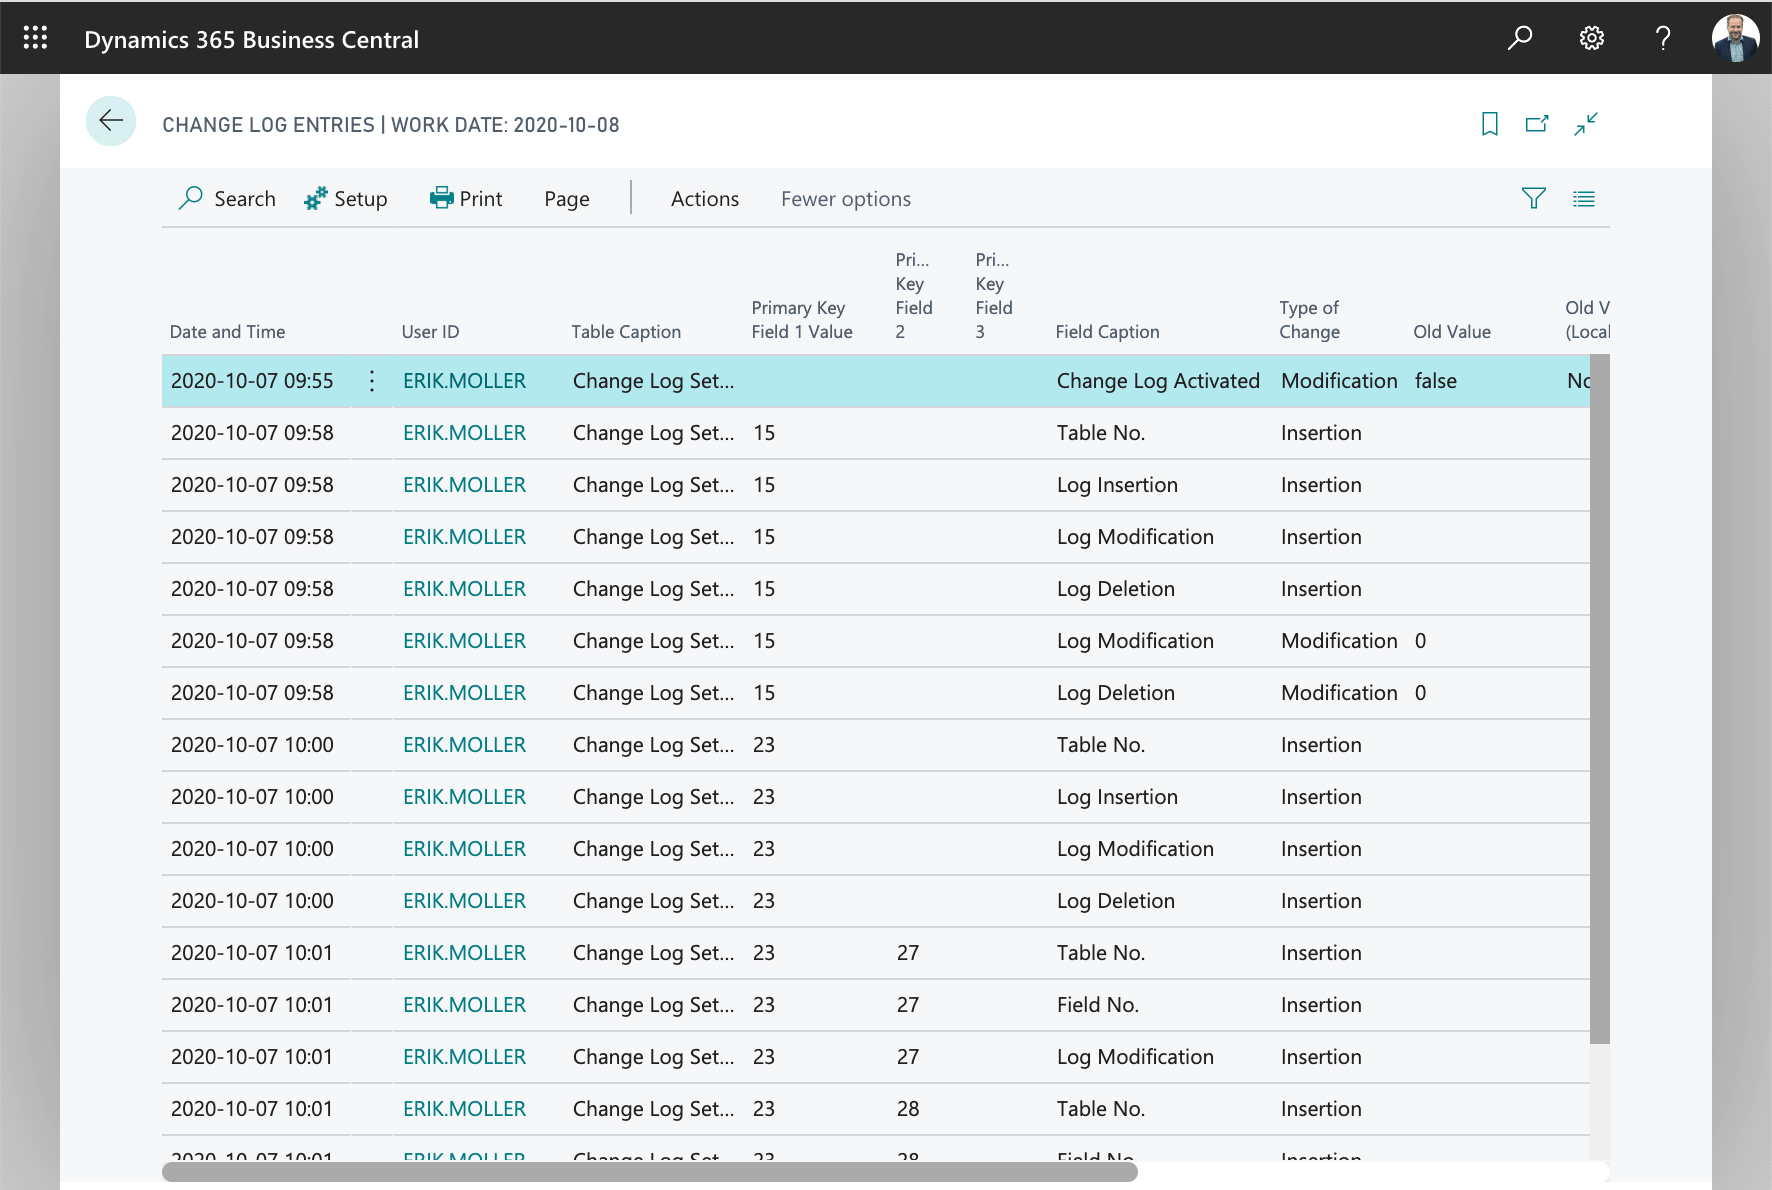
You can see when a change was made, by whom, which record type and which record. You can also see the change of values in the form of the old value and the new value. By scrolling the page to the right, you will see the fields Field title, Type of change, Old value and New value.
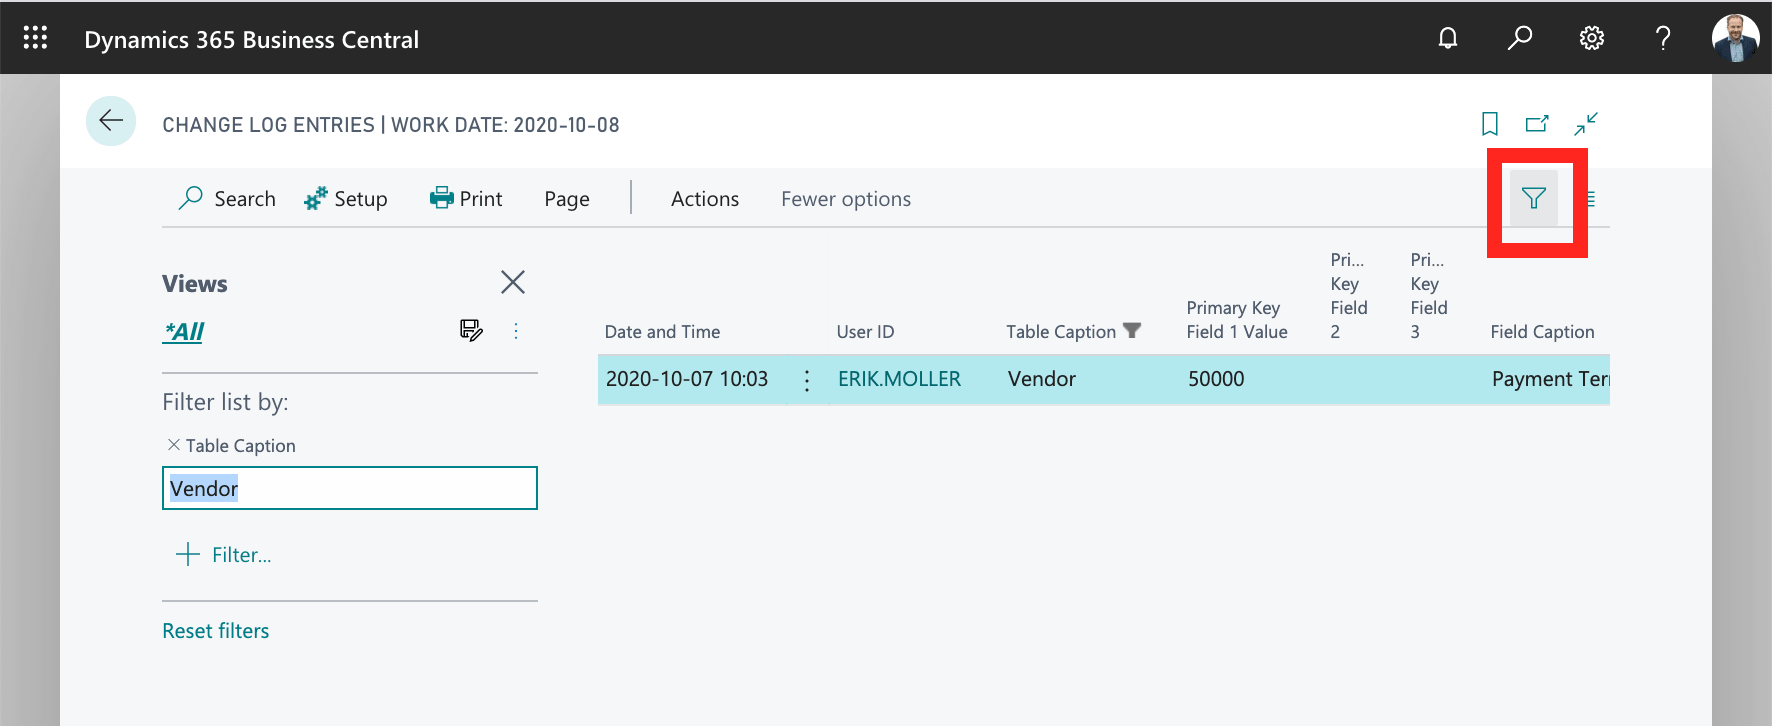
You can select only the changes you are interested in by setting relevant filters.
You can also print the change log as a report by selecting the Print feature:
Maintain the registry with the change log
The list of change log transactions contains a routine for clearing the log. In this you can set how old transactions are to be deleted, which table and also log entries caused by a certain user. Therefore, make sure that the access control restricts which users have write access to the change log.
#17 Get an overview of your companies in the Company Hub
Do you work with several different companies in Business Central and want an overall picture of the status of the different companies and a way to quickly navigate between them? In that case, you should check out the Company Hub feature.
The feature is in an Extension from Microsoft that you will find in the list of extensions under the name "Company Hub".
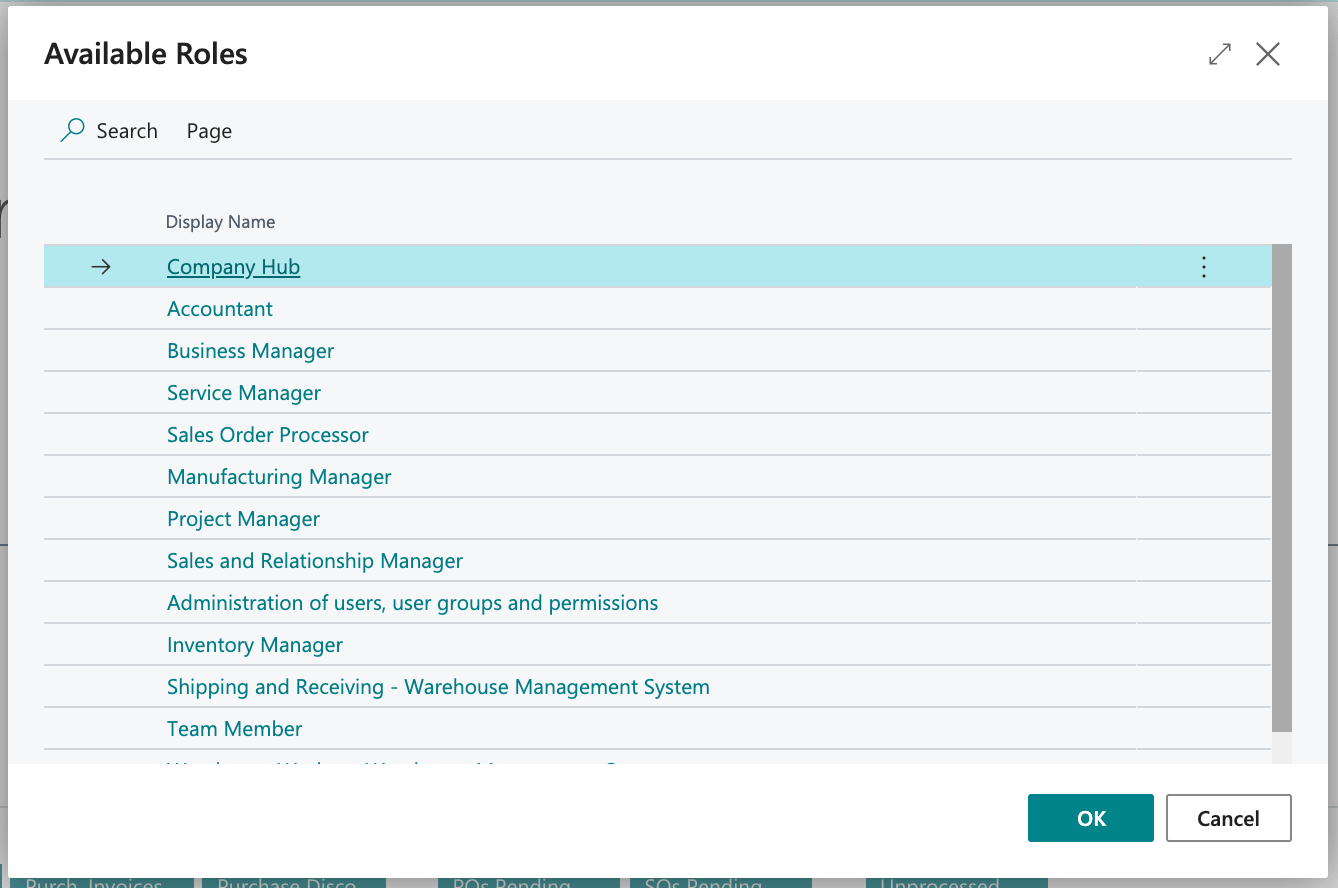
You can choose to use the role center that comes with this extension by selecting the Company Hub role in My Preferences:
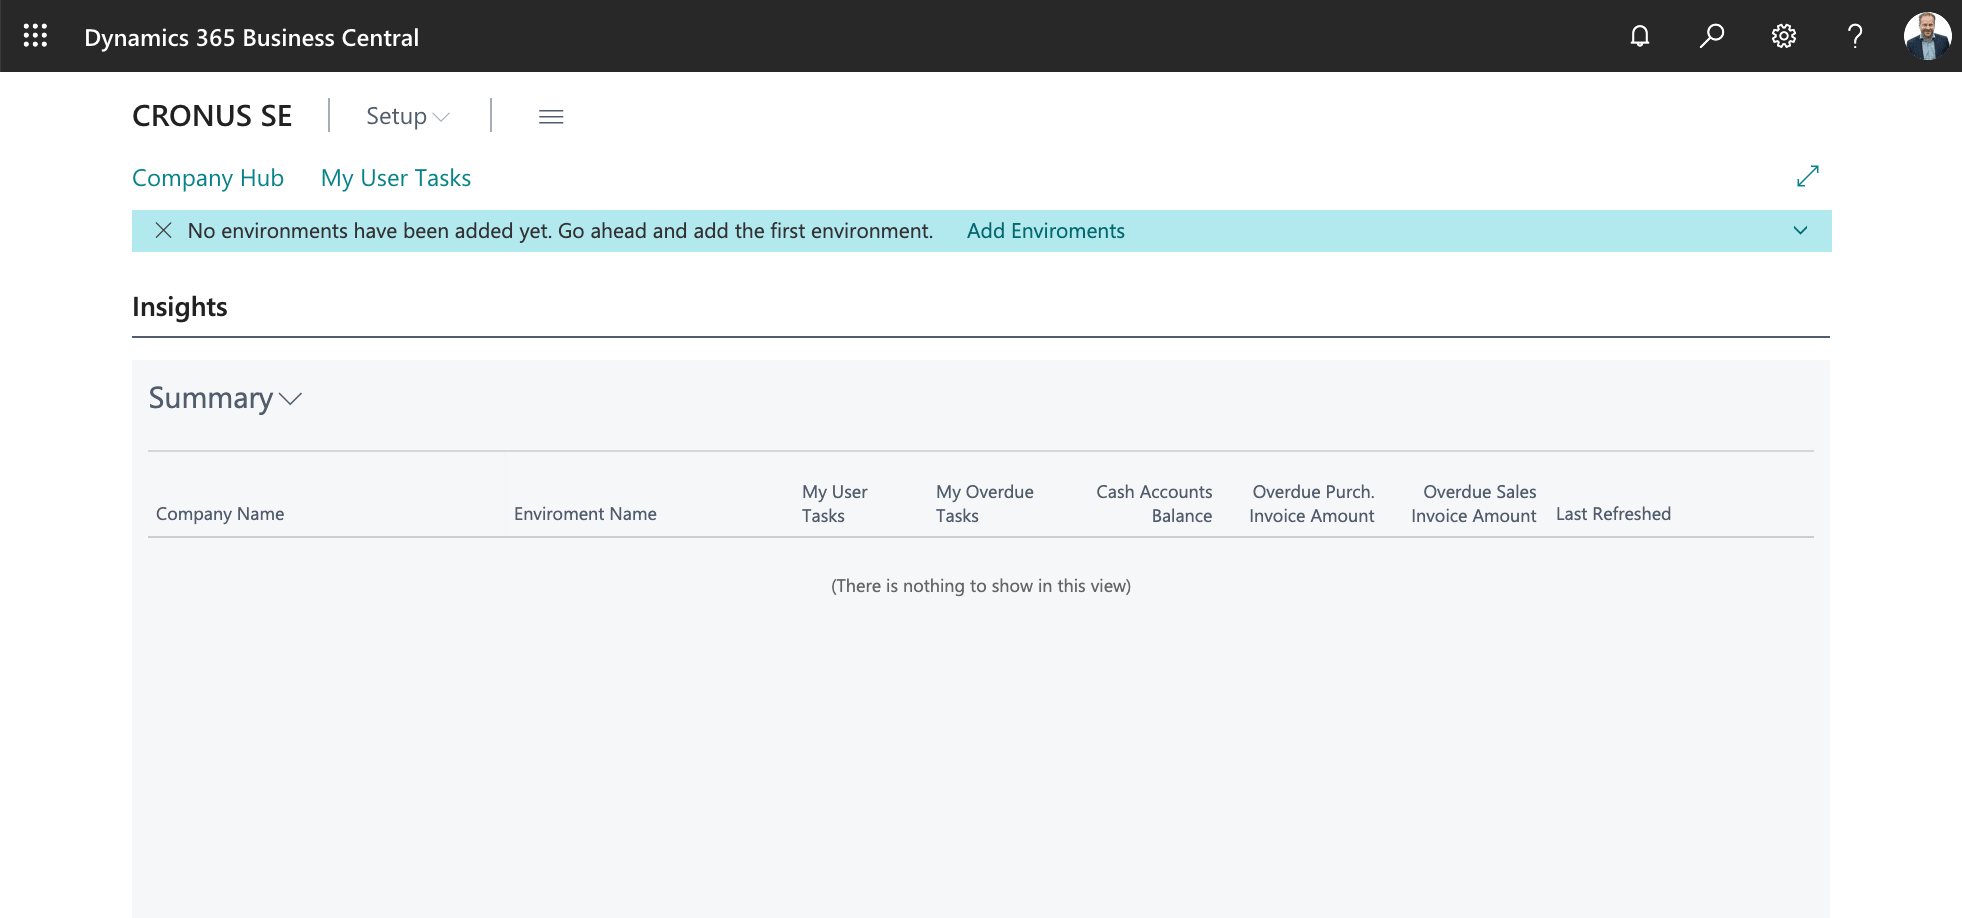
Alternatively, you can easily access the features by searching for them:

In this list you can easily access companies in one or more environments of Business Central. This can include both local installations and/or cloud installations. The list gives you an overview of all the companies you work with and an easy way to navigate to the specific companies.
To set up access to companies, you start by adding links to the environments that contain the companies. By registering an environment including the link to it, you give the Company Hub function the opportunity to connect to this environment to showcase its companies.:
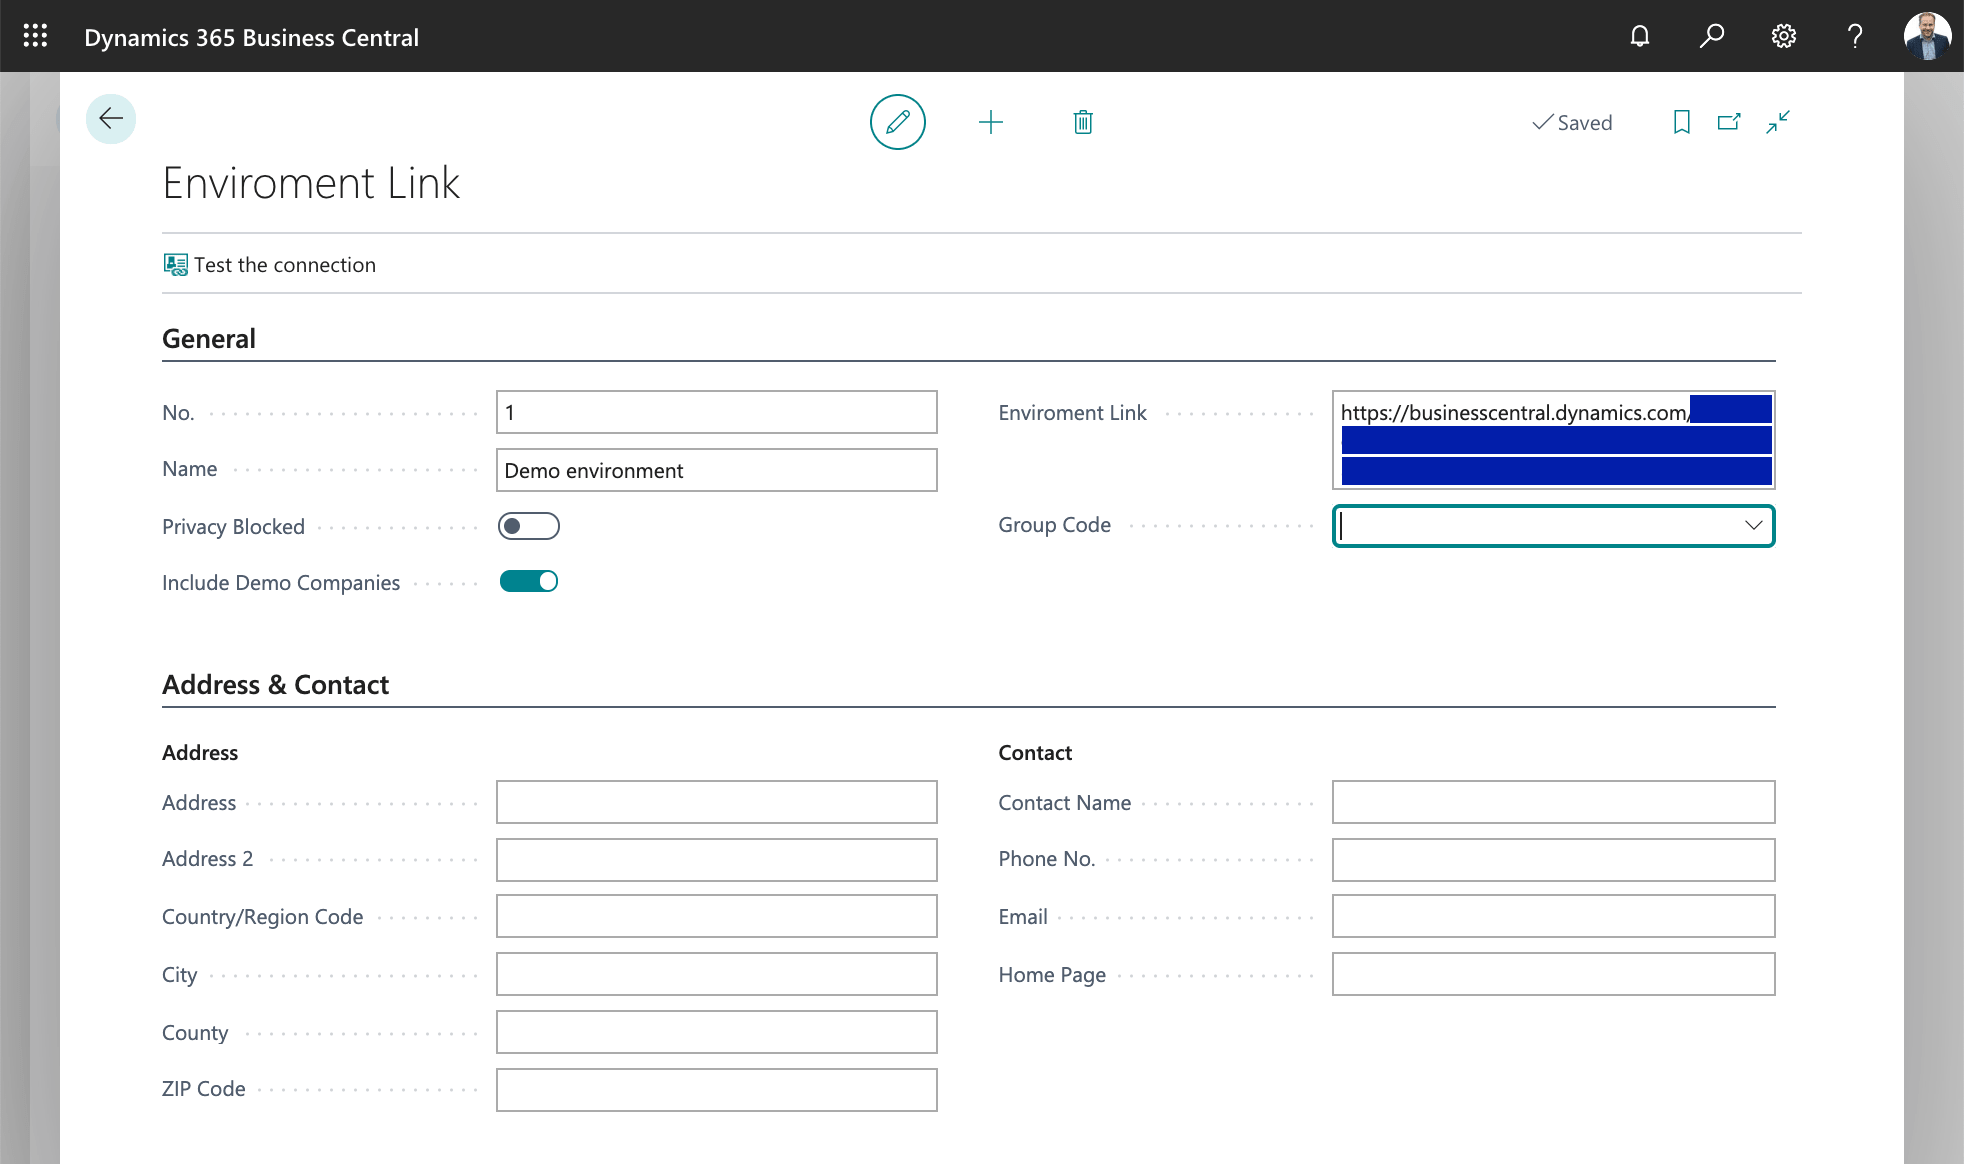
The Company Hub extension will then connect to this environment to retrieve the list of companies and the information from them. You can therefore get this question from the system if this is ok, to which you answer "Always allow" so as not to have to answer this question several times.
When the companies from the added environment are loaded, you see directly in the list information that is retrieved from them. You see balances on cash accounts, overdue customer and accounts receivable balances.
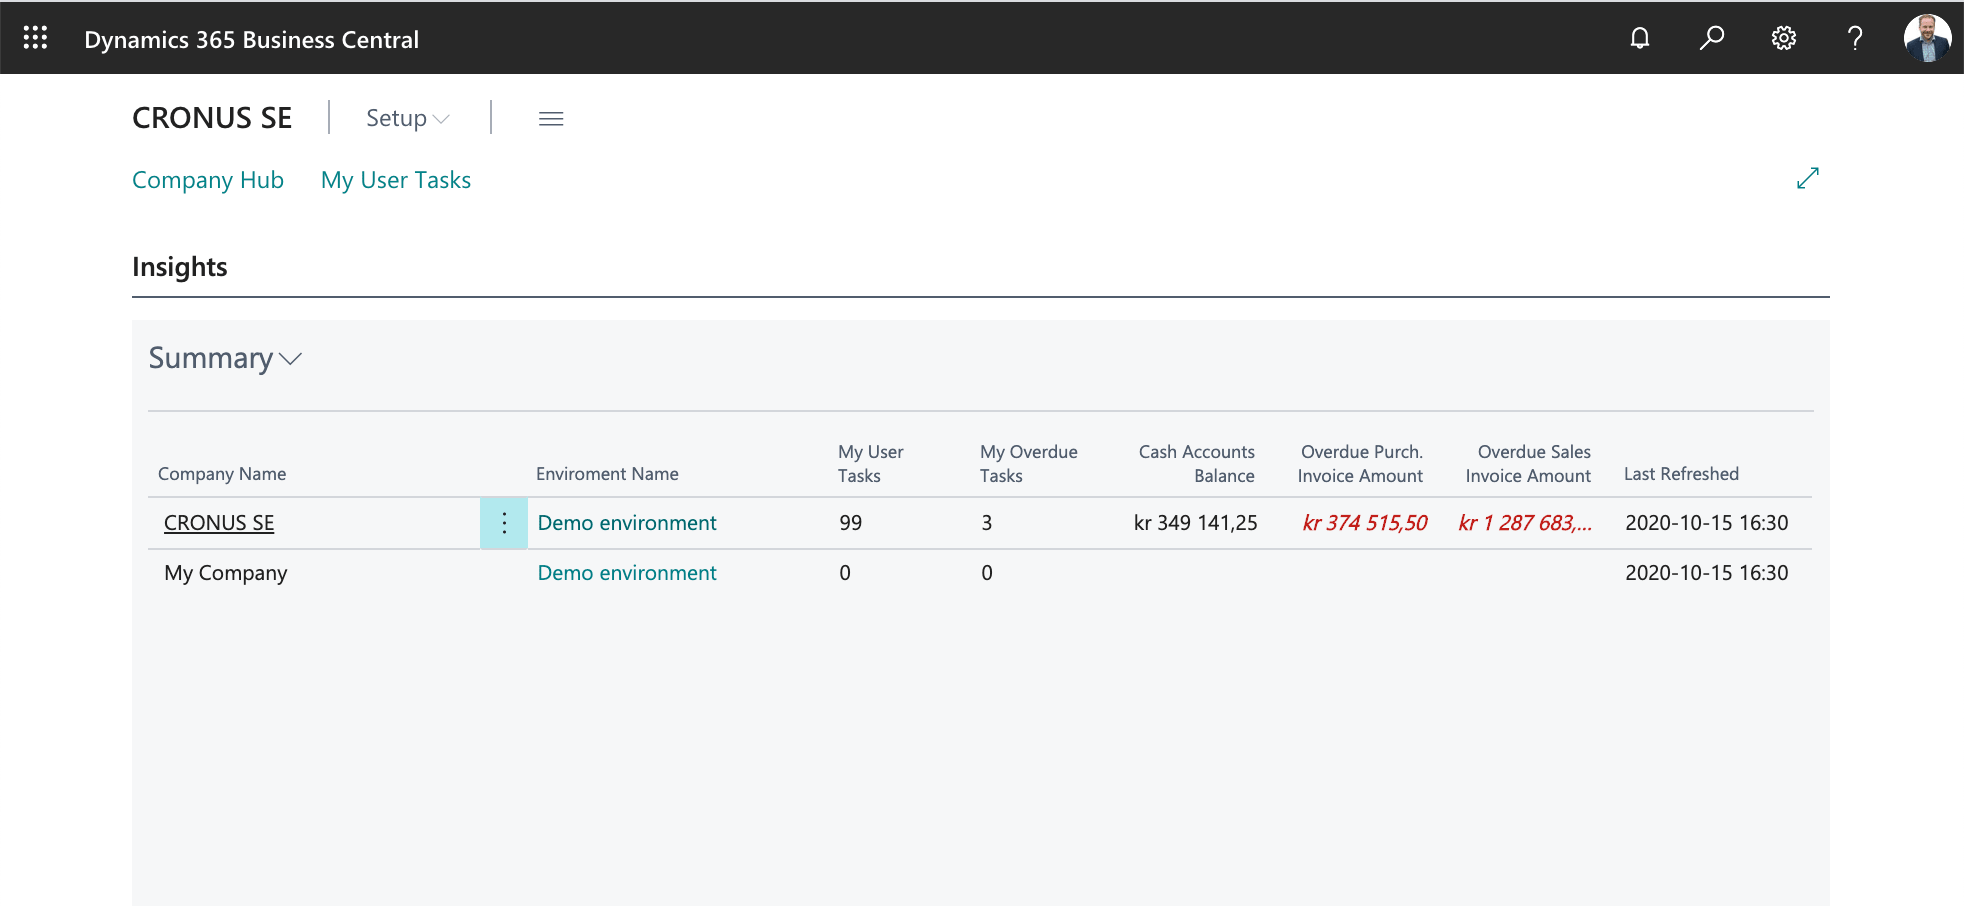
In the list of companies, you can also see if there is user information linked to you or the group of users you belong to. This allows you to quickly see which company you need to go into to perform tasks. You can also choose to view the list of all tasks:
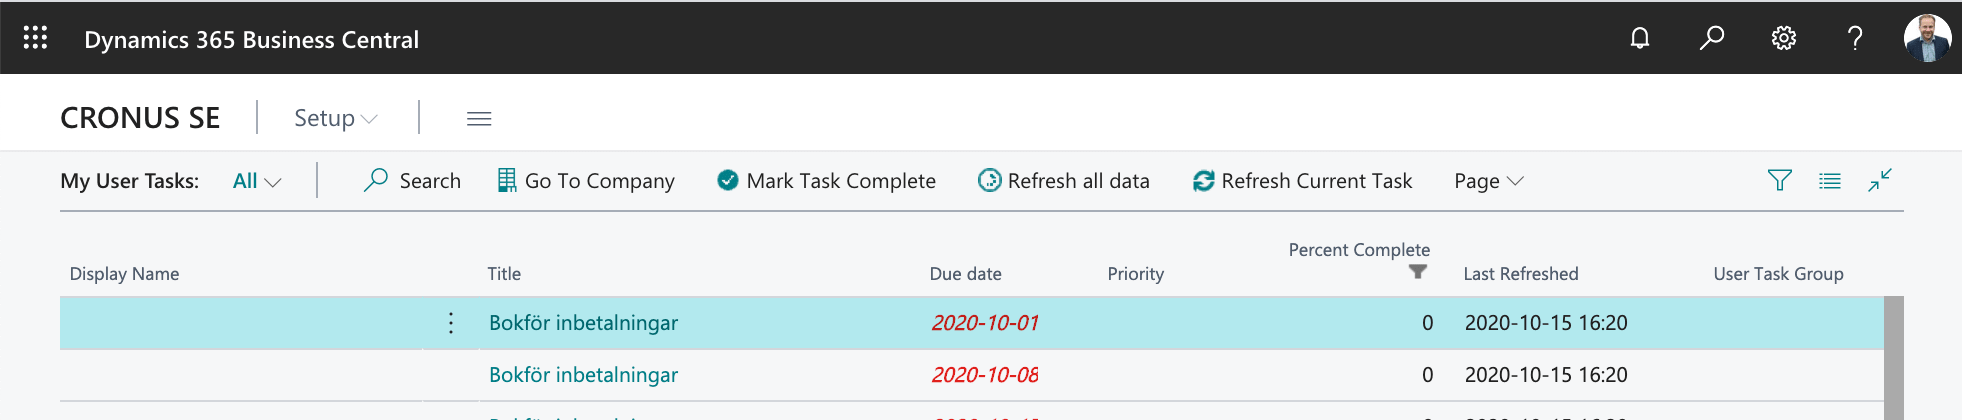
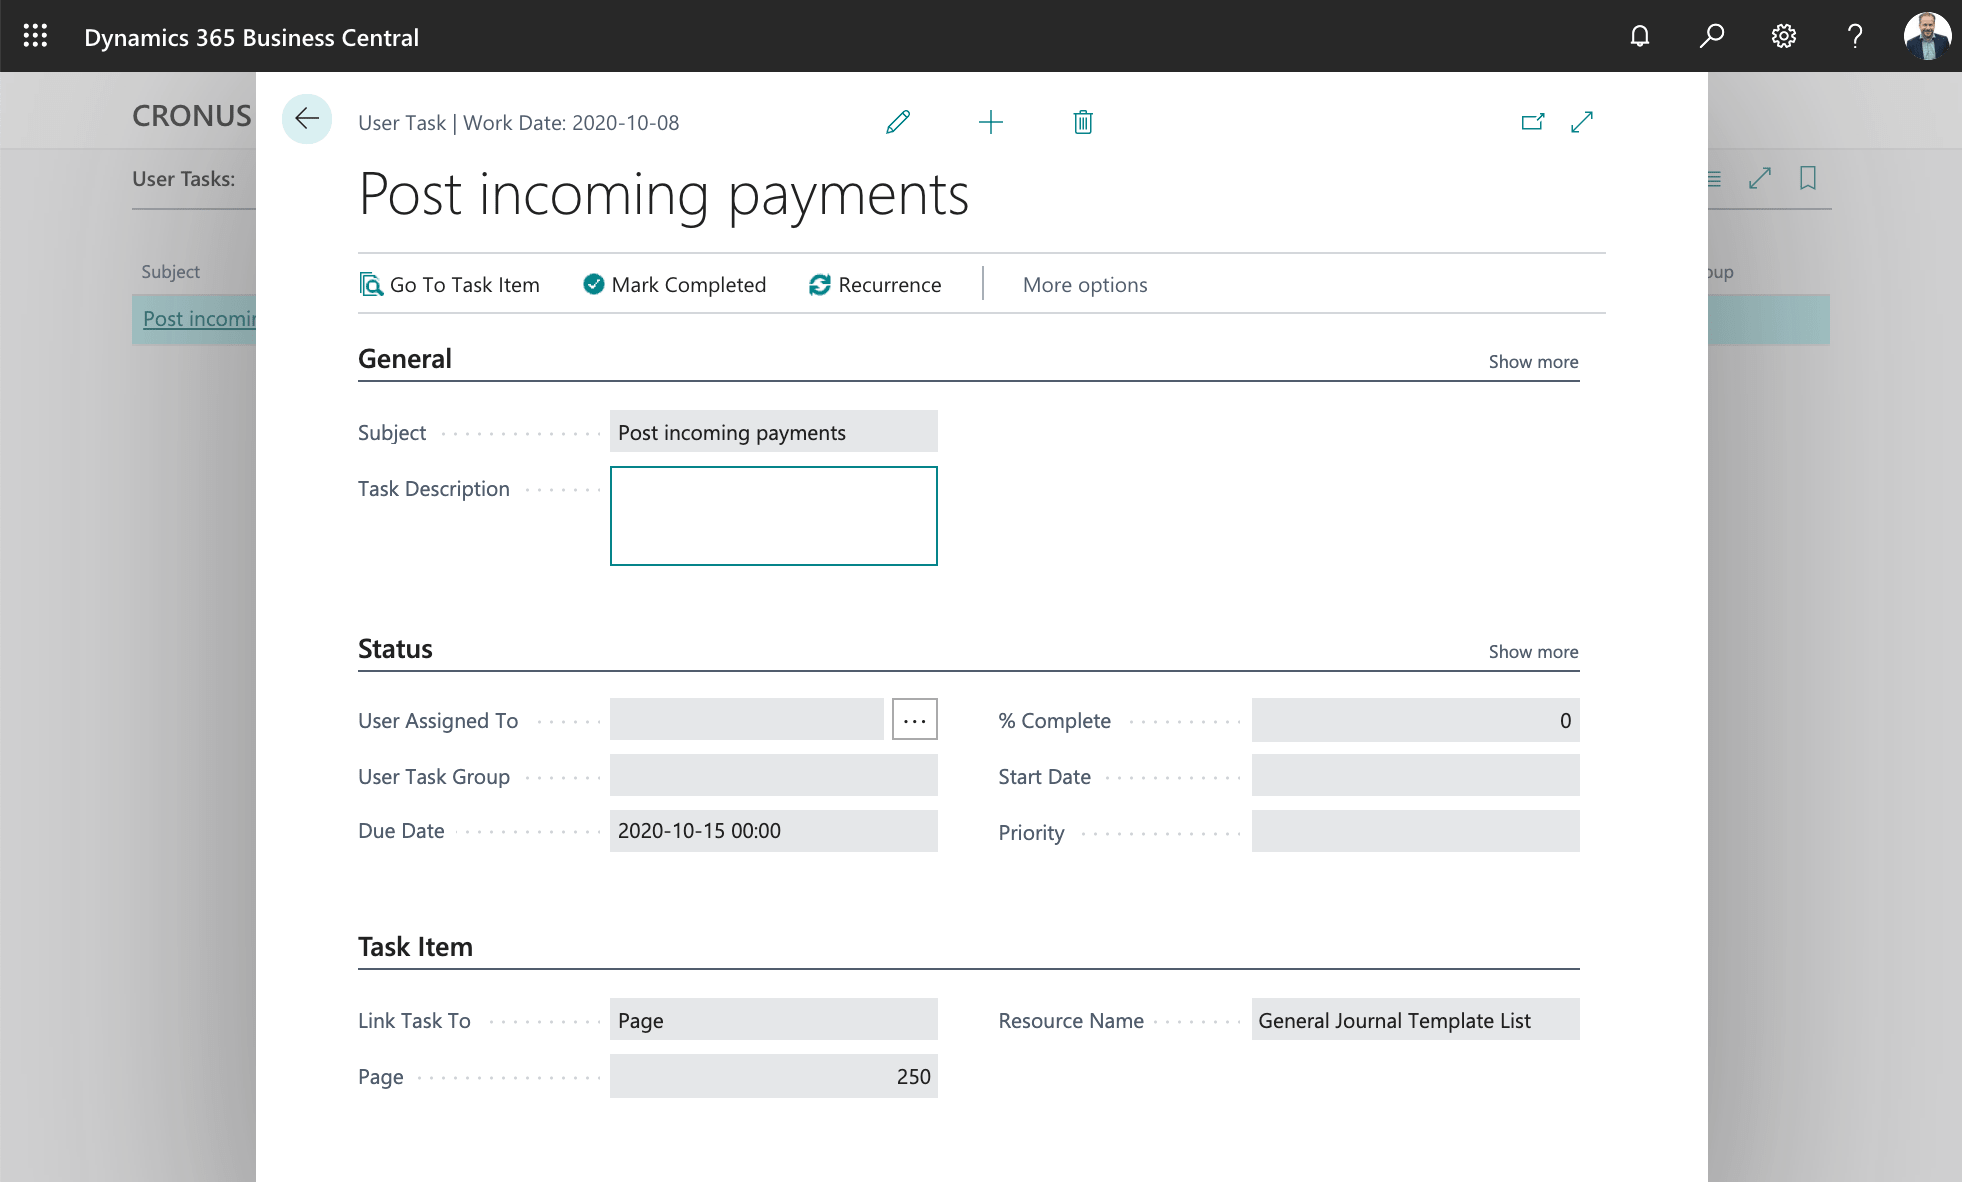
From the list of your user information in the linked companies, you can easily go to the information card in each company. Here you can, for example, mark when the task is complete, assign it to someone else or use it as a "springboard" to proceed to the form or report where you complete the task.
#18 How to create and use views in Business Central
In Business Central, you as a user have the opportunity to filter which entries are to be displayed in a list, based on the content in the entries' fields. You can combine terms in several different fields to find the items that are interesting to you.
In order for you to be able to work even faster, there is also the possibility of accessing pre-created filters via Views. In a list, you will see the pre-created views at the top left.
Selecting a view adjusts the filter based on the settings saved in the view. Depending on which list you are in, there are different built-in views available. Some of these built-in views not only contain a set of filters, but can also contain a specific layout of the list where different columns and actions are displayed.
Save filters as custom views
You can create new views yourself by saving the filters you set as a new view. After changing the filter in the list's filter box, you can choose to Save the current filter as a new View by clicking Save as… You then enter the name you want the new view to have.
Once you have created a new view, it is possible to save these with new filters, rename or delete them. The views are your own private so you do not have to worry about them setting it up for anyone else.
Create shared views
In Business Central, it is also possible to create predefined views that are available to other users. For each Profile / Role, you can choose to define views that are automatically available to the users who have this role.
To create shared views, select the function Customize pages from the current profile in the list of profiles. A new window will then open where you can make adjustments in the same way as you do for your own users. The difference is that all users who are connected to this profile can automatically take part in the new views you create.
As soon as you choose that you have finished customizing the pages for the profile, your customizations will be available to the user.
Change the order of views
Over time, they can become many views that you added to a list. Therefore, it may be of interest to change the sort order on these.
To change the sort order, select the Customize function, whereupon the list is displayed in customization modes where you can add, hide and move fields, among other things. In adjustment mode, you also have the option to change the order of your own views by dragging them to the desired position.
Views that are shared by the profile you belong to cannot be deleted, but if you do not want it to be visible, you can choose to hide the view.
#19 Create notes and store attachments to Business Central records
Do you have information about customers, suppliers, projects, articles, etc. that you want to store so that it is easy to access from inside Business Central? In Business Central, it is possible to create notes, links and to attach files to records.
Create notes for a Business Central record
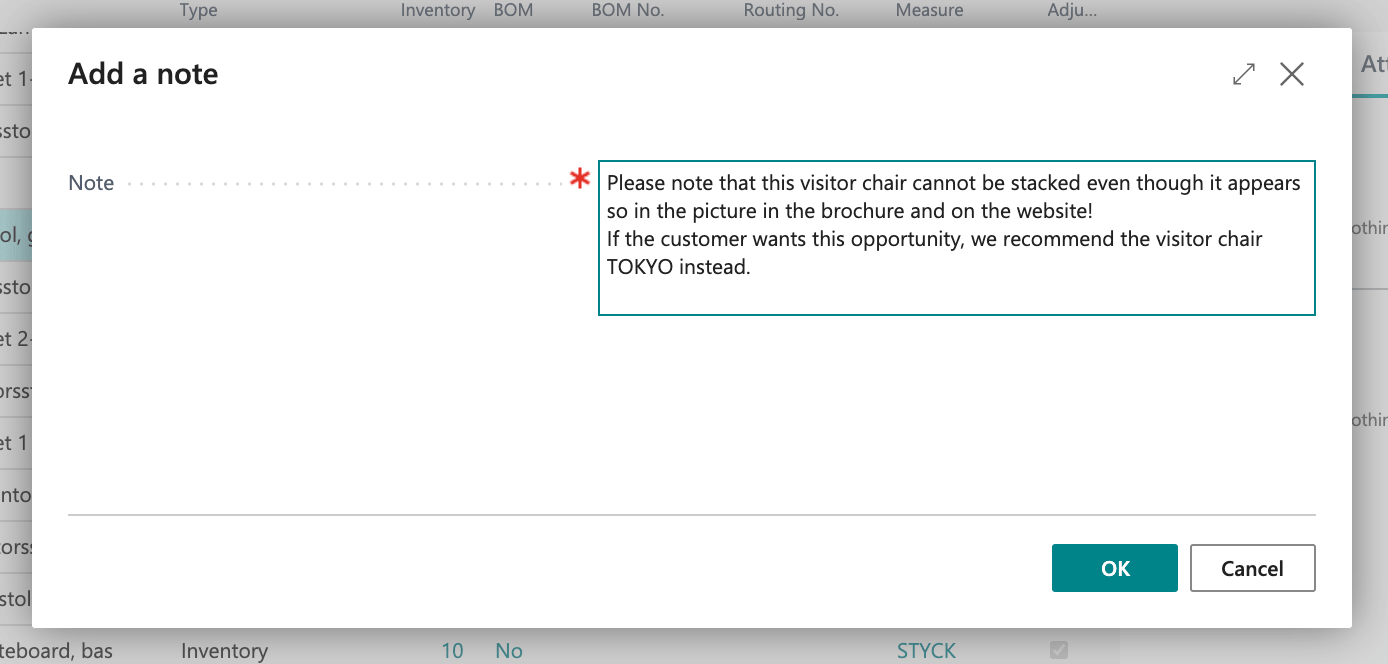
The Business Central, you can create a note attached to most types of records. These notes are in the form of plain text (you can change the line but can not change, for example, fonts or highlight text in bold) with a maximum of 1024 characters. You can create any number of notes associated with an record and the system automatically logs when the note was created and the name of the user who created it.
You can view and create notes for an record both from the list and from the card by selecting from the Attachments fact box.
Clicking on the + sign displays a dialog as follows where you can enter a note that is saved when you click OK.
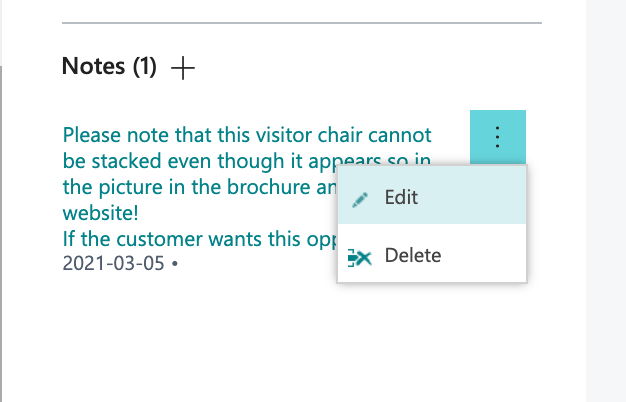
To edit or delete a previous note, click on the symbol with the three dots to the right of the note to select the action in the menu.
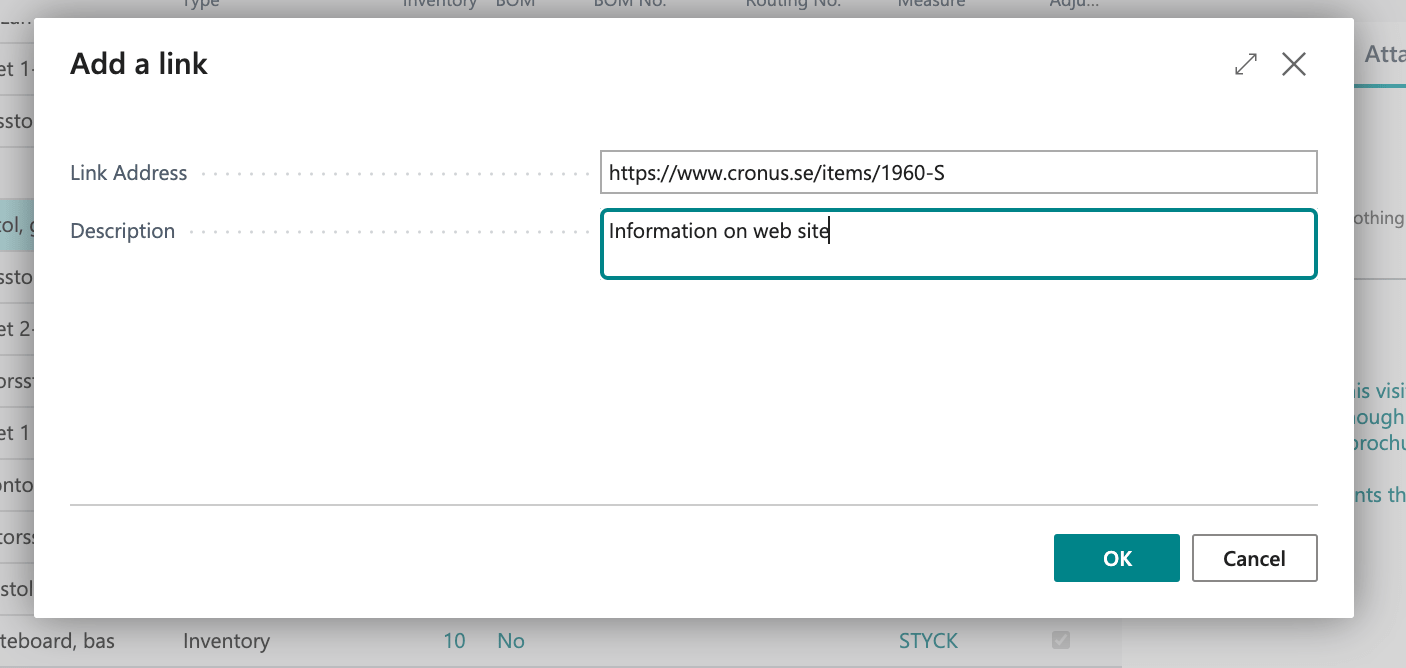
Save link attached to a record
If there is information in documents or web pages that you want to easily access from an record in Business Central, you can easily save these links either from the list of entries or from the card.
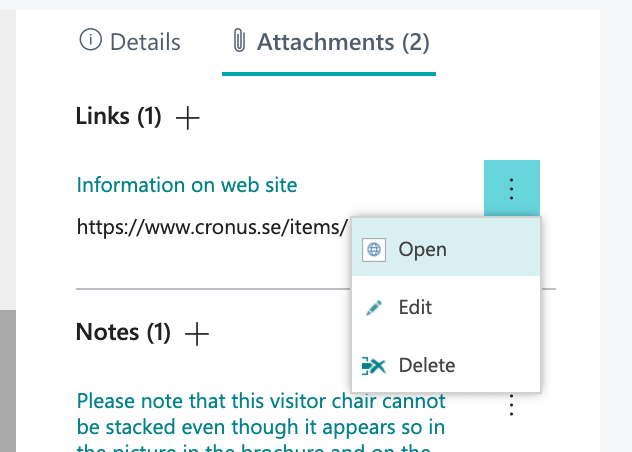
Links appear in the same way as notes in the Attachments fact box.
To add a new link, click on the + sign and the following dialog will appear:
Make sure the link you create is accessible to the users who will access the information. It can be publicly available on the Internet or protected for employees in your organization.
To edit or delete a previous link, click on the symbol with the three dots to the right of the link to select action in the menu.
Store attached files directly in Business Central
An alternative to linking to information from a record is to save the information directly in Business Central. This means that it is always available to users who have access to Business Central, while at the same time ensuring that it is backed up in the same way as all other important business data.
To access and upload attachments to a record, you first need to open the card (unlike links and notes, which are also accessible directly from the list). The Attachments tab contains the Attachments section and the Documents field, which shows the number of attachments to the current entry.
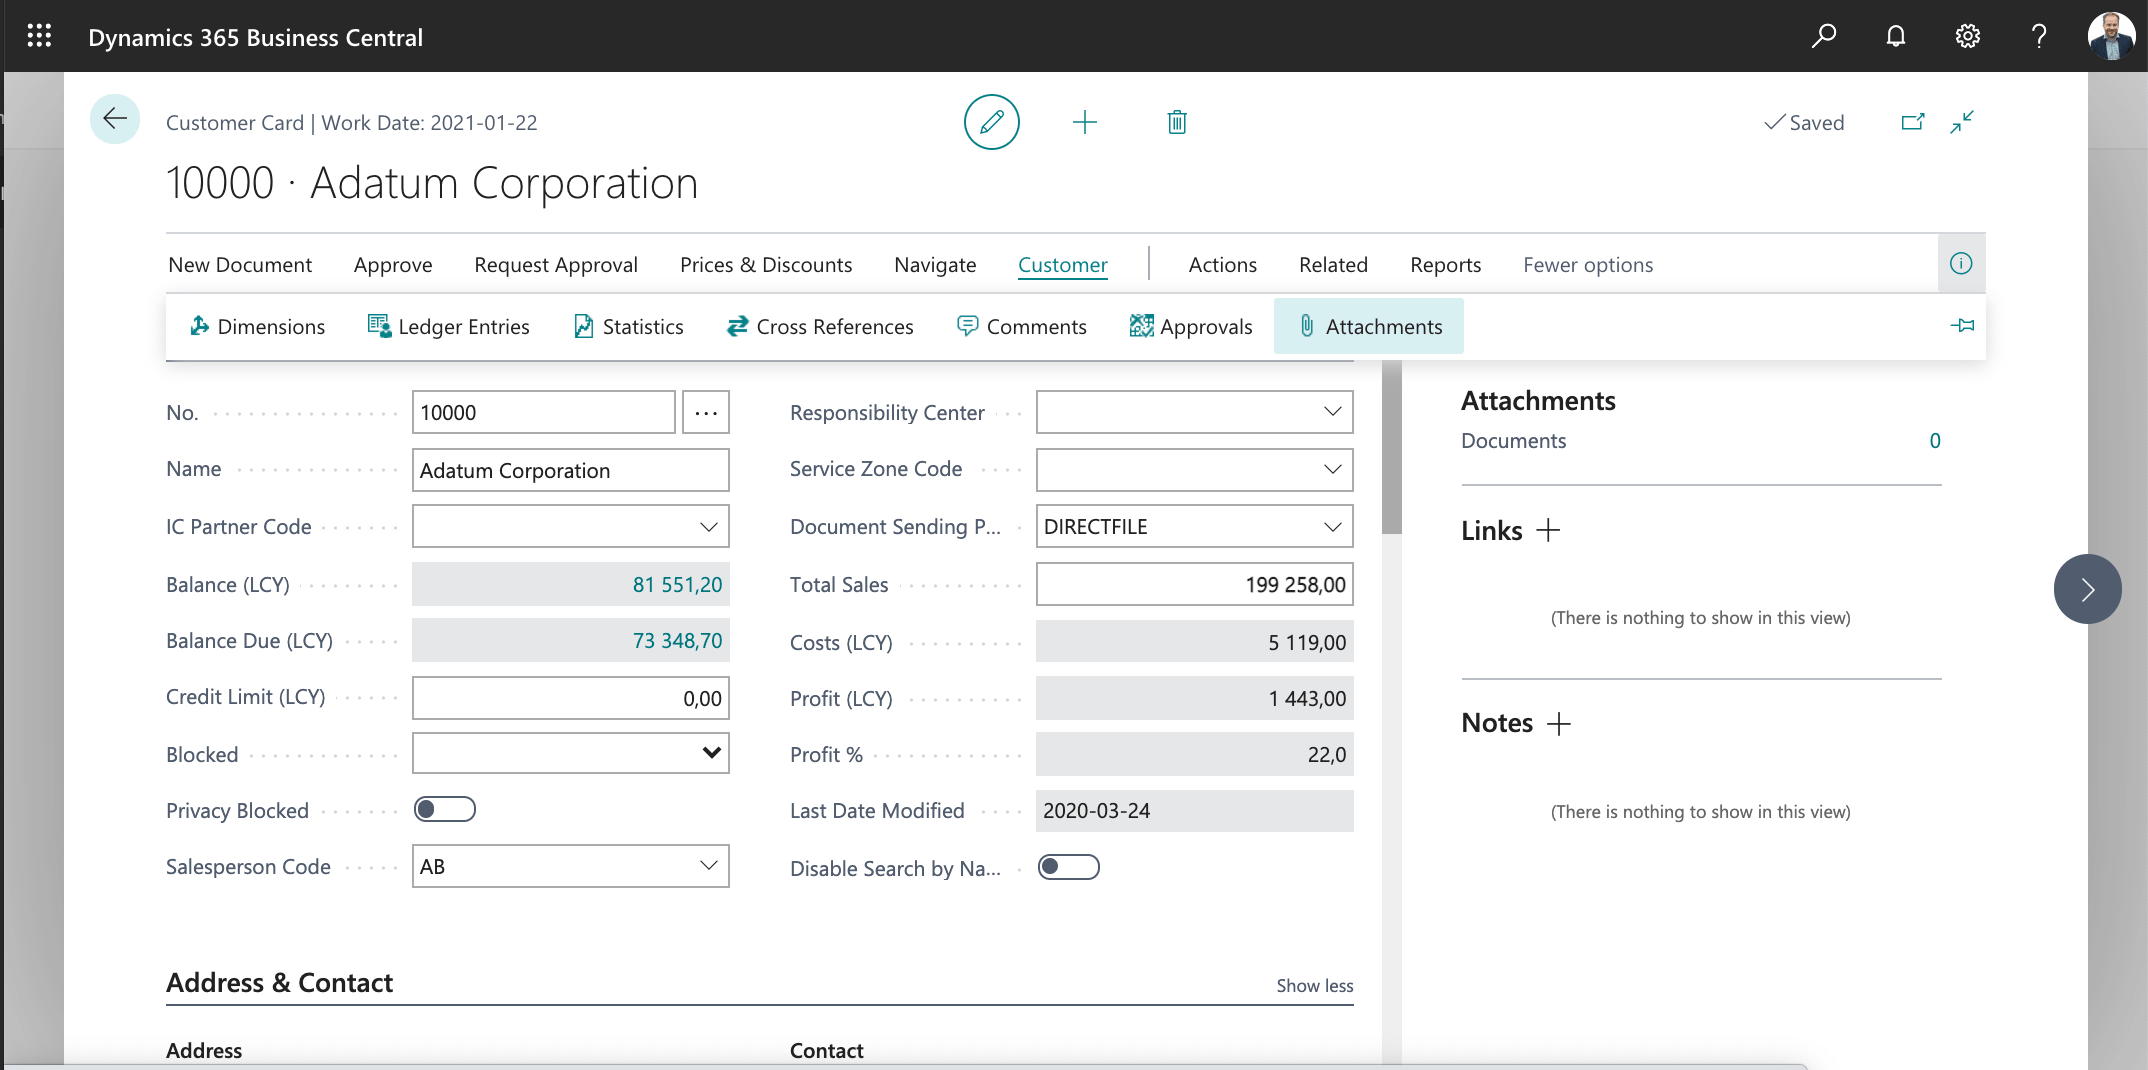
To view the attachments or attach a new file, click on the number that shows how many documents are uploaded. Alternatively, you can select the corresponding action in the form menu.
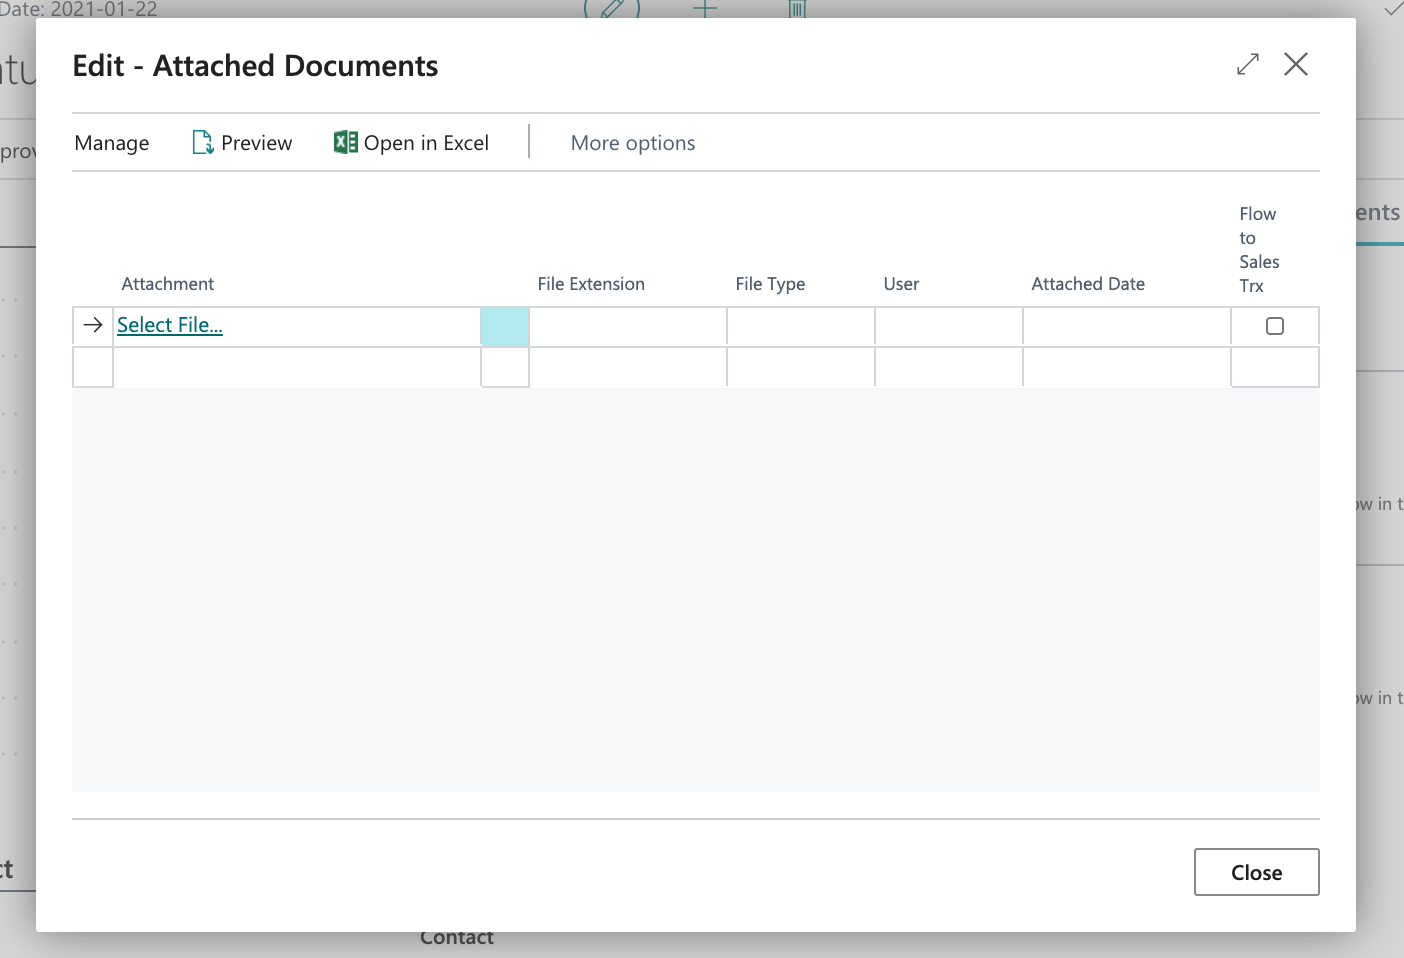
To upload a new attachment, click the link Select a file….
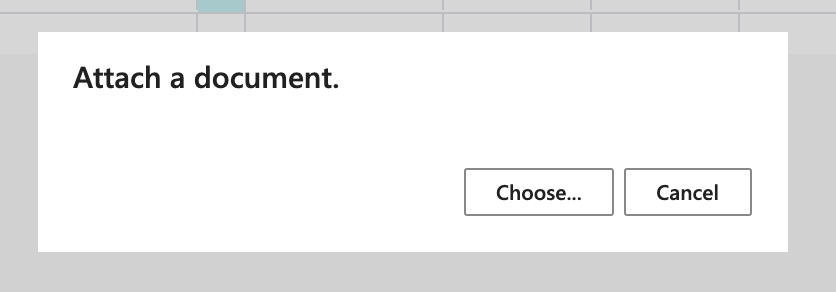
Select the file you want to attach, then upload it and it will appear in the list of attachments.
The file name, file type, which user uploaded the file and the time for this action are set automatically. You can change the time of upload, but if you want a different name for the attachment, you need to change the name of the file before you are upload it.
If you select the Flow to sales transactions field on an attachment to a customer, the attachment is copied to documents (quotes, orders, invoices, credit notes) that are created from that customer. Note that this can result in your database growing rapidly and causing increased costs.
If you attach a file to a sales order and select the Flow to sales transactions field, the attached file will automatically be transferred to the sales invoice when the order is processed.
#20 Utilize Microsoft Teams with Business Central
Do you use Teams to streamline collaboration and share information? Does it clash with how you use the business system? In that case, the ability to insert items from Business Central directly into the discussion can be really powerful!
By copying the address from your browser where you run Business Central and cutting into the discussion, everyone has the opportunity to not only open the record in a new browser but can also access the record directly from within Teams.
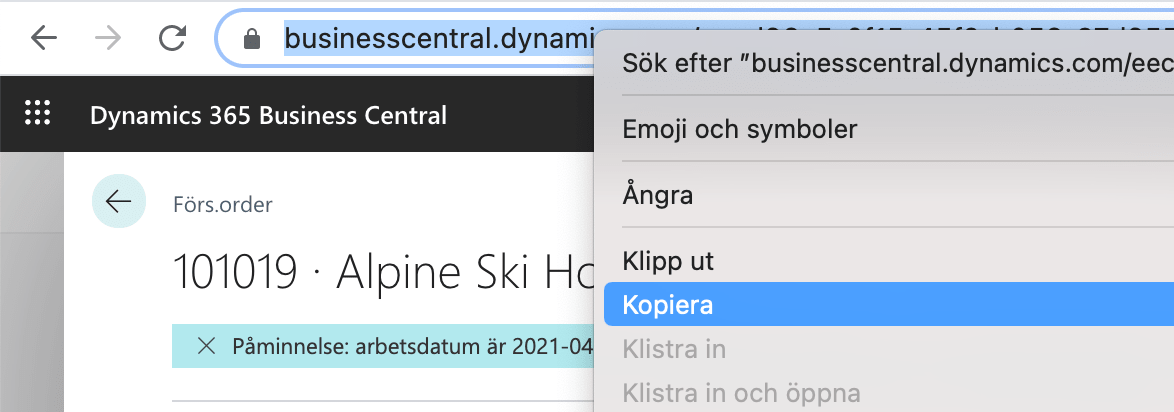
In the discussion, just paste the link and wait a few seconds before the post loads. If this is the first time you are doing this, you may need to log in to Business Central first.
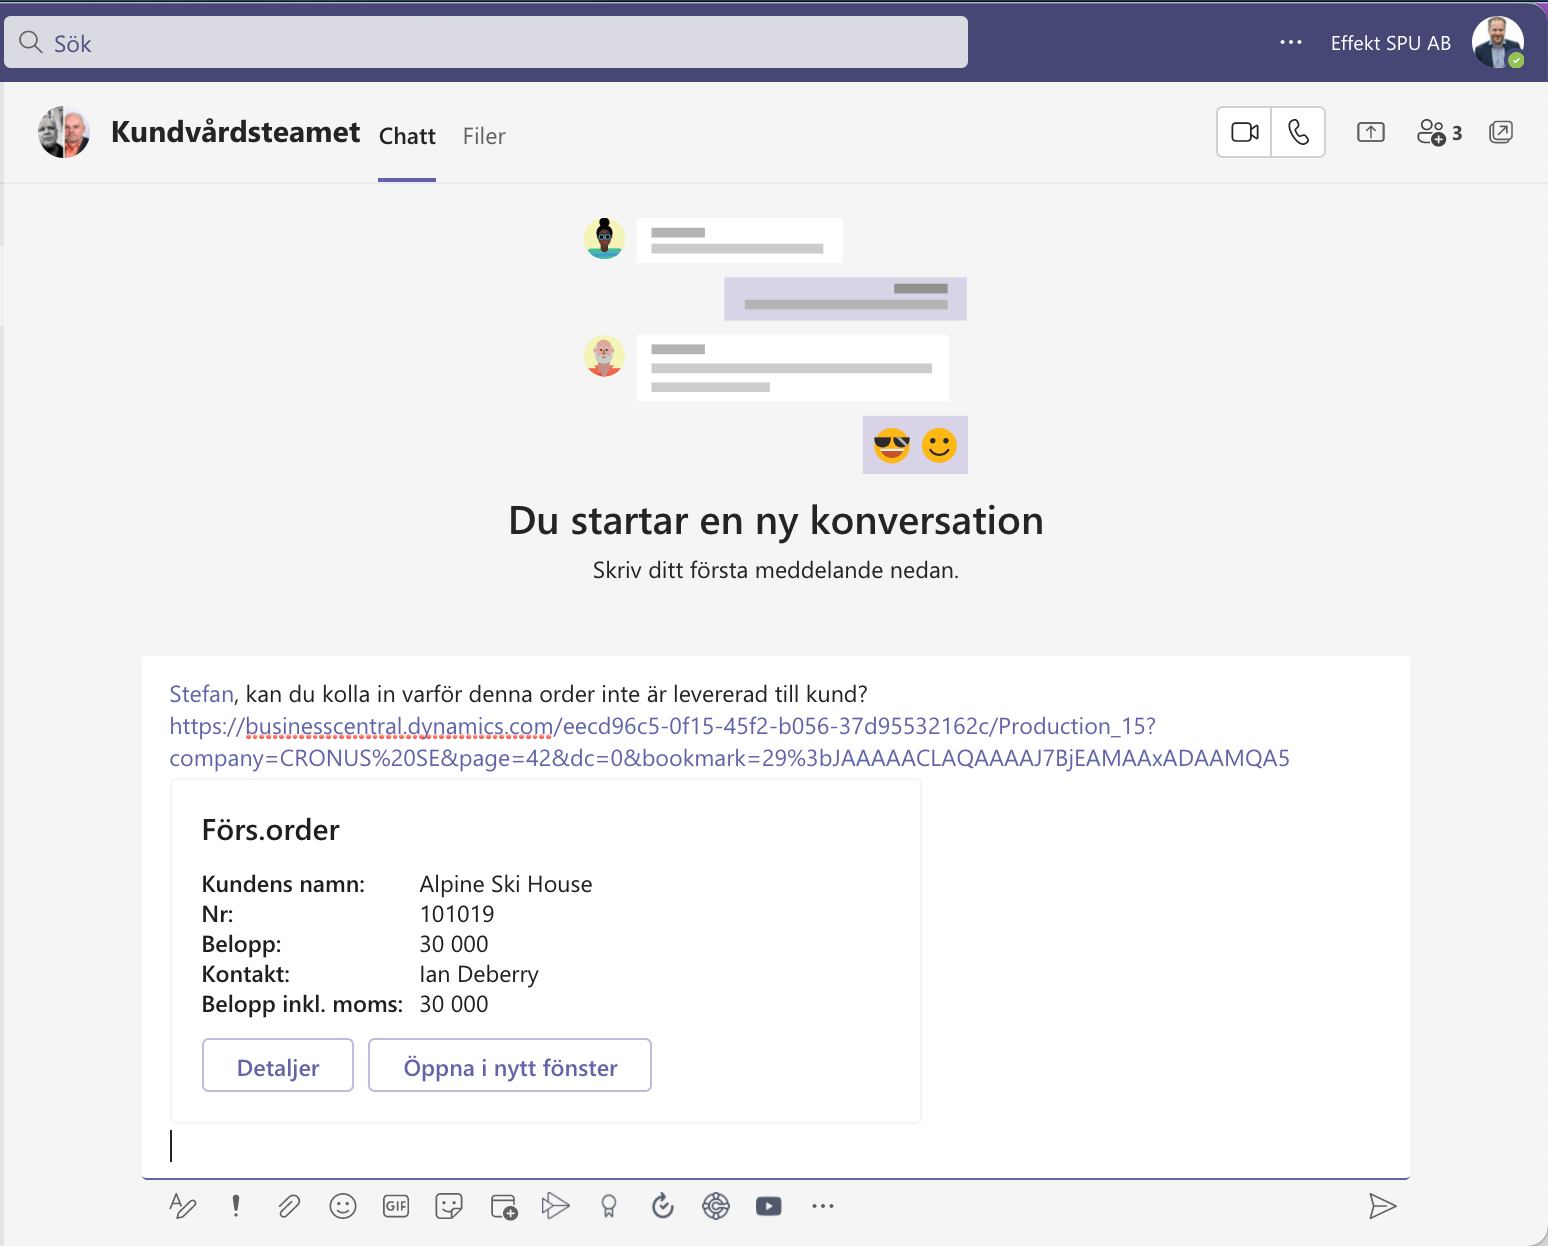
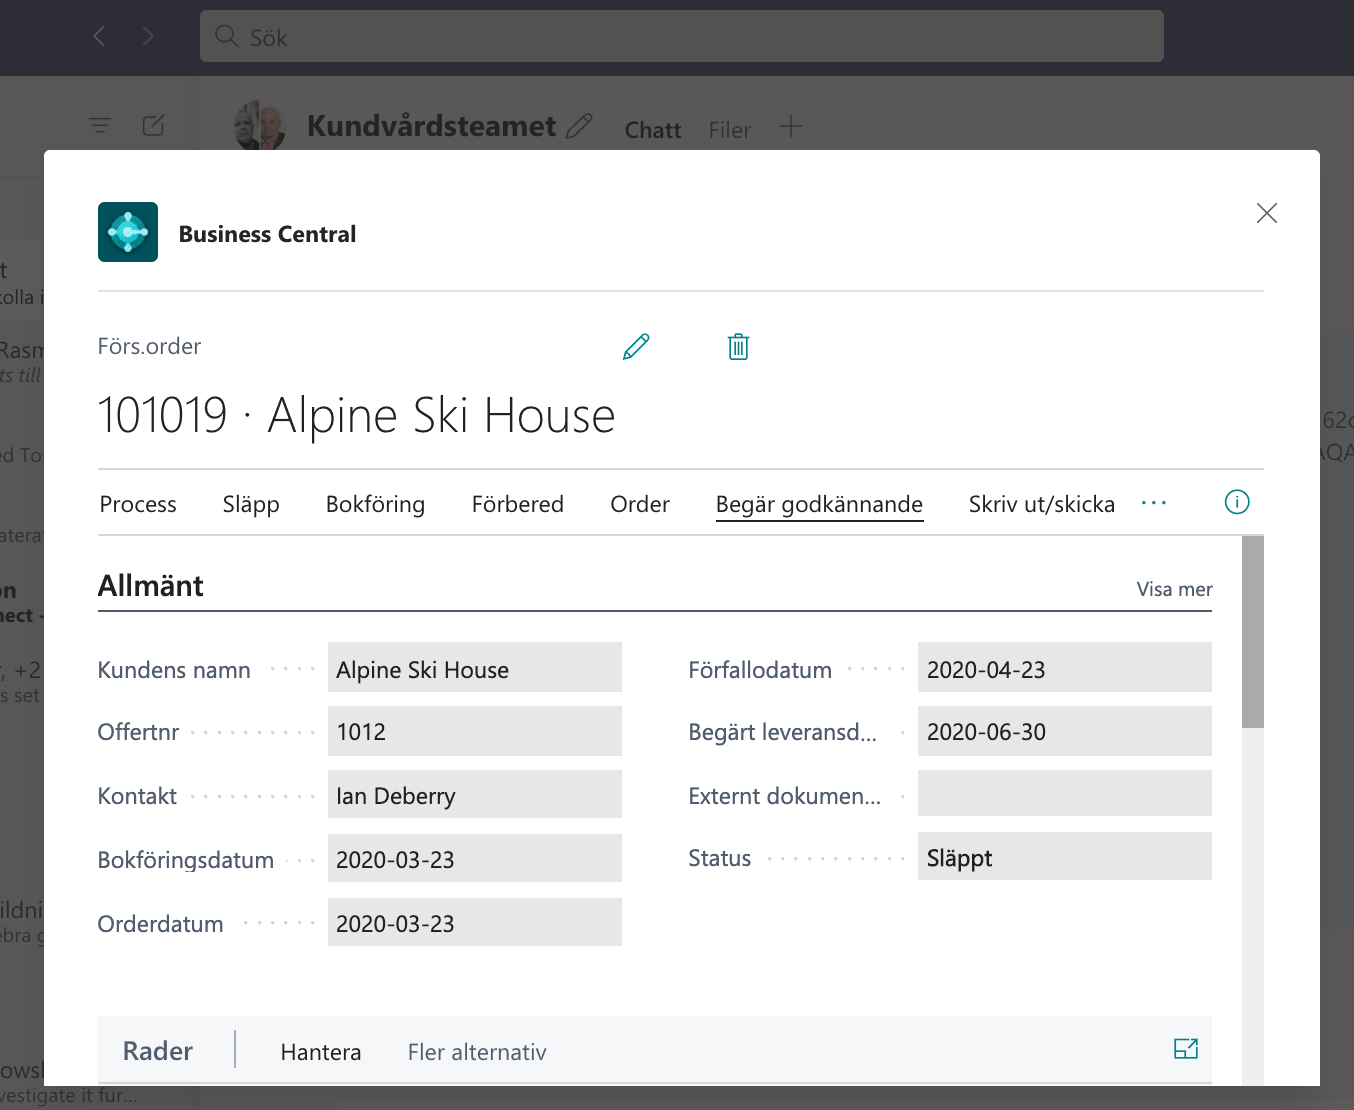
In addition to all users seeing overall information about the record directly in the discussion, they have the option to either open the record in a new browser window or to review and continue working with the record without leaving Teams.
Share this post
Author

Erik Möller